Build a slack webhook
Create a Slack Automation
- Navigate to Automations in Slack
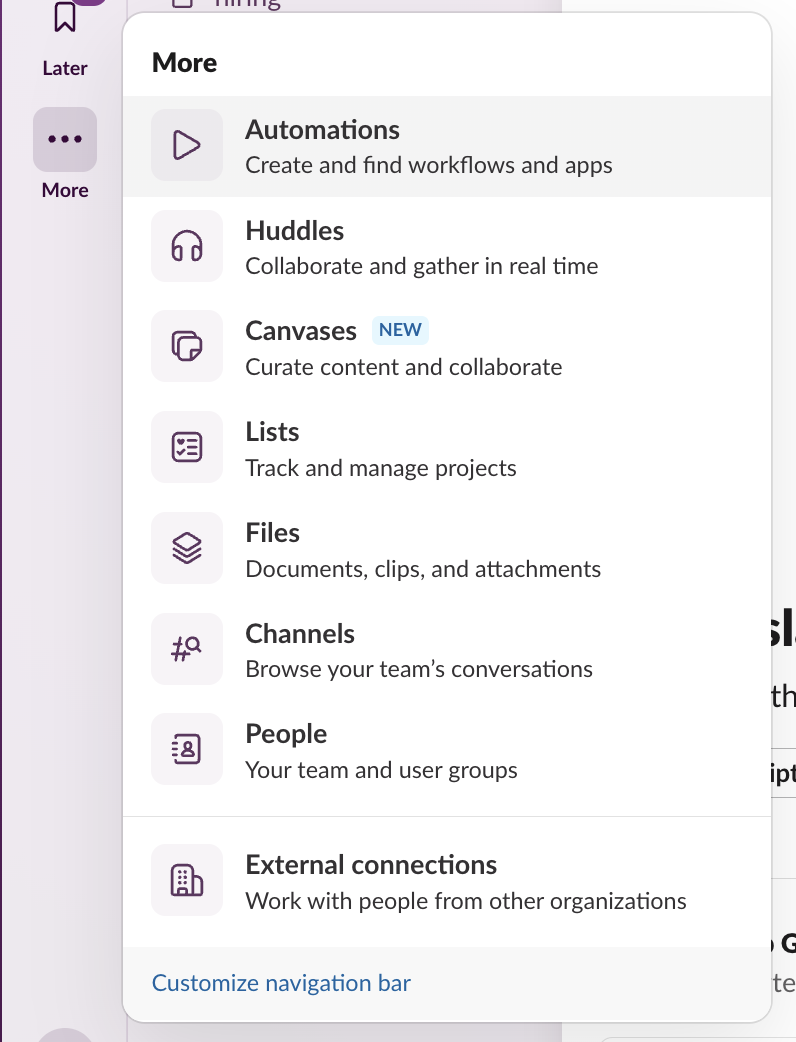
- Click “New Workflow”
- Rename the workflow to “Schematic Webhook”
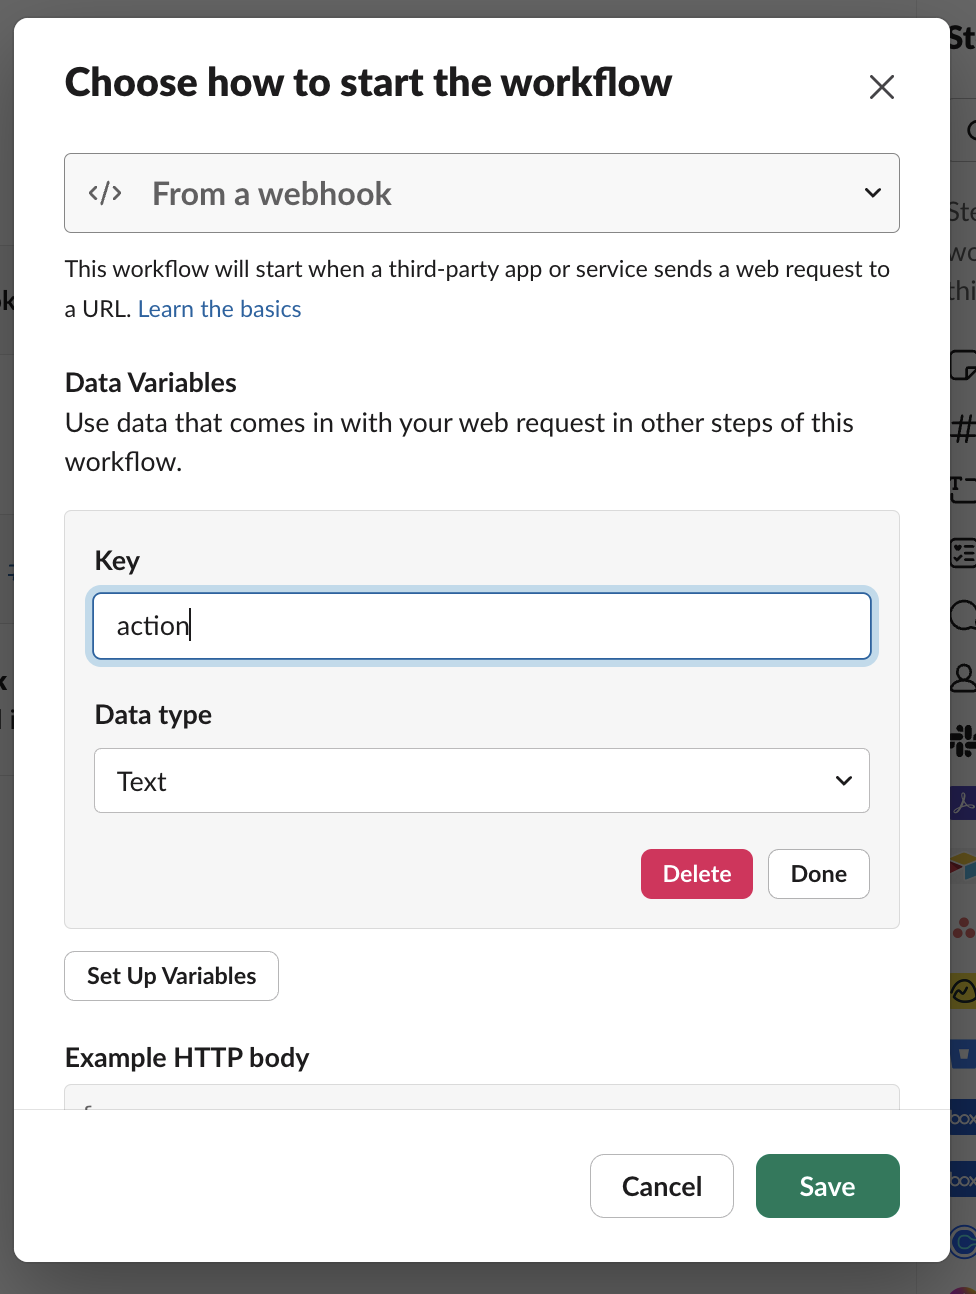
- Start the workflow “From a webhook” and click Continue in the modal (we’ll set up variables later)
- Copy the Web request URL
Create a Schematic endpoint
- Navigate to Integrations in Schematic
- Click Webhooks and Create an endpoint
- In the modal, name the endpoint “Slack Alerts”
- Use the “Web request URL” from Slack in the URL field
- Select the following triggers: company.created, company.deleted
Company webhooks will look like this:
Configure the Slack Automation
- Navigate to the Schematic Webhook workflow in Slack
- Click into the Webhook step to configure it, and click “Set up variables”
- Type action into the key field and select the Text data type
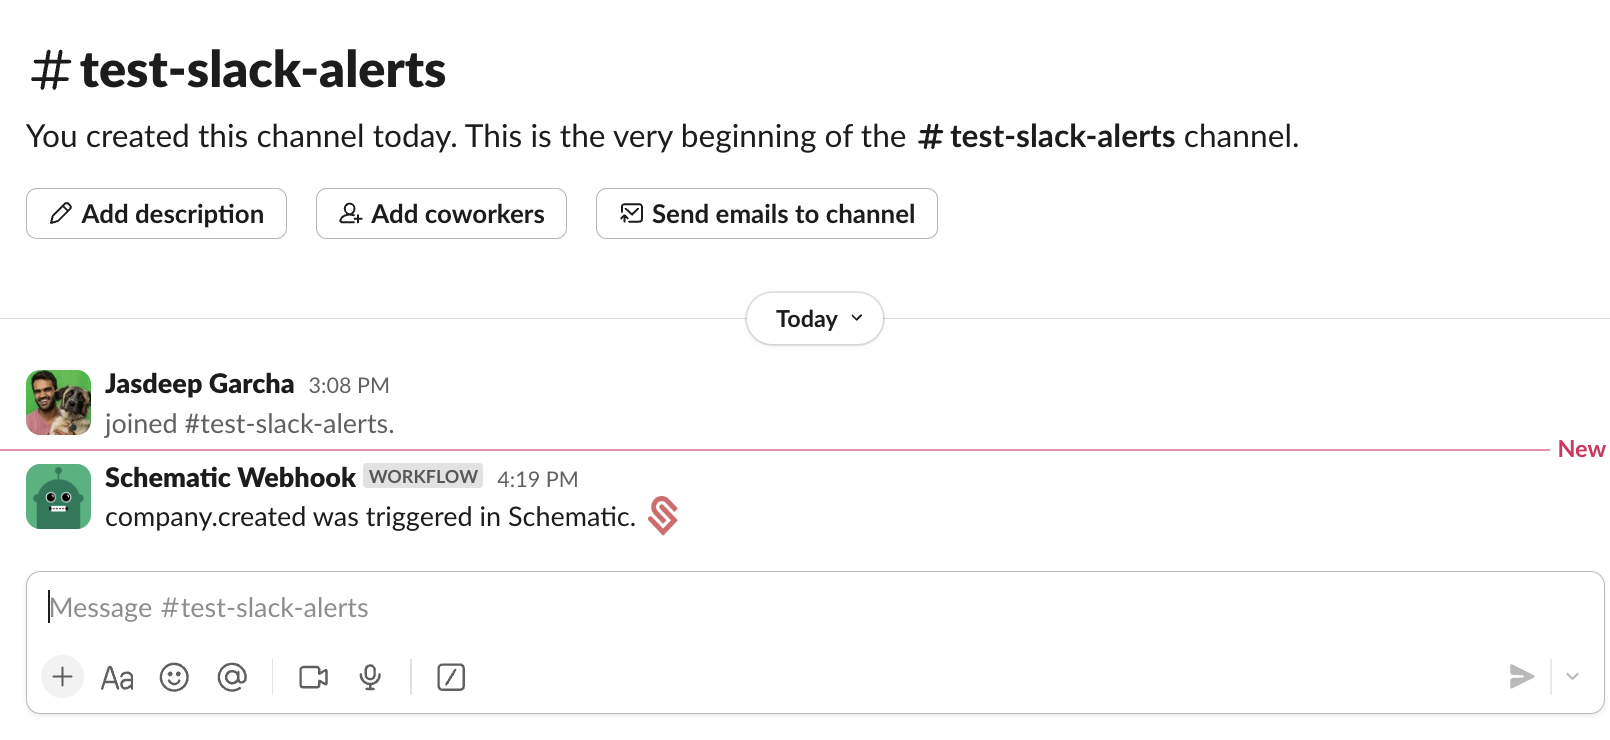
- Once your webhook is configured, set up a new channel in Slack named “test-slack-alerts” (or anything you like!)
- In your workflow, select Messages > Send a message to a channel
- Insert the action variable and add a message.
Test your webhook
Now that our Slack Automation is set up, we can test triggering webhooks from Schematic.
- Navigate to the Company tab in Schematic
- Click Create and fill in a name and a key for the test company
- You should see a new alert in Slack
You can also try deleting the company to trigger a company.delete.
Slack is limited to parsing top level fields (it cannot access nested fields, unfortunately)
Next steps
Nearly every operation you can make on objects in Schematic will trigger a webhook, so you can support a variety of scenarios, such as:
- Keeping CRM records in sync
- Updating Billing records
- Alerting internal stakeholders of customer changes via Slack or email
- …and more
We will be expanding support for other webhook scenarios in the future, including reaching limits.