Credit Burndown Billing Model
Recently, credit burndown models have become a popular form of usage-based billing. In credit burndown models, customers receive a credit balance that decreases as they consume product features. Customers can purchase additional credits at any time to exceed their plan’s default usage limits - this flexibility is the model’s primary design intent.
Credit burndown models are widely adopted across the software industry, from AI platforms like ChatGPT to developer tools such as Supabase and PostHog, as well as sales enrichment services like Apollo.io and Clearbit.
Credit burndown models typically follow a similar structure:
- Customers subscribe to a paid plan that includes an initial credit allocation per billing cycle (usually monthly).
- NOTE: Free tier plans can also use credit burndown, though they typically provide minimal or zero default credits.
- Key features draw against the credit balance as they are used. Products usually offer multiple features with varying credit costs.
- If credits are depleted, customers can purchase additional credits immediately to maintain service. Many products include automatic top-up options to prevent usage interruptions.
Key advantages of credit burndown models include:
- Revenue scales directly with customer usage, similar to other usage-based billing approaches.
- Customers prepay for credits, eliminating billing surprises and unexpected charges.
- Multiple different features can be unified into a single pricing metric, simplifying pricing for customers.
- Credit costs can vary, allowing for experiementation and bulk discounts (e.g. 100 credits for $10, 1,000 credits for $90, 10,000 credits for $800, etc.)
- Likewise, individual feature costs can be adjusted independently without affecting credit pricing or other features, enabling cost management as operational expenses change.
Video Tutorial
This video tutorial demonstrates how to set up a credit burndown billing model in Schematic, walking through the key steps of setting up credit types, plans, and credit based features.
Implementing Credit Burndown in Schematic
In this guide, we’ll show you how to implement a credit burndown billing model in Schematic. We’ll start with a scenario where you have an existing usage-based plan that includes two features - “AI Assists” and “AI Experiments”. Our goal is to create a new plan that offers these same features but uses credits as the billing mechanism instead of direct usage tracking.
By the end of this guide, you’ll have a fully functional credit-based plan where customers can use their credits to access both features, and purchase additional credits when needed.
The steps we’ll be taking are:
- Create a Credit Type that can be applied to plans.
- Create a new plan that will use our credit burndown model.
- Add the Credit Type to this plan.
- Add features to this plan and configure how they use credits.
- Configure Credit Bundles that customers can purchase to top up their balance. 6.Add this plan and credit bundles to the Catalog so Customers can use it.
1. Create a Credit Type
First, we’ll create a Credit Type that can be applied to plans. While Schematic allows you to create multiple credit types and apply them to different plans, most companies use a single credit type across all their credit based plans for simplicity.
Mouse over Catalog and select Credits to open the Credit Type Page.
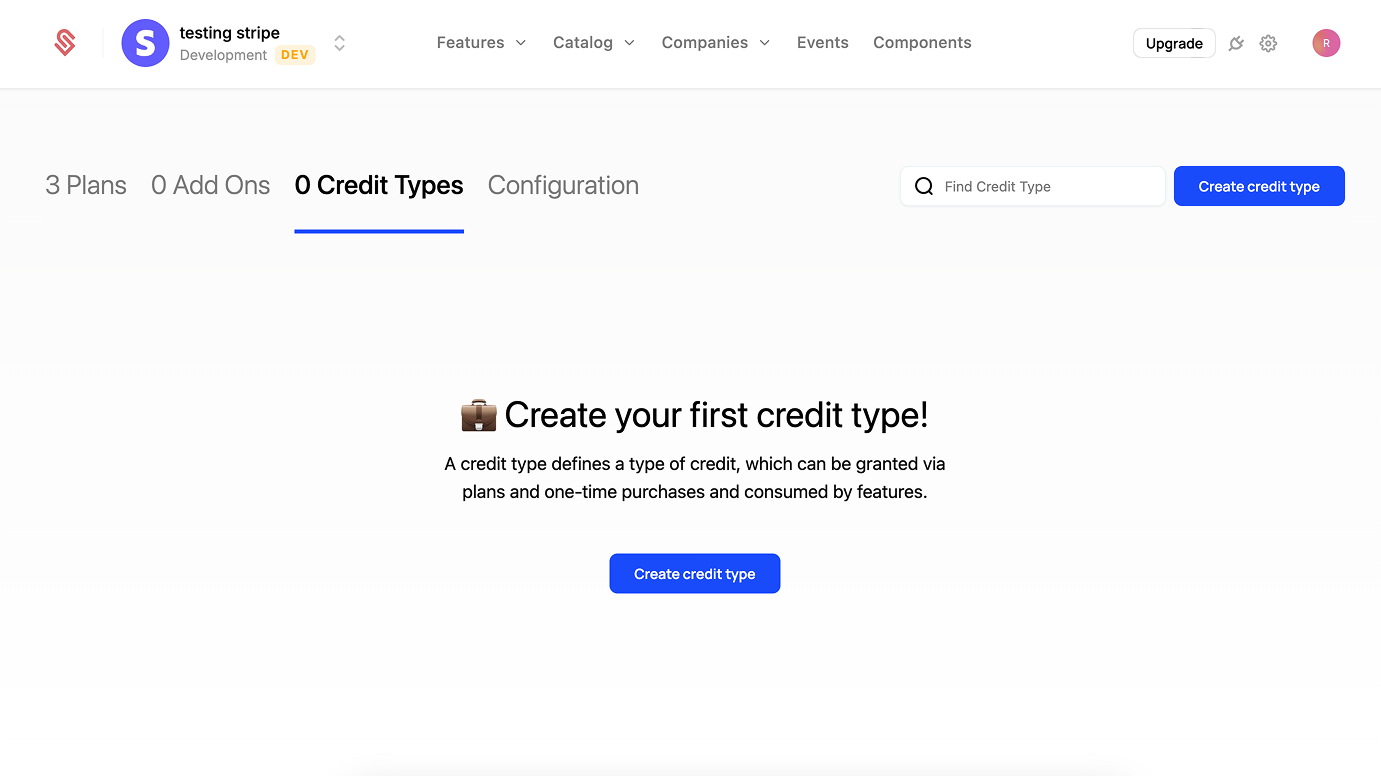
Click the “Create Credit Type” button to begin:
- Provide a name for your credit type, we’ll use “AI Tokens” for this example. If you have multiple credit types, we recommend usage-based names (e.g. “Data Credits”, “API Tokens”) or a tier-based names (e.g. “Premium Credits”).
- The description field (optional) is shown to users in the customer portal and checkout flow.
- Provide a singular and plural name for your credits. We’re using “AI Token” and “AI Tokens” for this example.
- Cost Basis is to help you track the cost of credits throughout your product and finance workflows. This field doesn’t directly control the costs of credits, but represents a guideline for future usage. We’ll use $0.01 for this example, but you can use fractional cents (e.g. $0.00025) if needed.
- Click “Create Credit Type” to save your changes.

2. Create a new plan that will use our Credit Burndown model.
Now that we have a Credit Type, we’ll create a new plan that will use it. Within Schematic, any plan can incorporate credit burndown, whether it’s a new plan or an existing one. For this example, we’ll create a dedicated credit-based plan to keep things simple and clear. This approach makes it easier to understand how credits work.
- Navigate to the “Plans” tab and click the “Create Plan” button.
- Provide a name for this plan. We’ll use “Credit Based” for this example. Then click “Continue”.
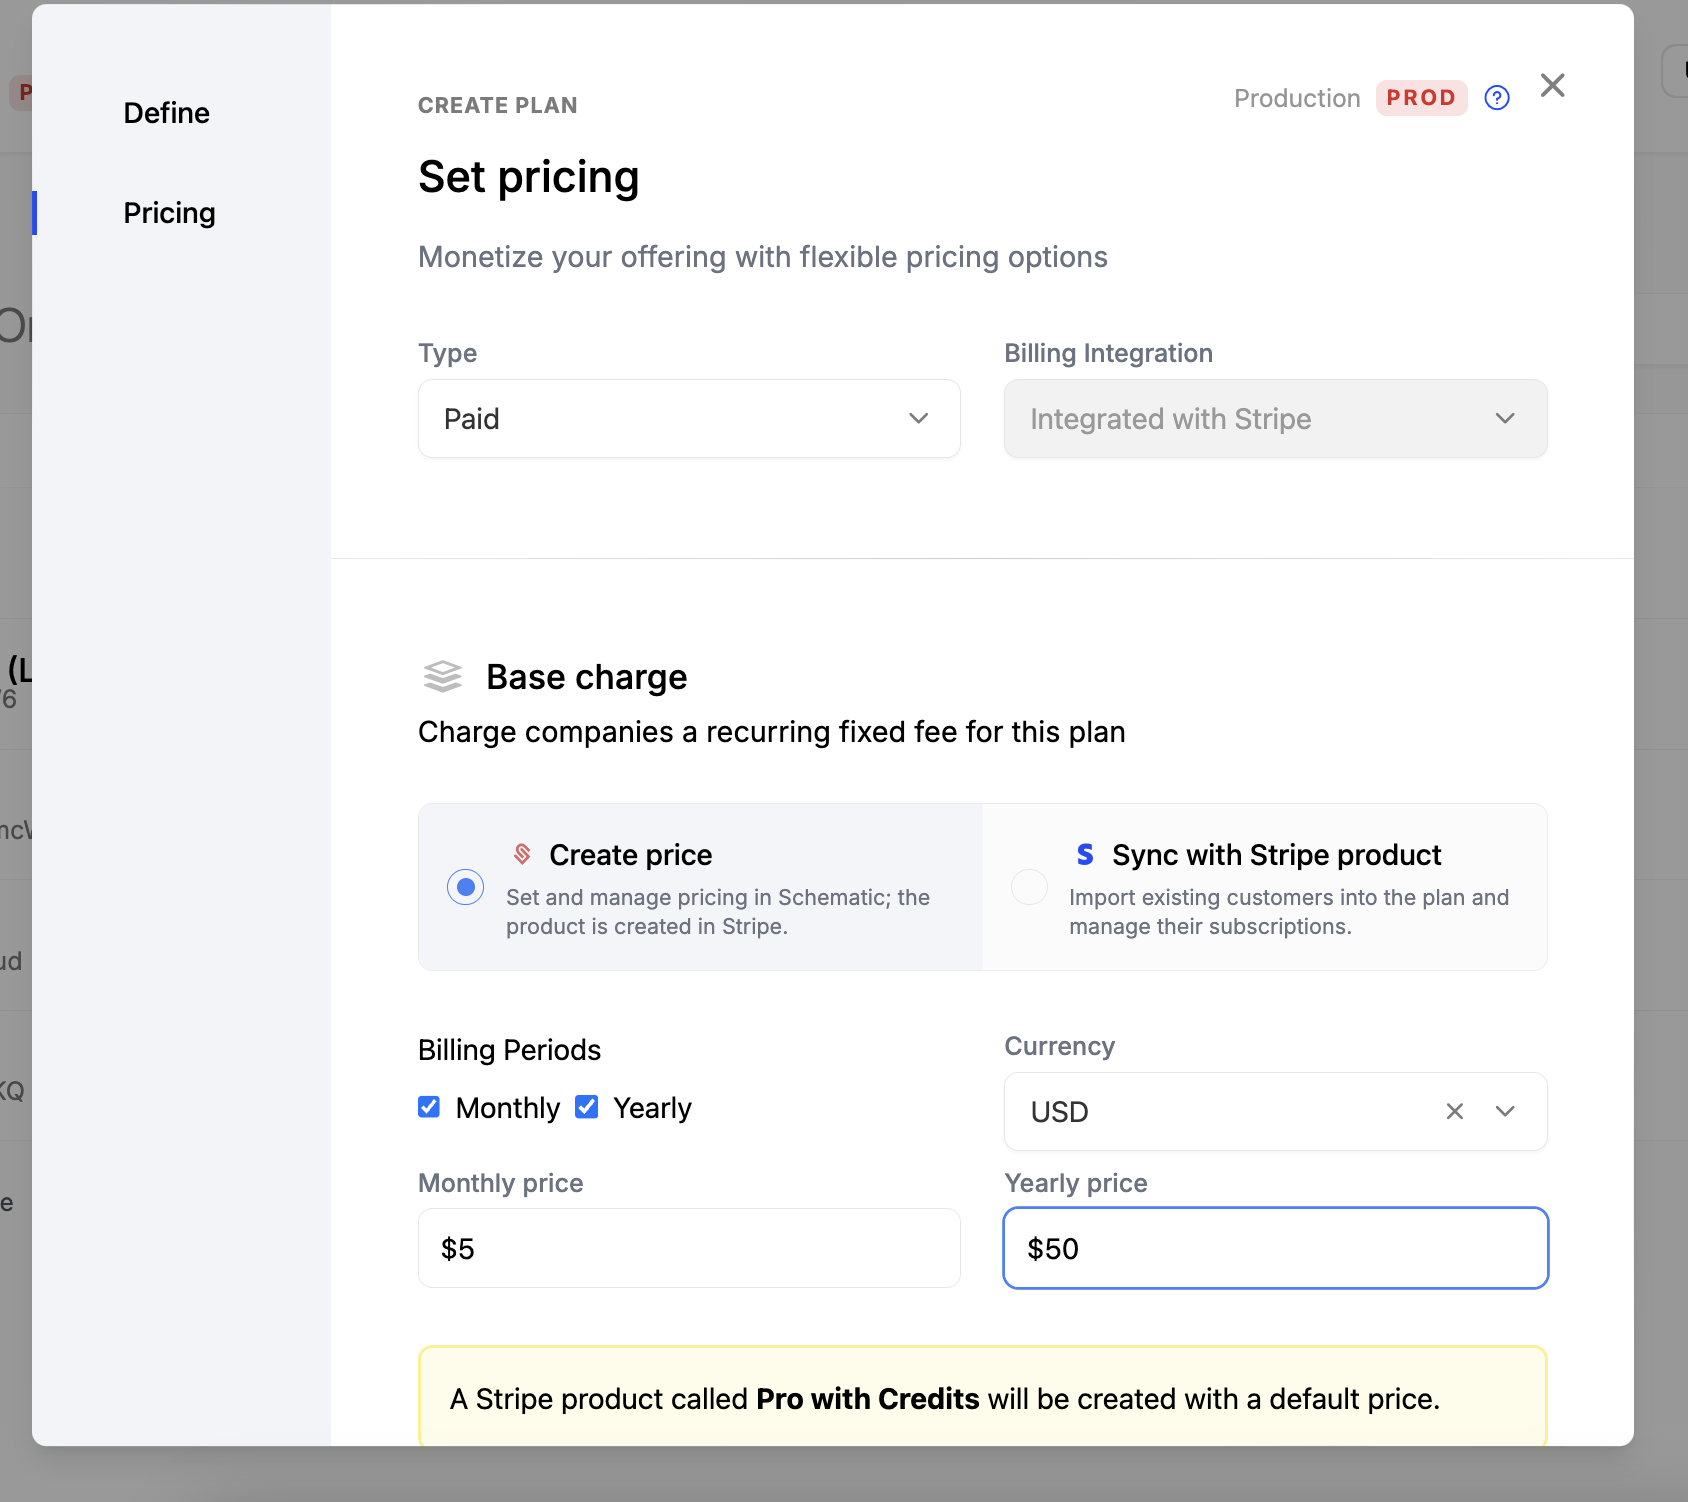
- Next, step the plan to a “Paid” plan and provide a monthly (50) price.
- Click “Save” to create the plan.
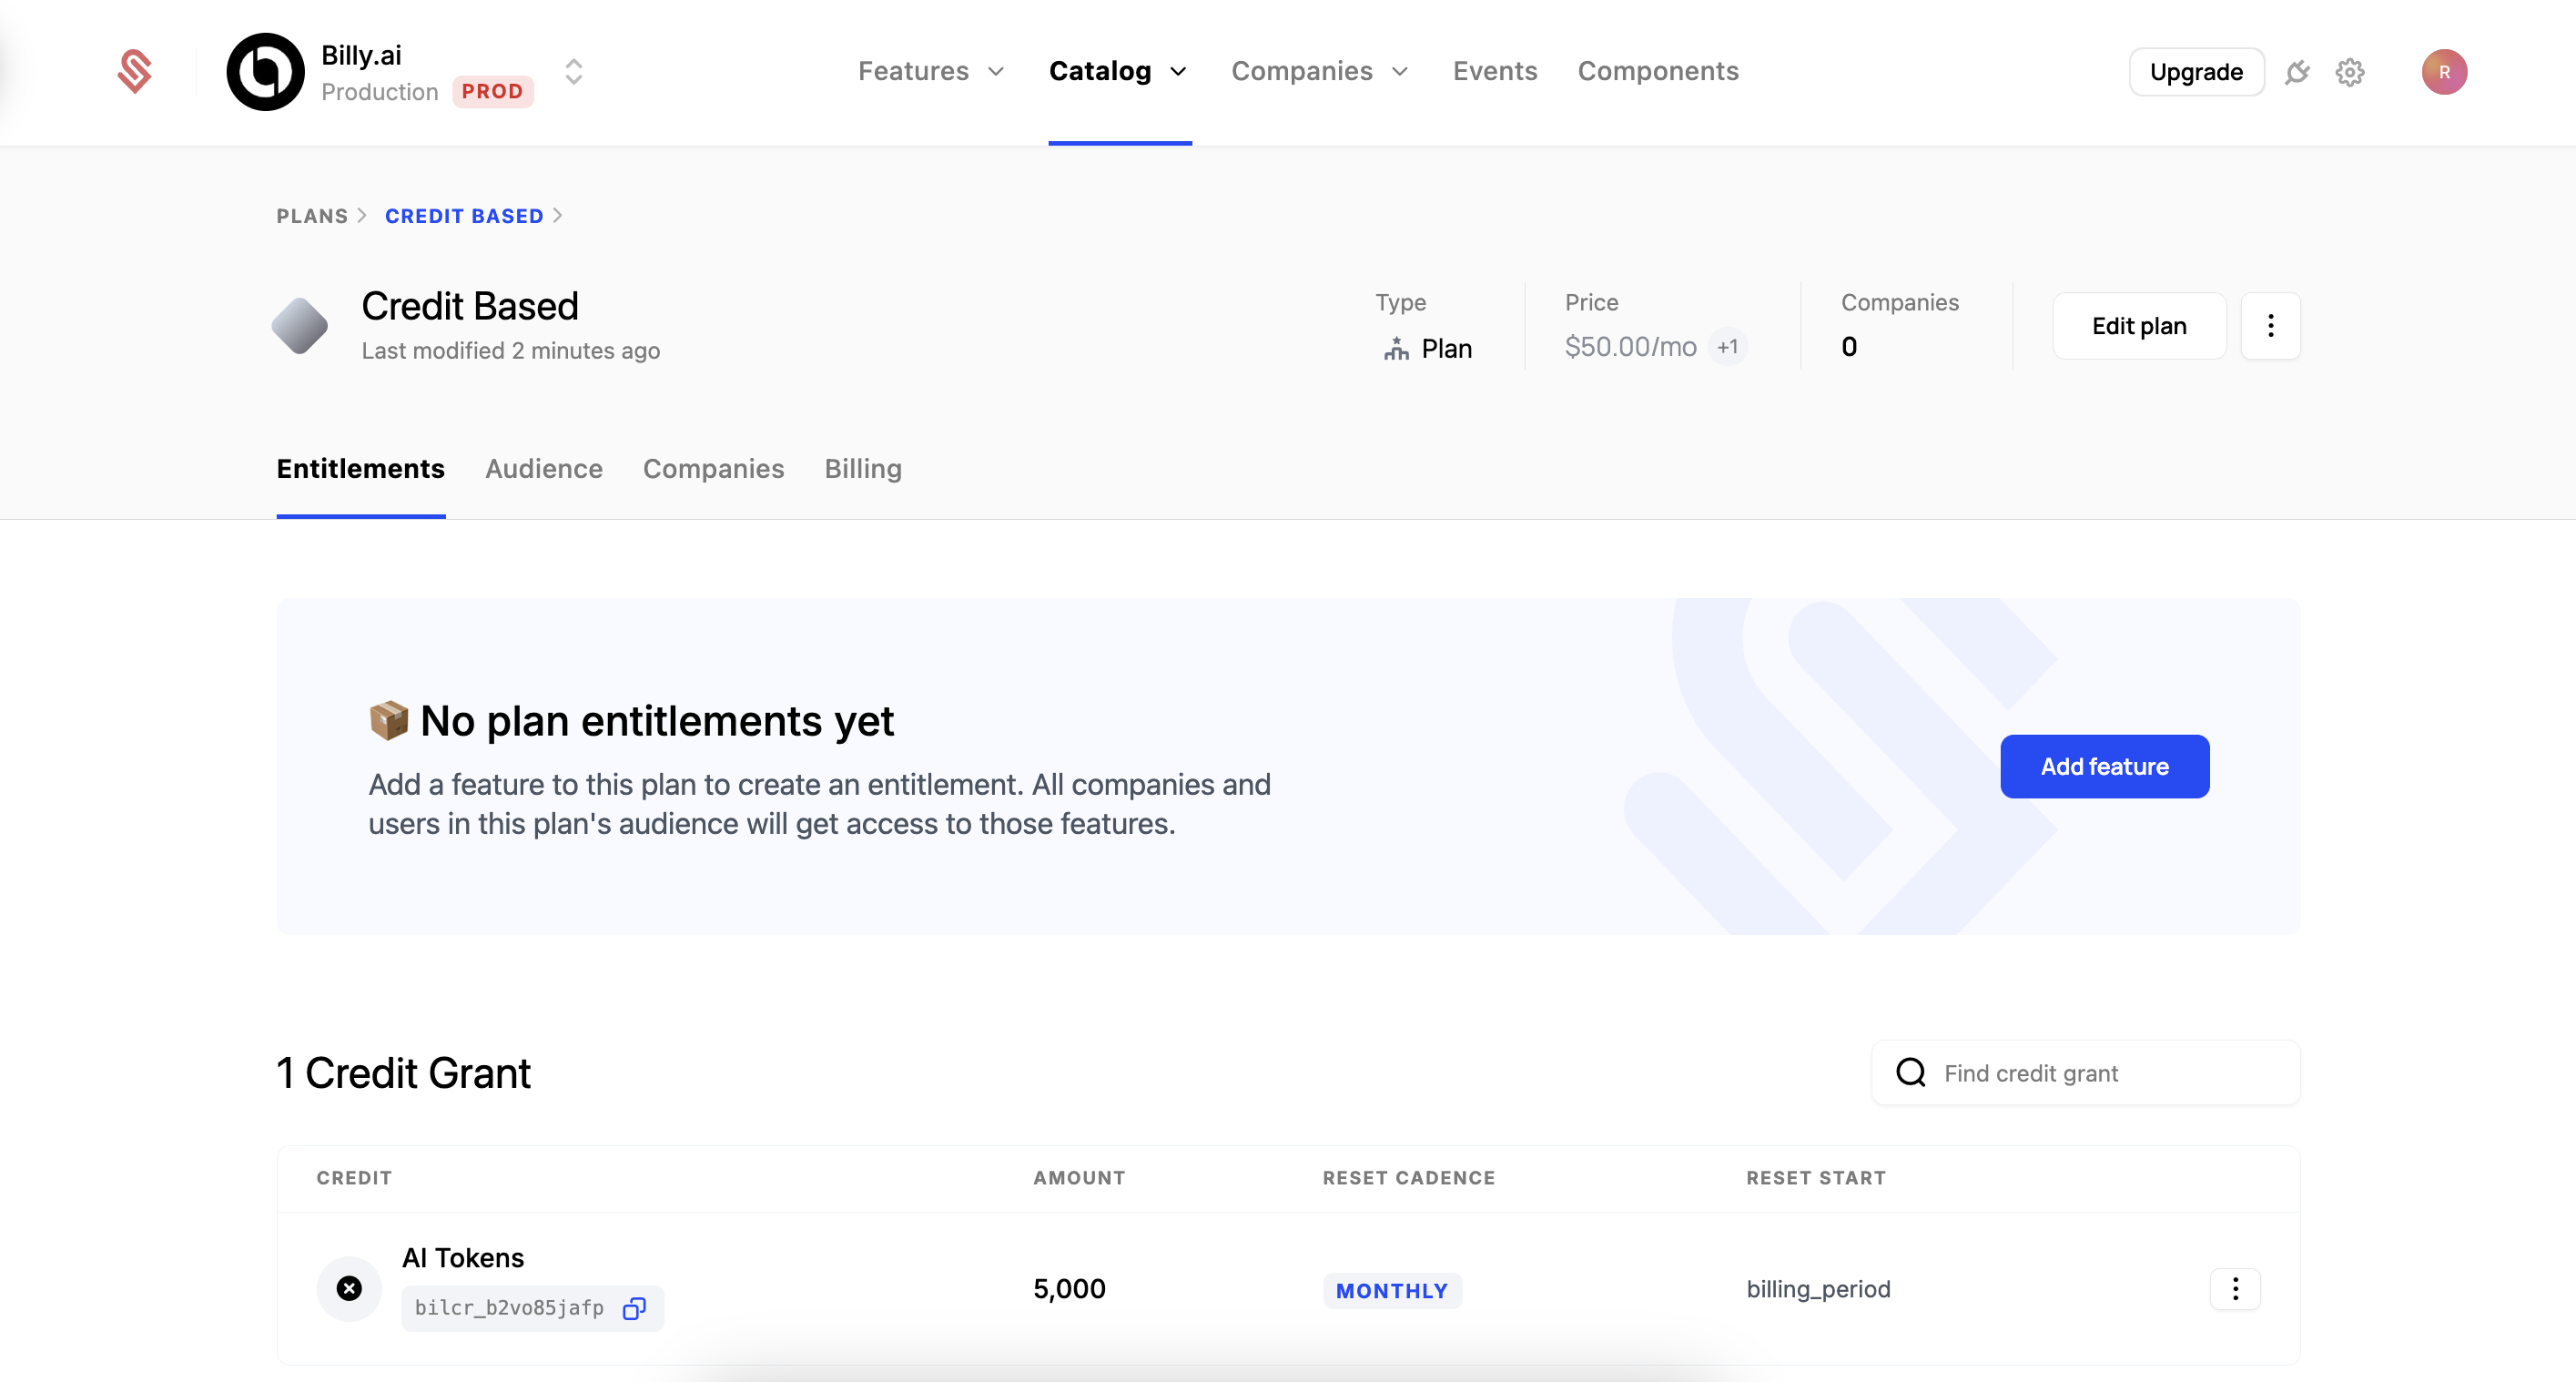
3. Add the Credit Type to this plan.
Now that we have a plan, we’ll add the Credit Type to it.
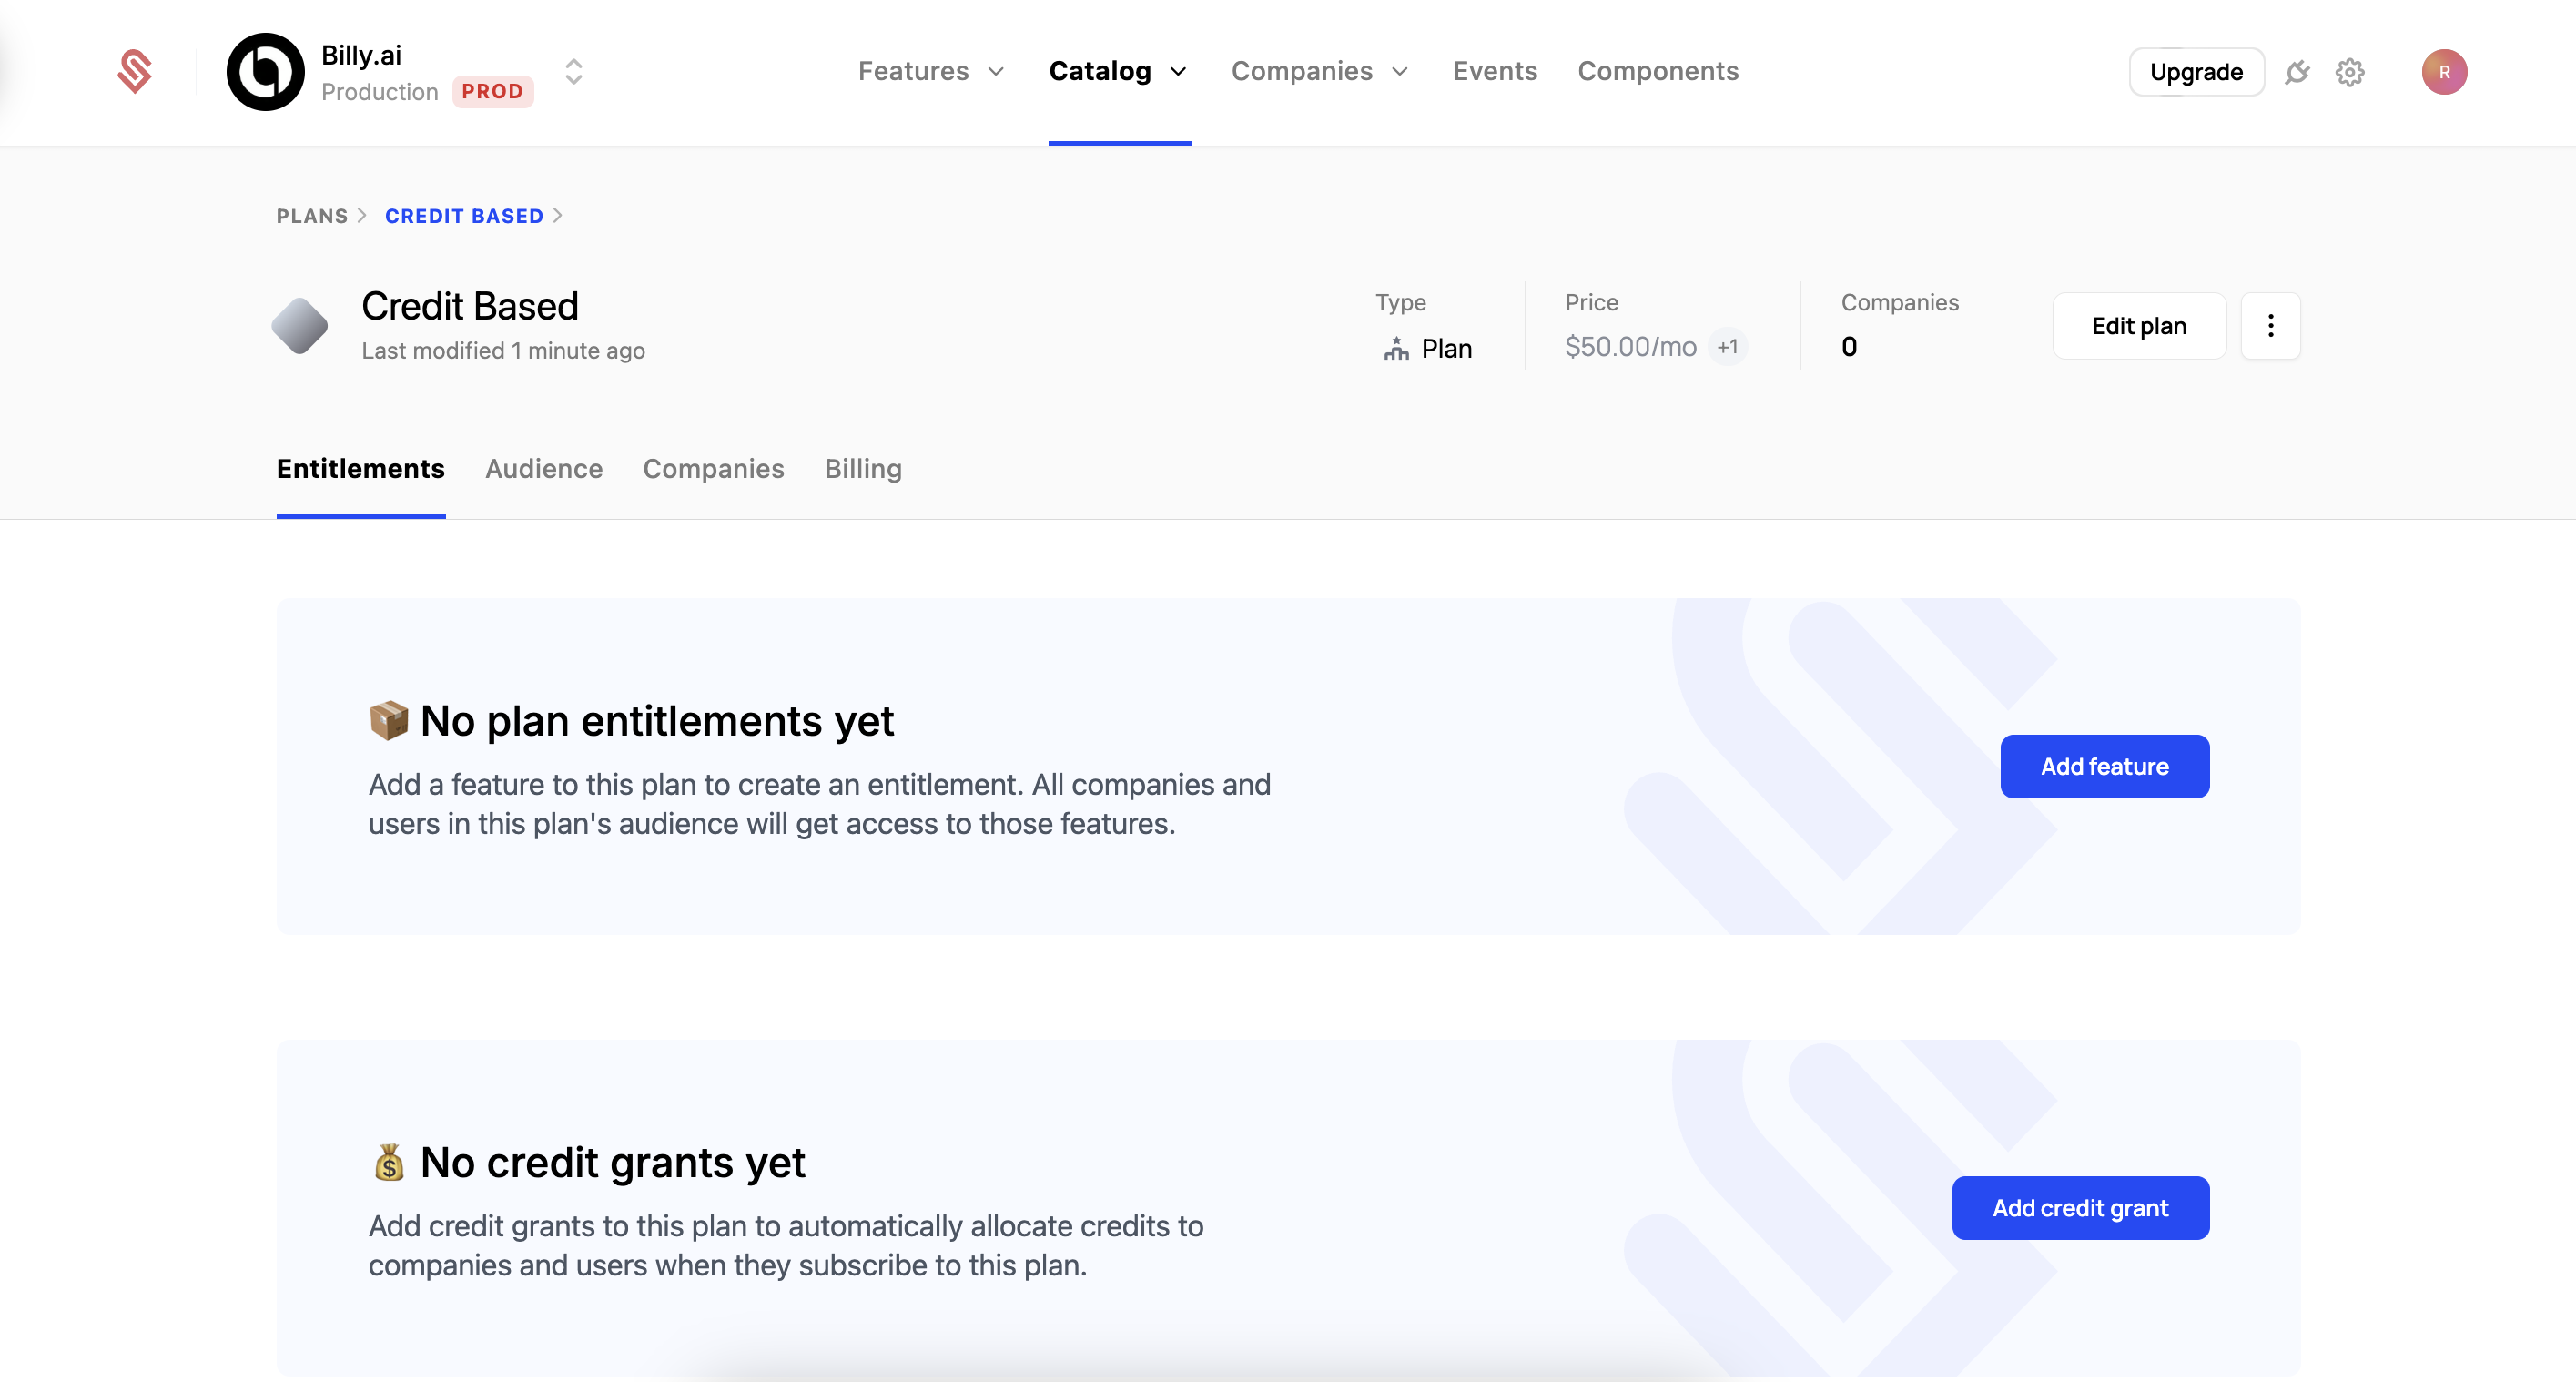
- Click “Add credit grant” to begin the process.
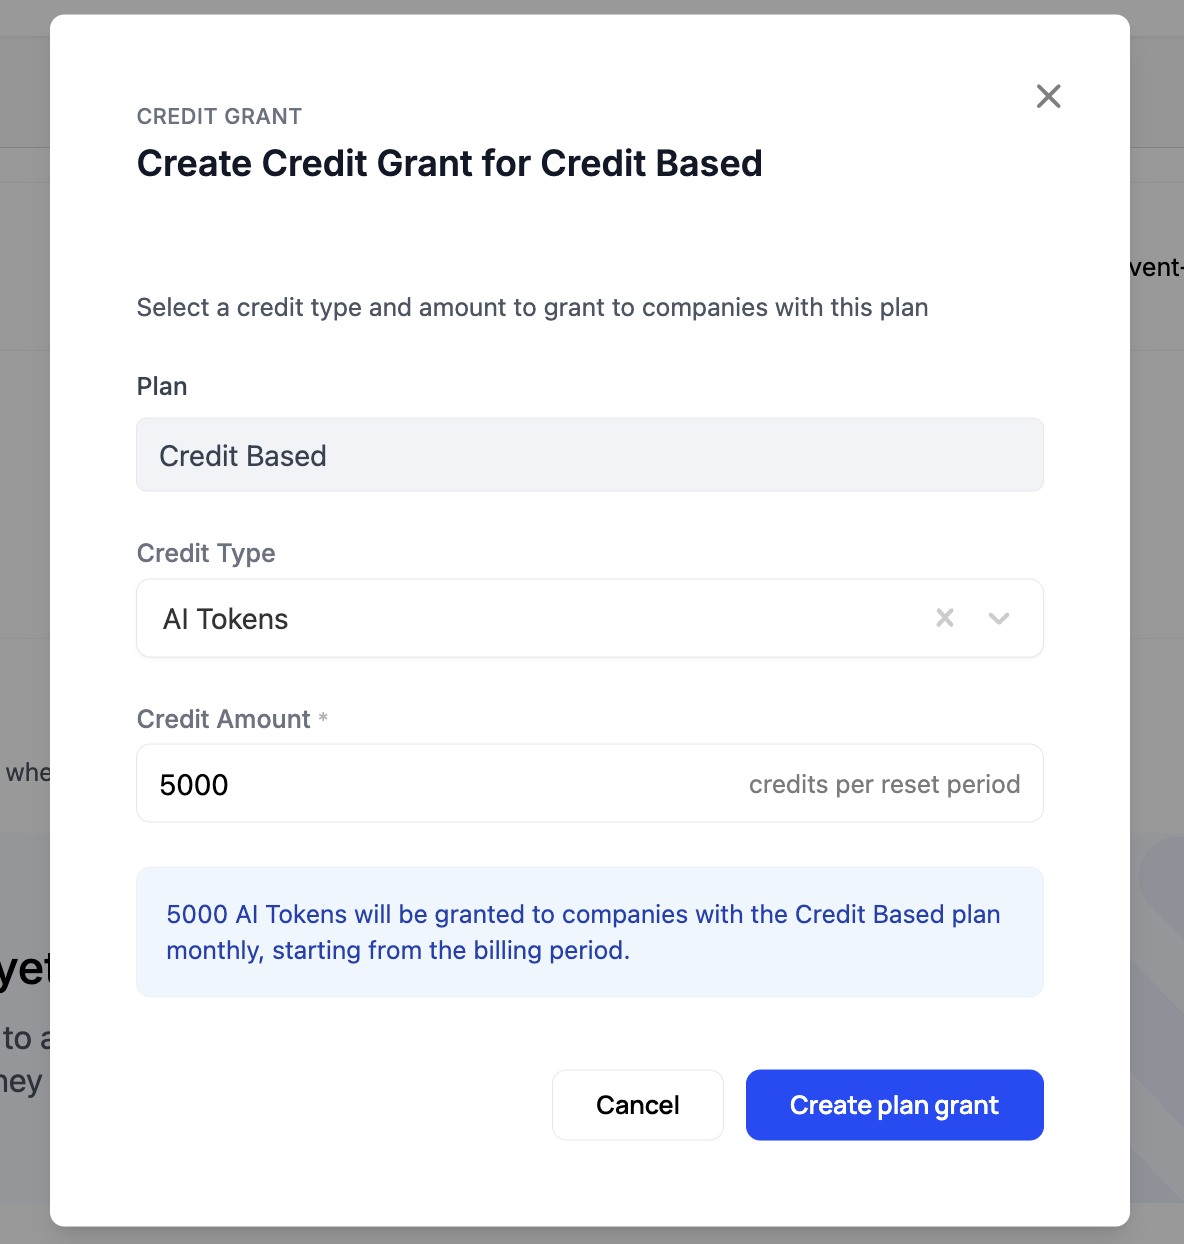
- Select the Credit Type we created earlier, “AI Tokens”.
- Set the number of credits the plan provides each period. Each new billing period, customers will receive this number or credits, and any unused credits from the prior period will expire. We’ll use 5,000 for this example.
- Click “Create plan grant” to save your changes.
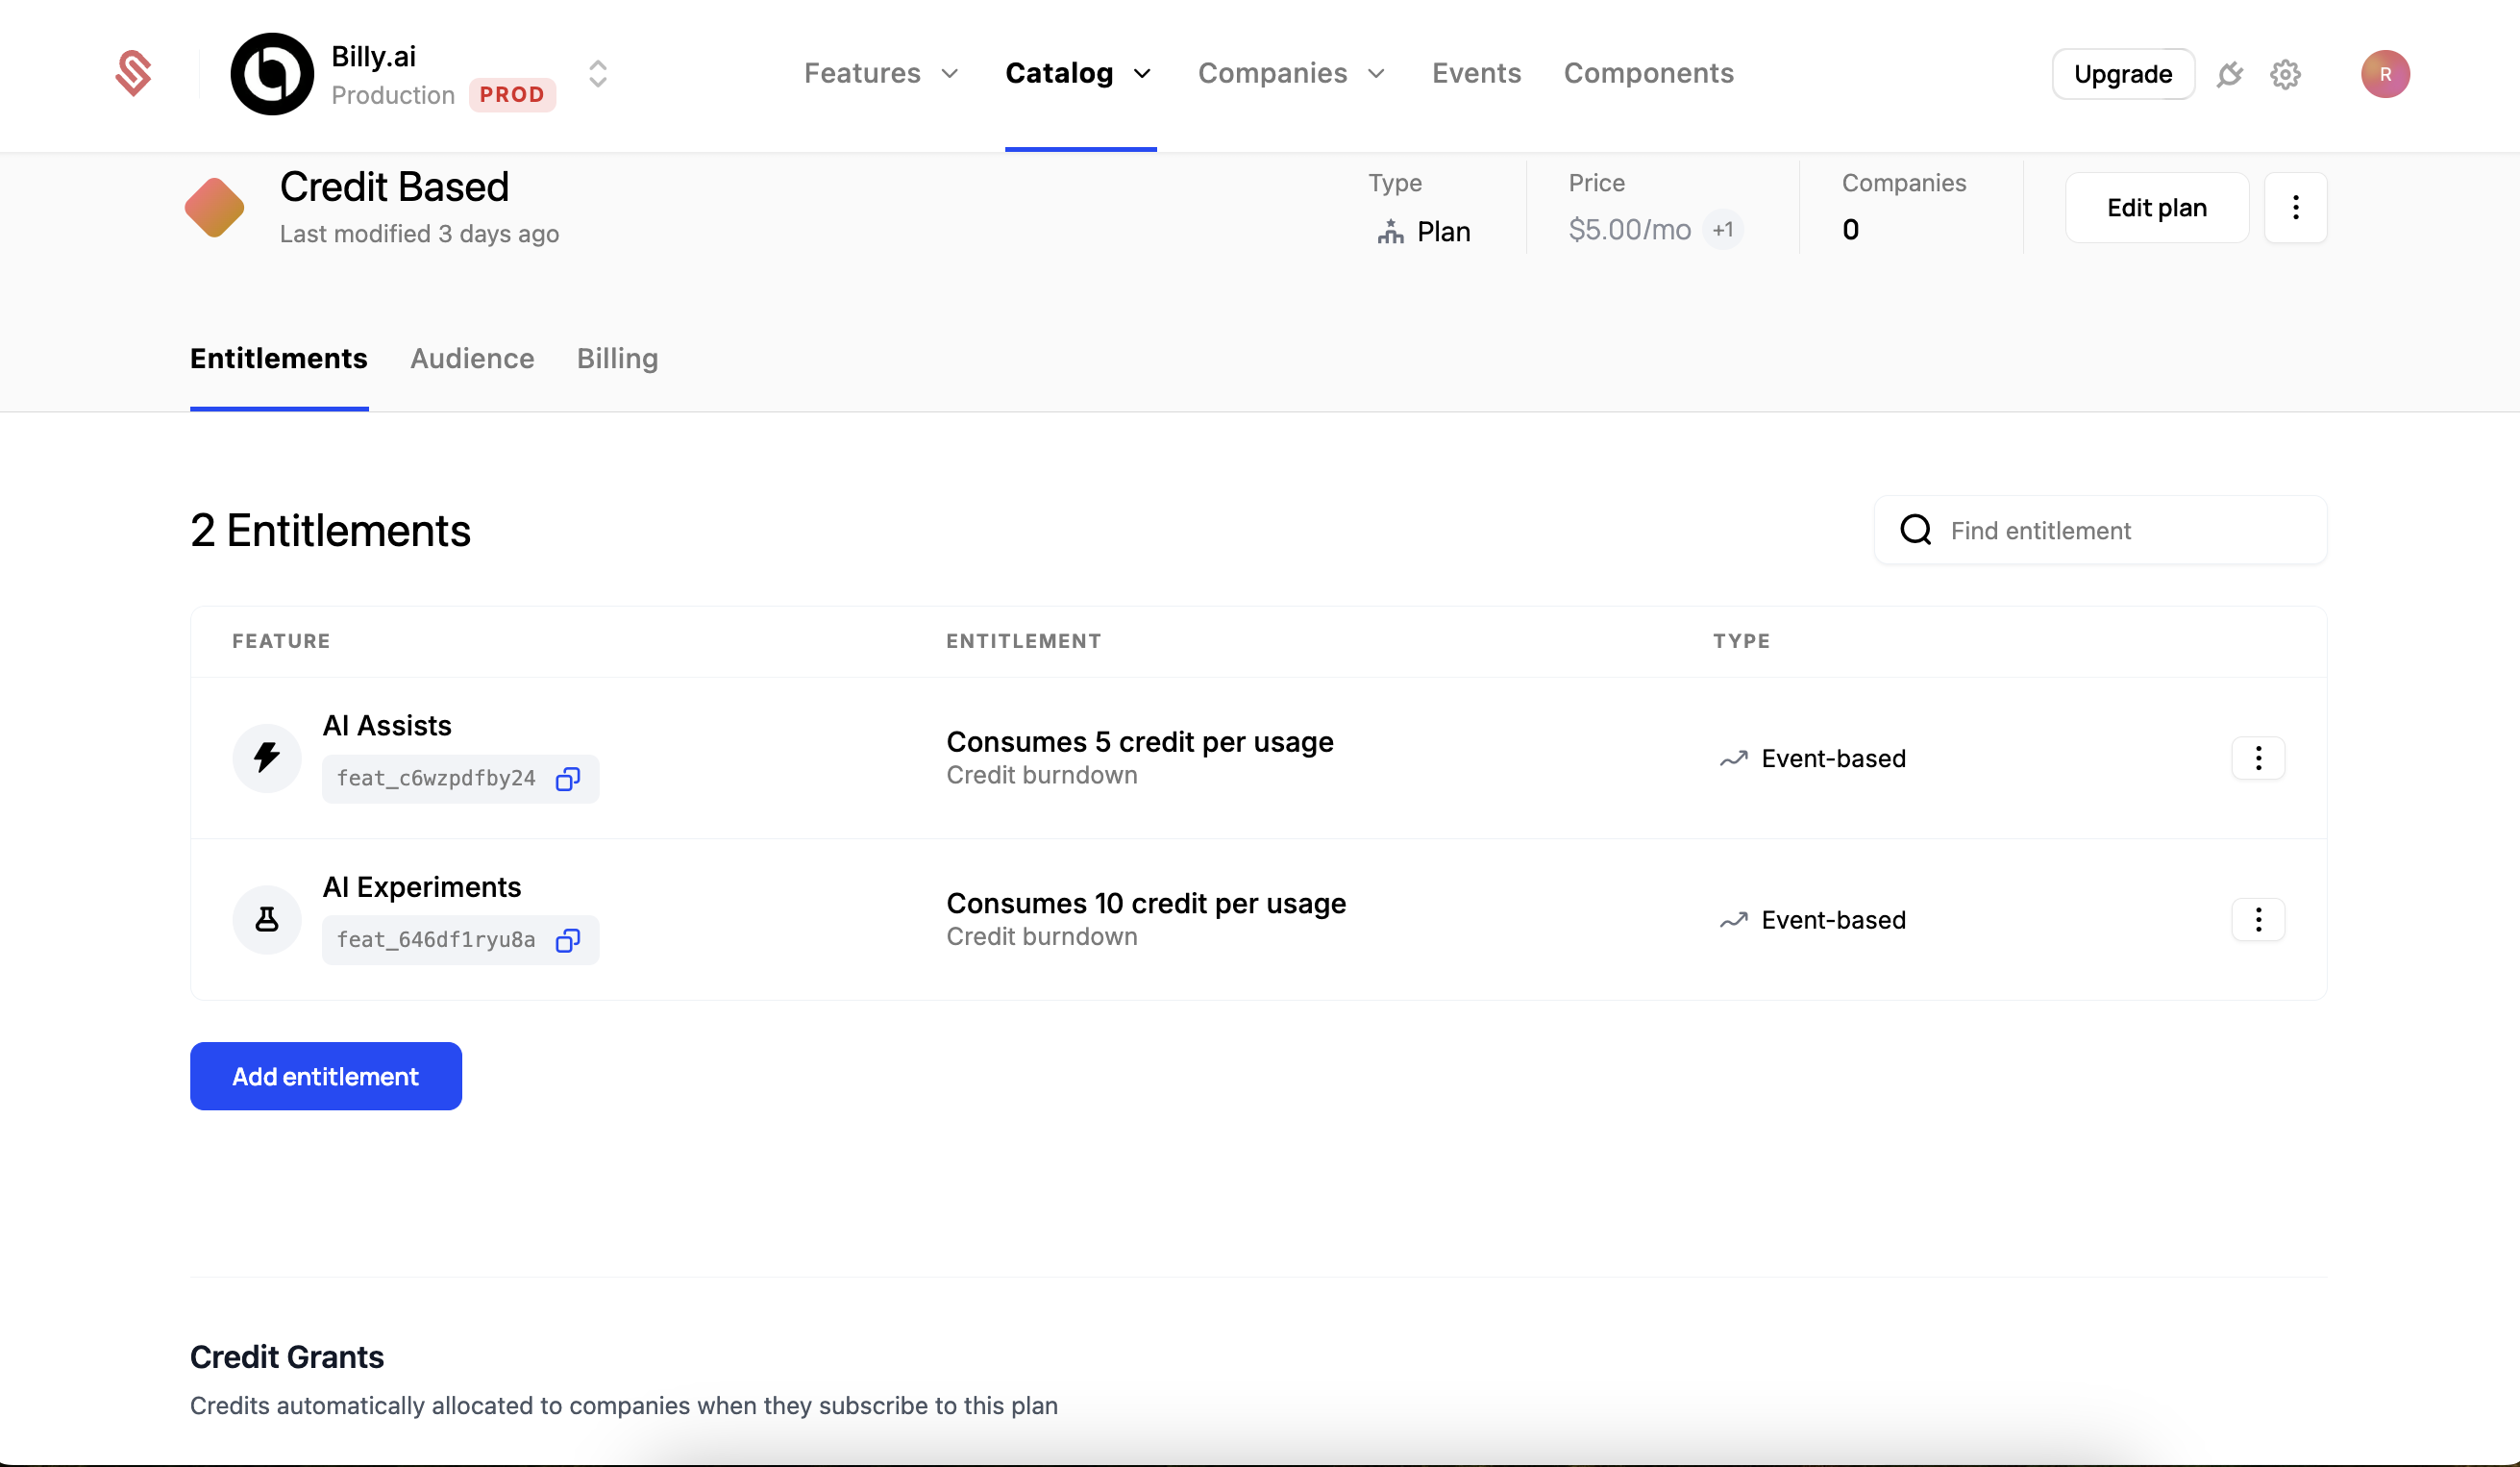
4. Add features to this plan and configure how they use credits.
Now that we have a plan with a credit grant, we’ll add the credit-based features that will use these credits.
- Click the “Add feature” button to begin the process.
- Select the “AI Assists” feature and click “Continue”.
- Set the type to “Credit burndown”.
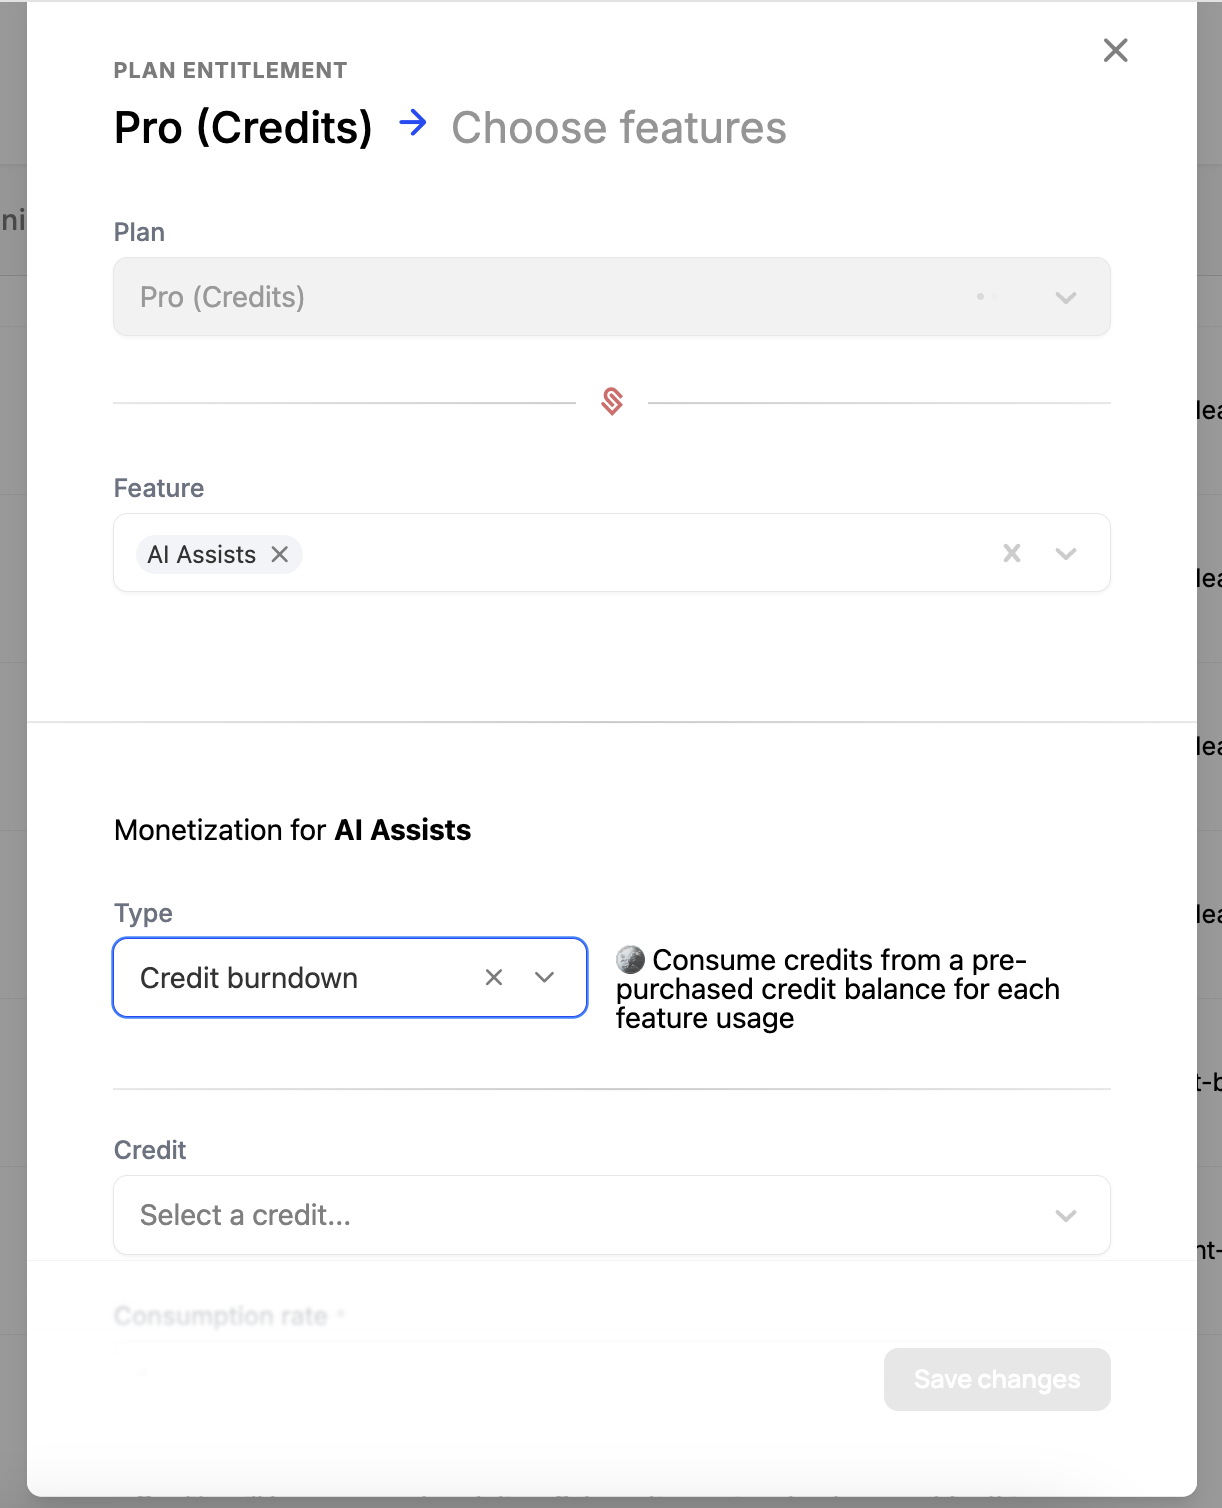
- Select the credit type we created earlier, “AI Tokens”.
- The consumption rate is how many credits each action will consume from the credit pool. We’ll use 5 for this example.
- Click “Save Changes” to add this feature to the plan.
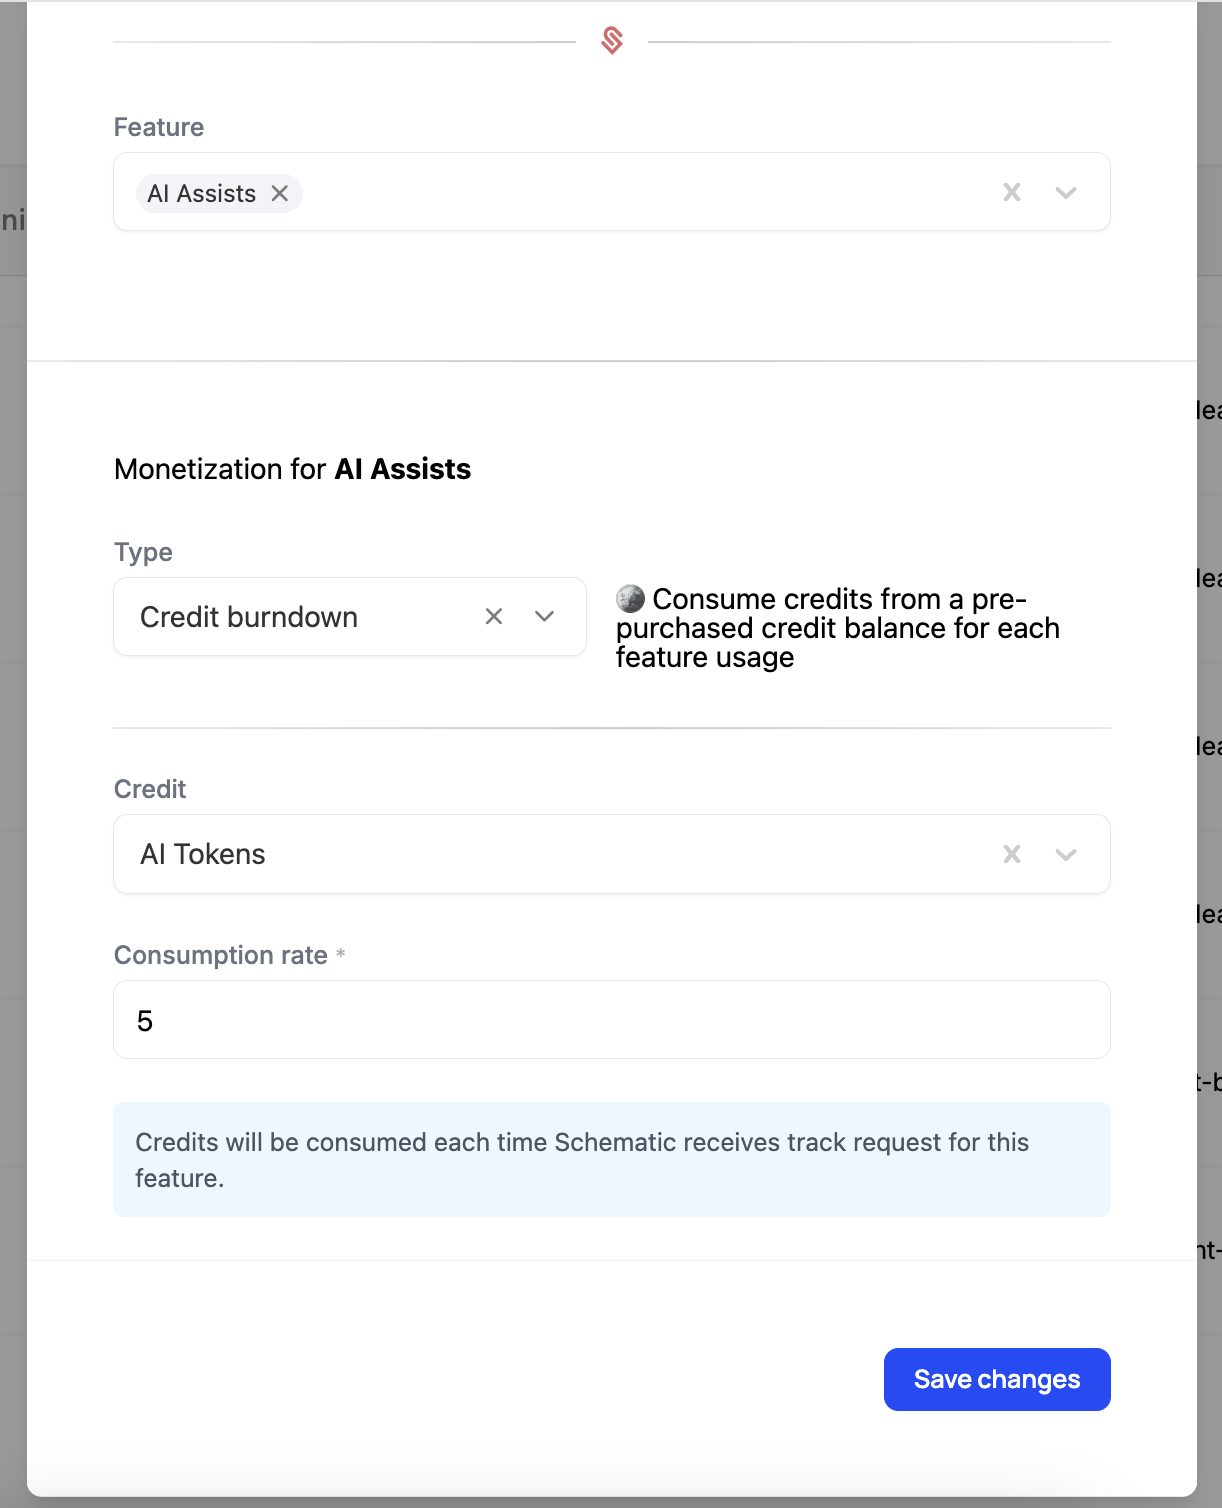
- Repeat this process for the “AI Experiments” feature, setting the consumption rate to 10.
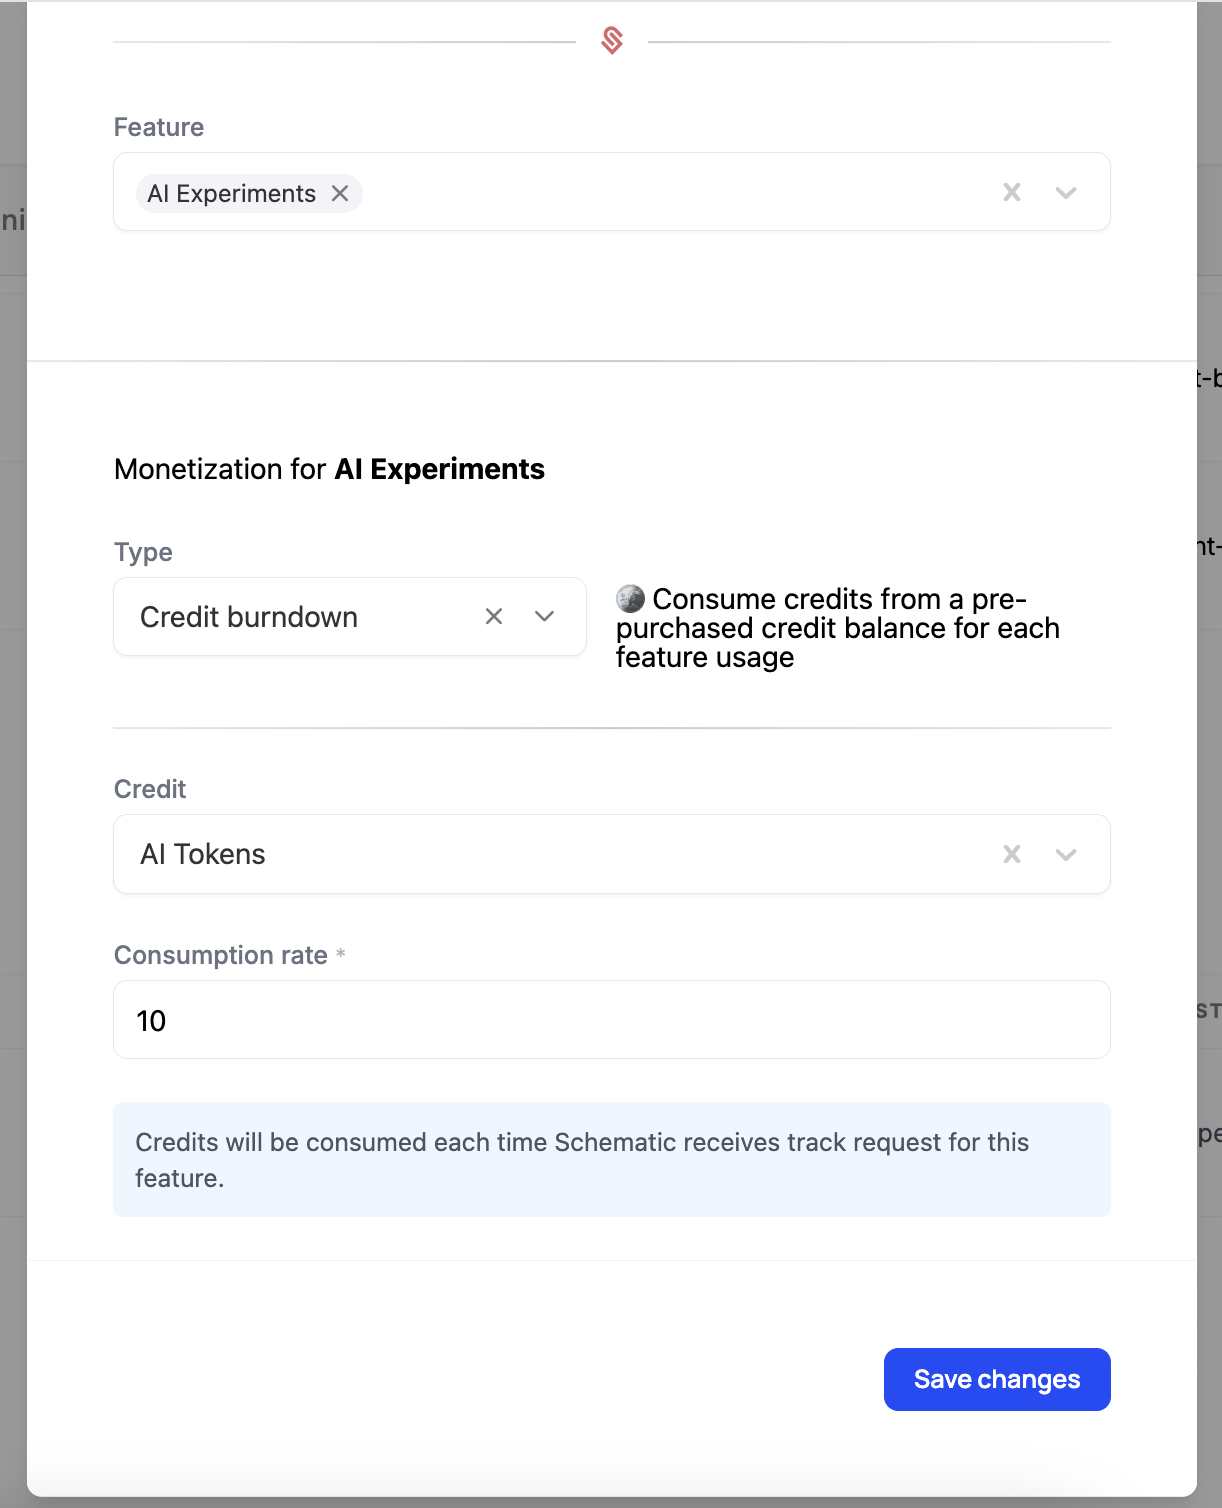
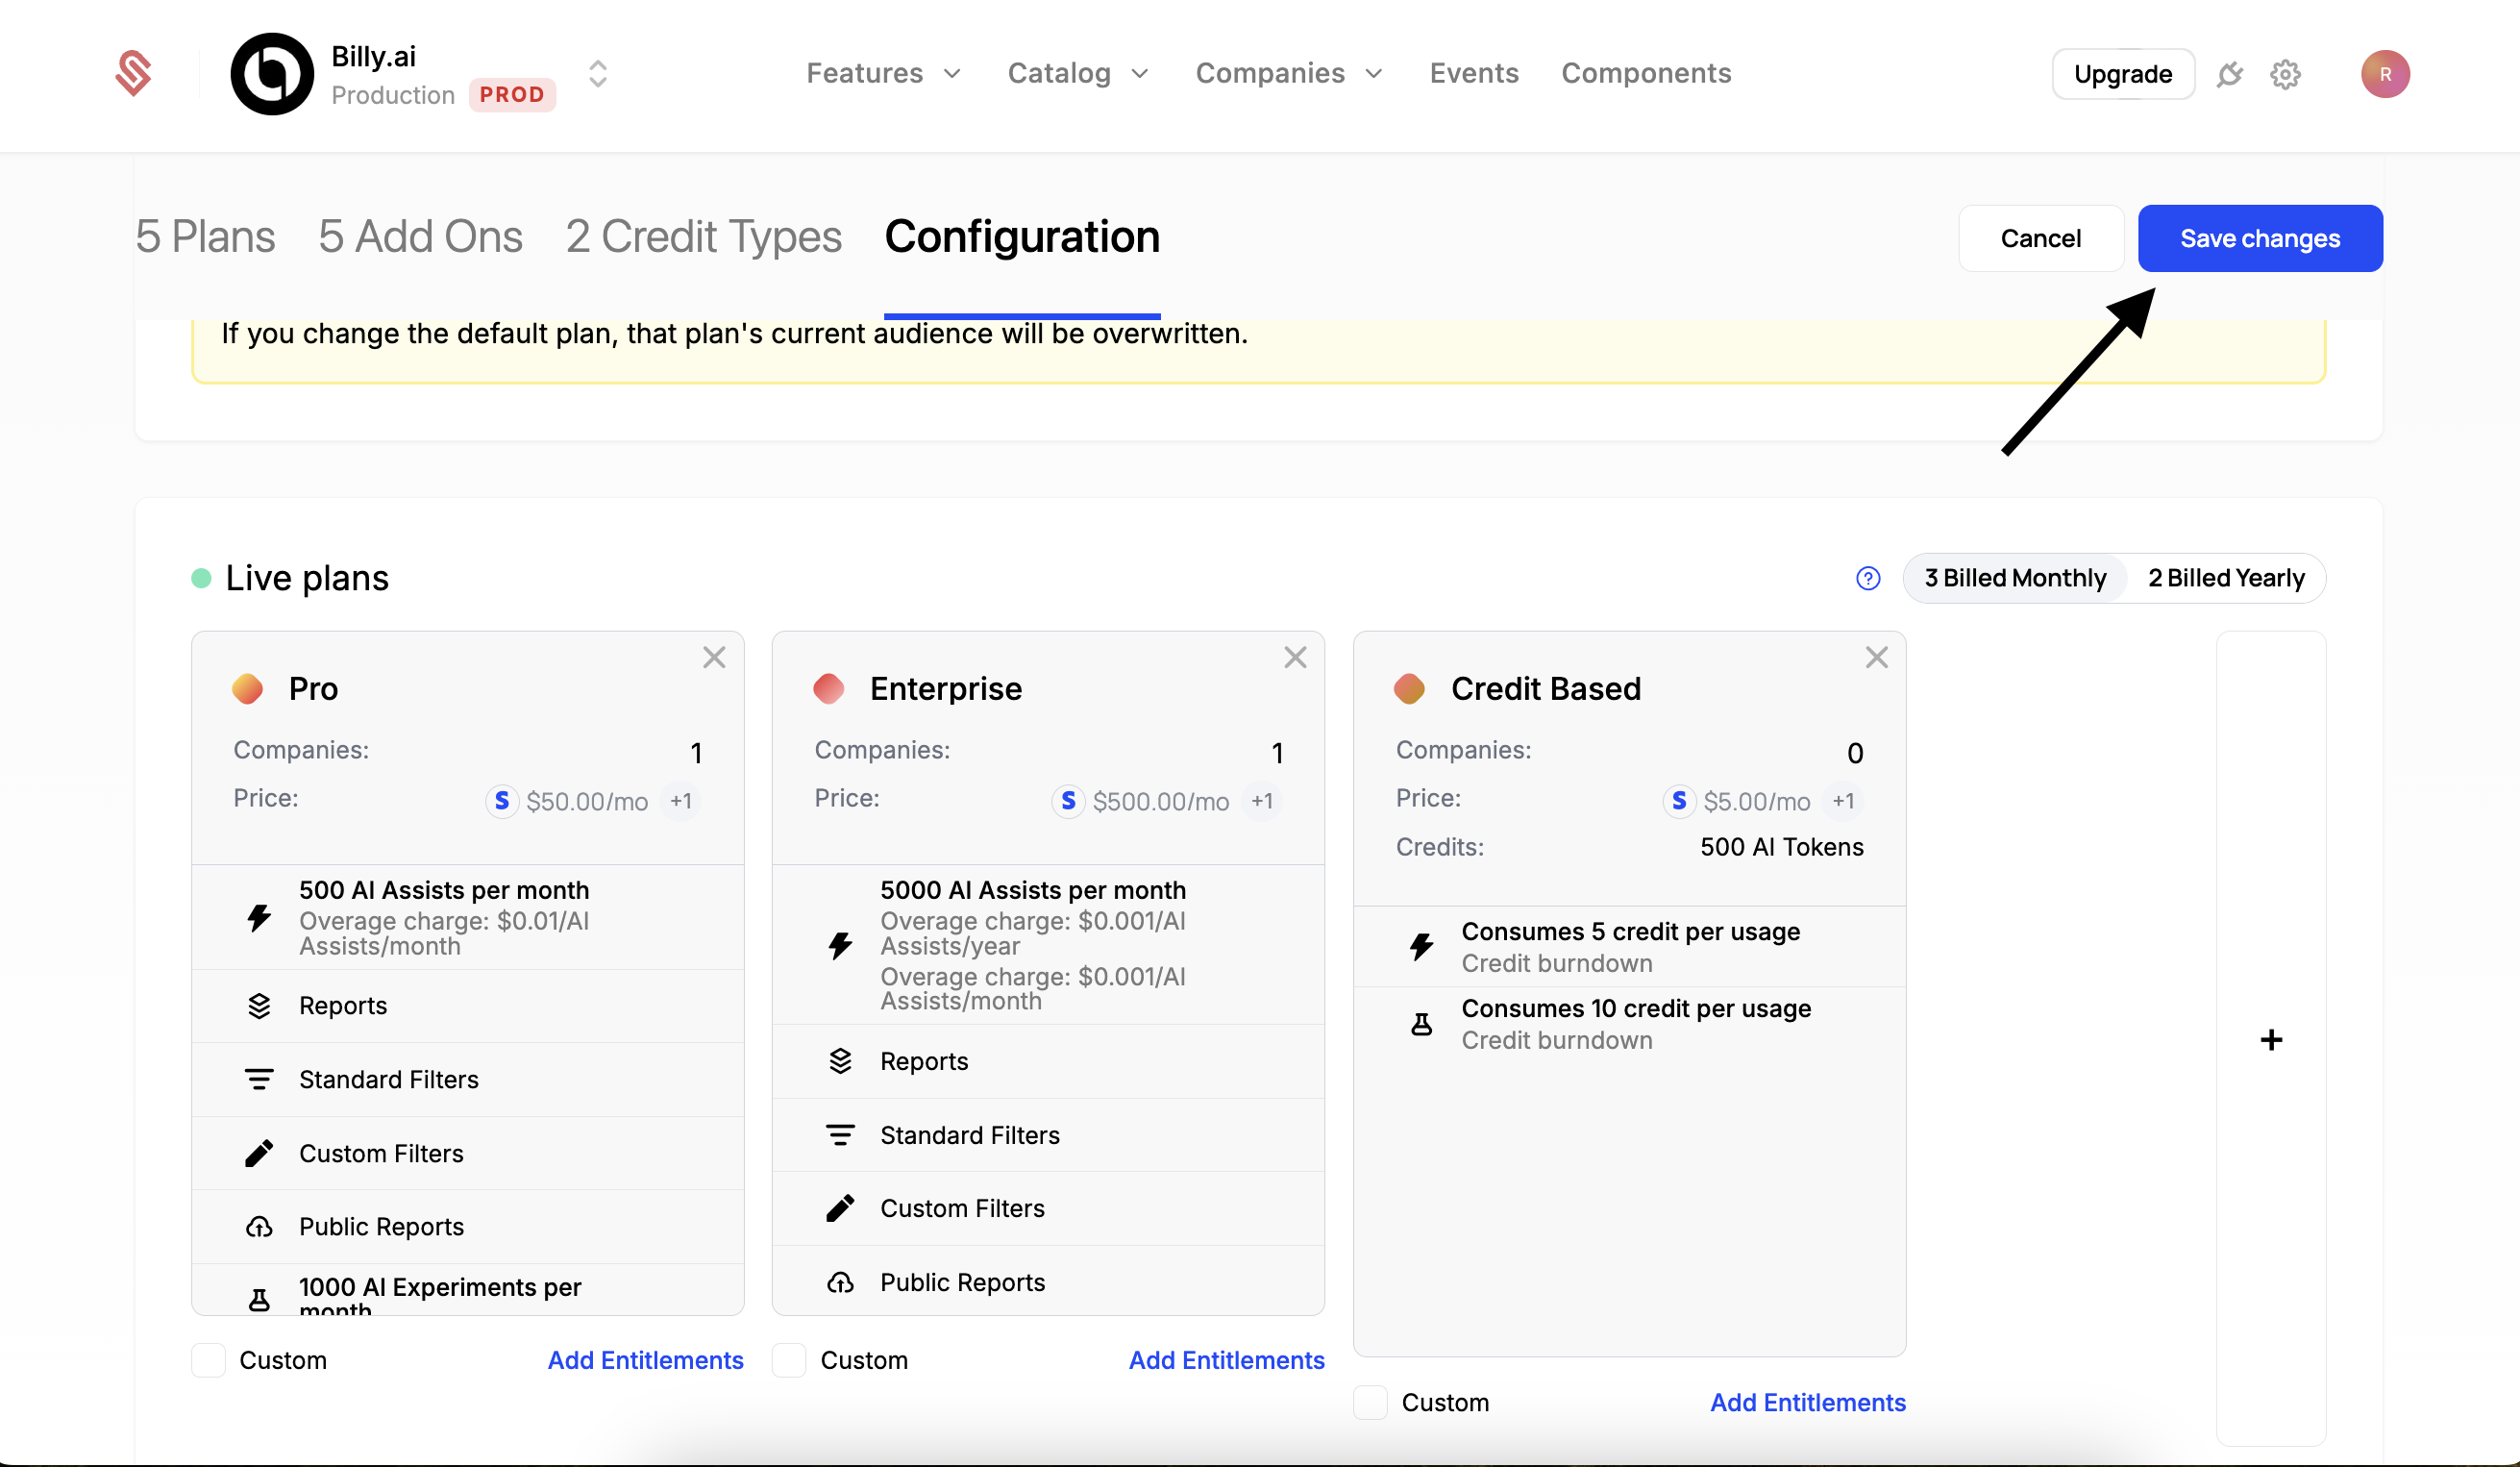
When you’re finished, your plan should look like this:
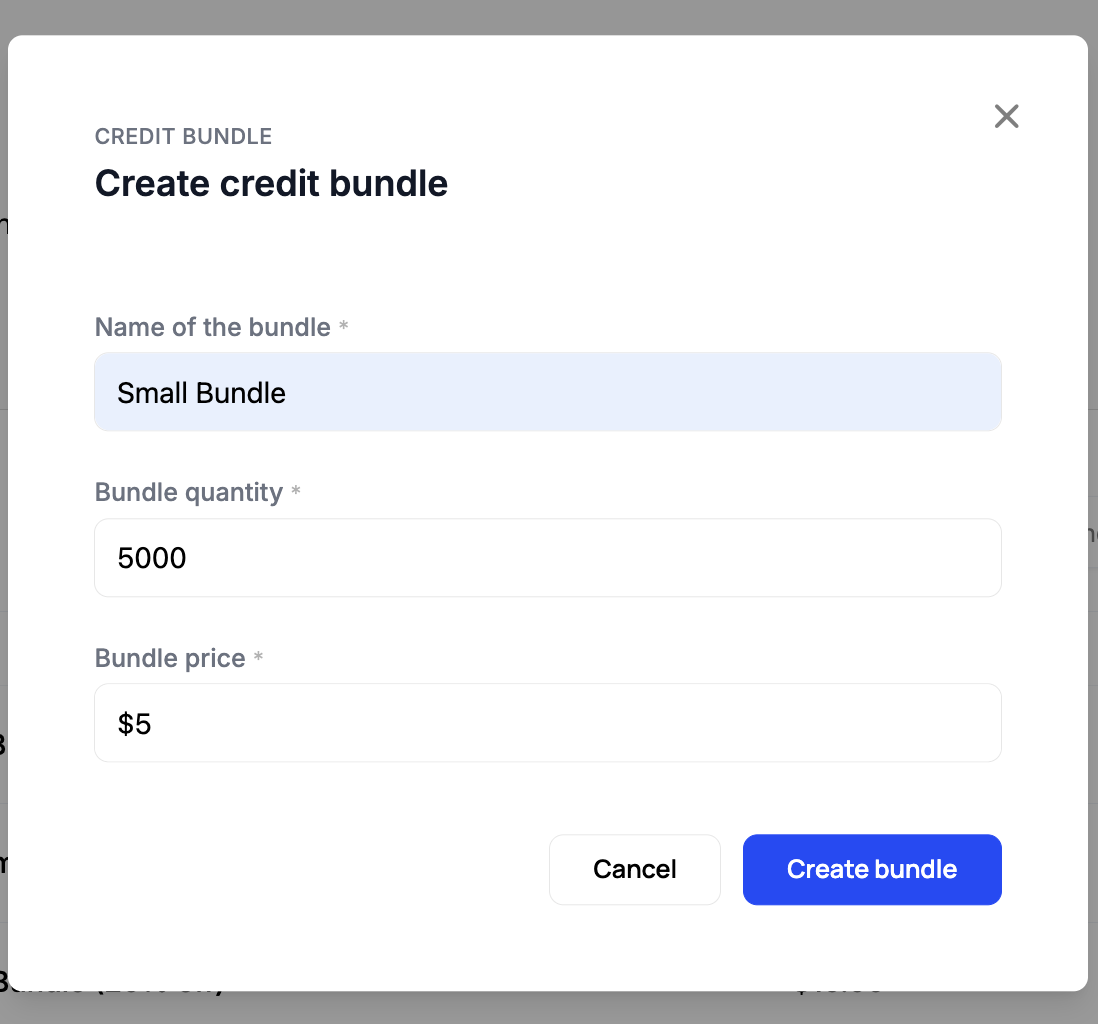
5. Configure Credit Bundles that customers can purchase to top up their balance.
Finally, let’s add credit bundles that customers can purchase to top up their credit balance. These purchased credits never expire and roll over month to month, allowing continuous usage of credit-based features after the plan’s default balance is exhausted.
When customers consume credits, they draw from the credit grant with the nearest expiration date. This means they’ll typically use their monthly plan credits first before drawing from purchased credits, since monthly credits expire at the end of each billing period.
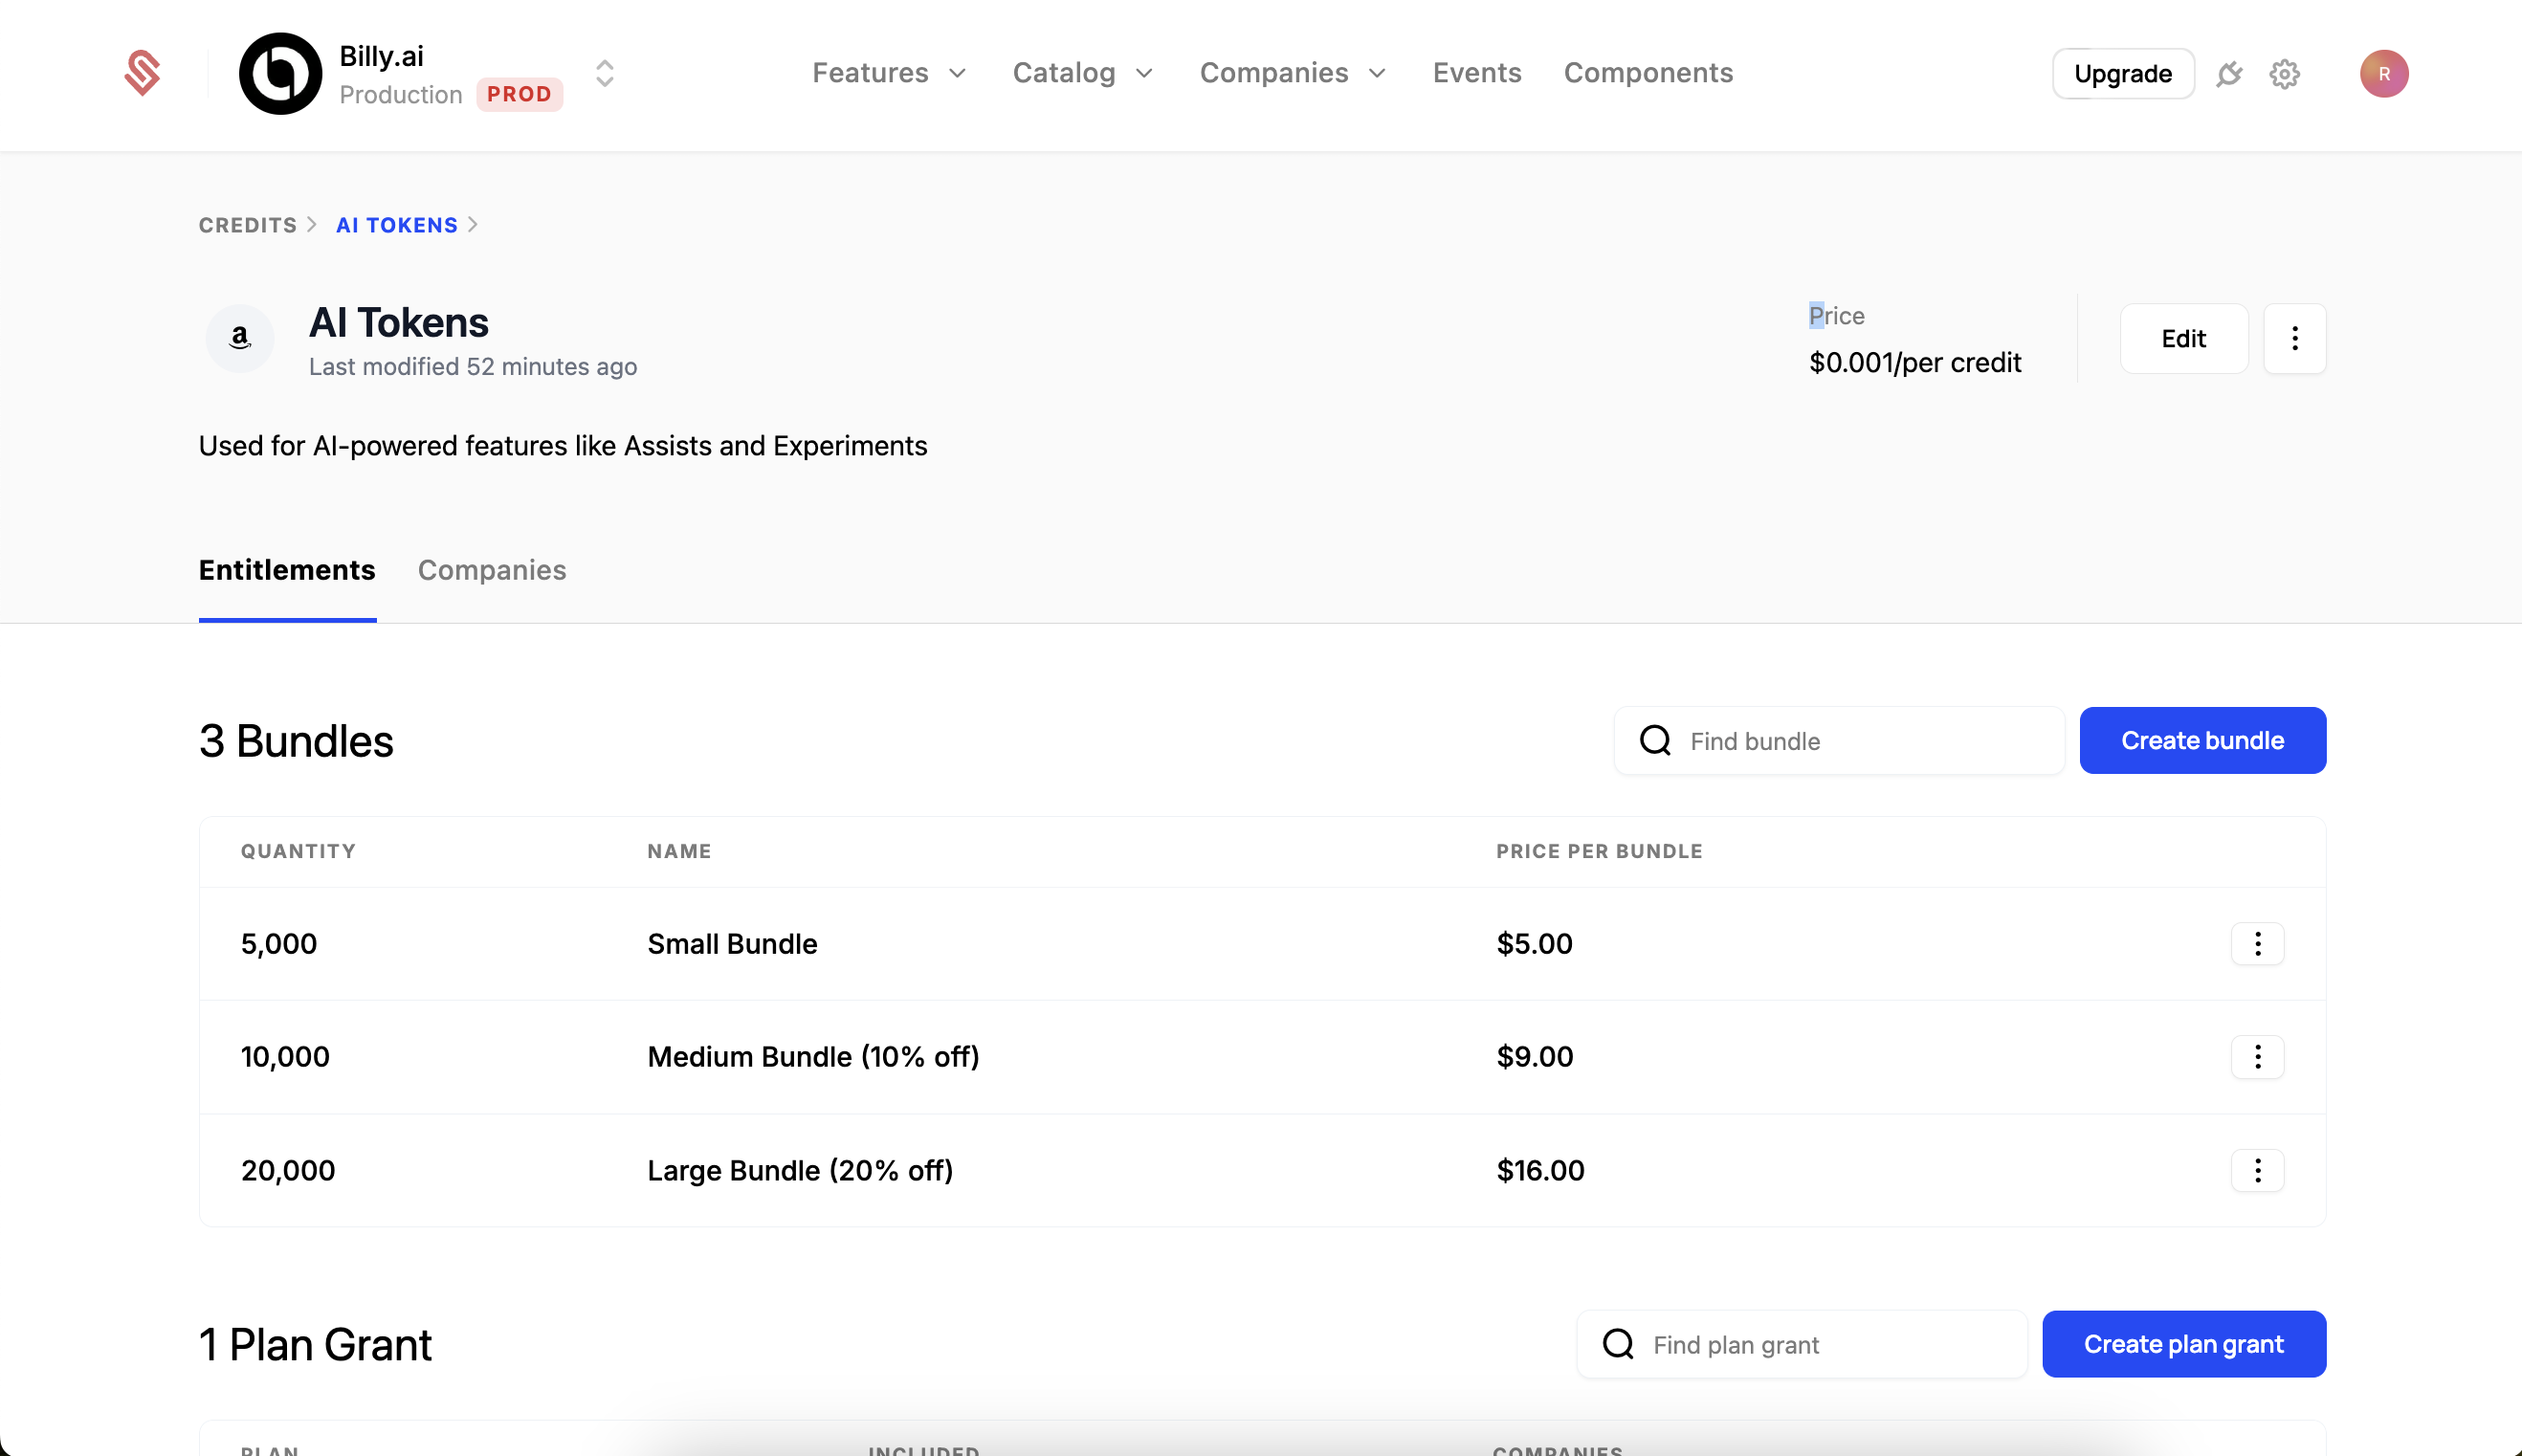
- Navigate to the Credit Type page (Catalog > Credits > “AI Tokens”).
- Give your bundle a name. We’ll use “Small Bundle” for this example.
- Select the number of credits you want to include in the bundle. We’ll use 5,000 for this example, which is the number of credits the plan provides by default.
- Next, we set a cost for this bundle. We recommend this cost is in line with the cost basis of the credit type. We’ll use $5 for this example.
- Click “Create Bundle” to save your changes.
- Repeat this process but add a “Medium Bundle (10% off)” with 10,000 credits and a cost of $9. We recommend offering a bulk discount on larger credit purchases, to incentivize customers to purchase more credits at once.
- Repeat this process one more time for a “Large Bundle (20% off)” with 20,000 credits and a cost of $16.
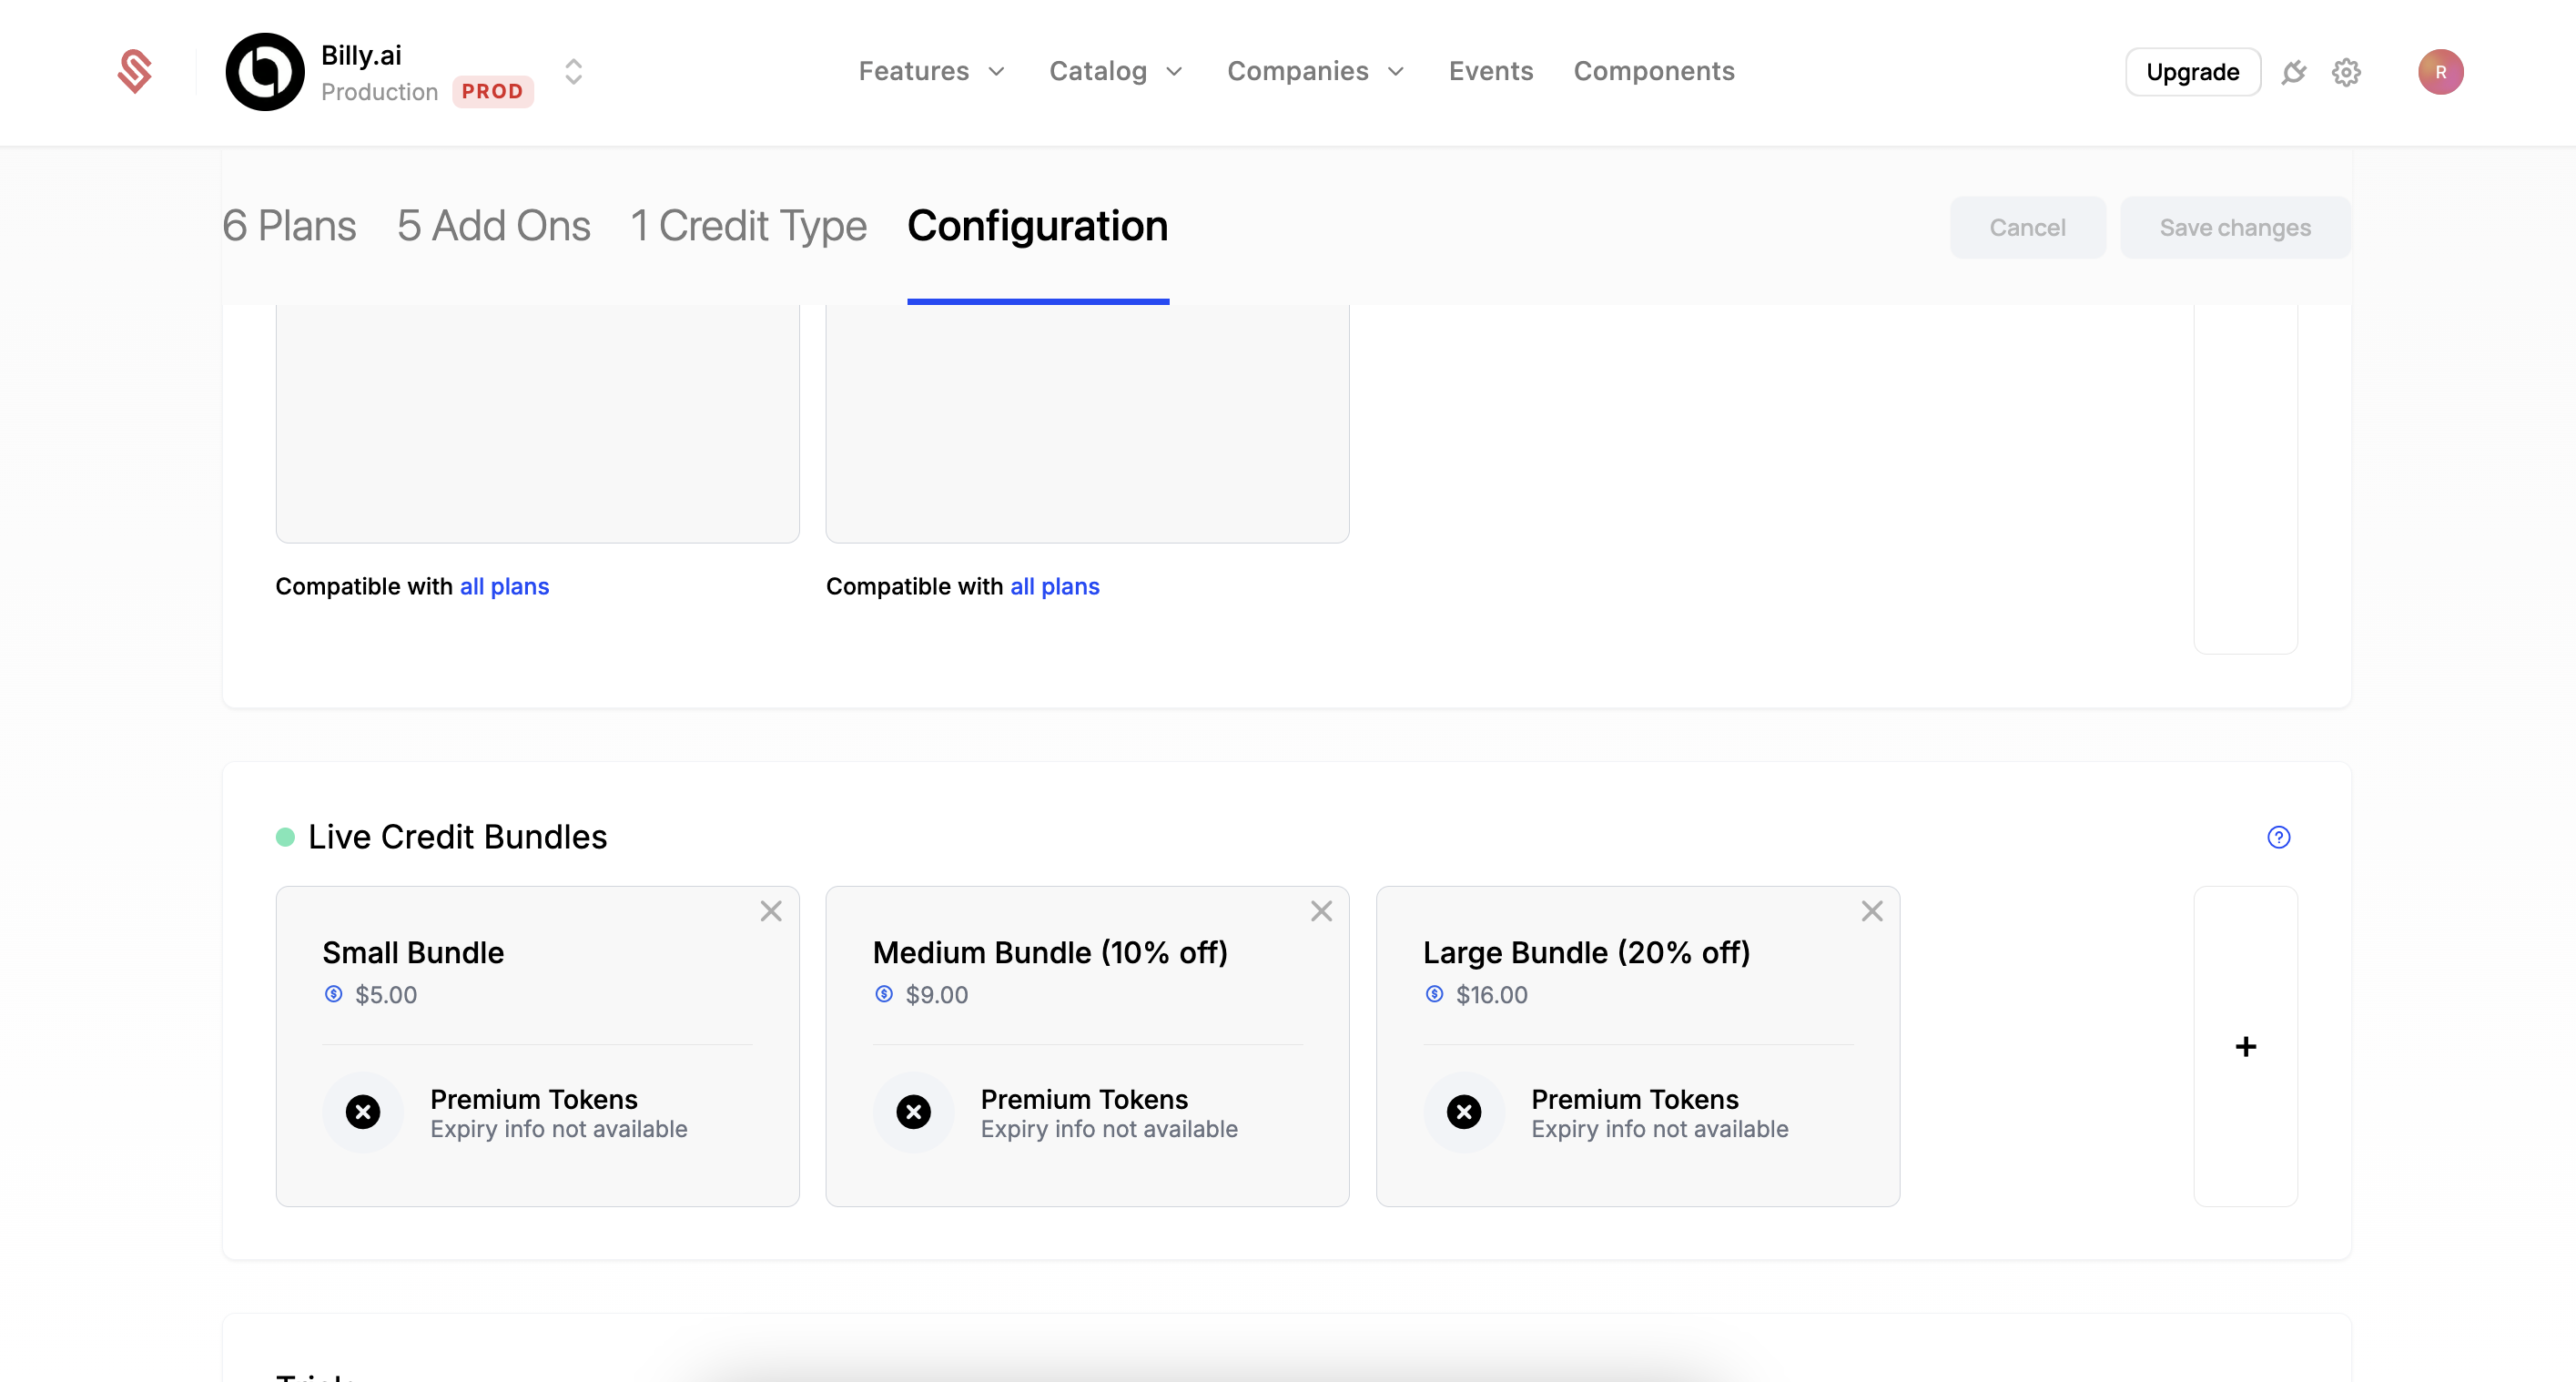
When you’re finished, your credit bundles should look like this:
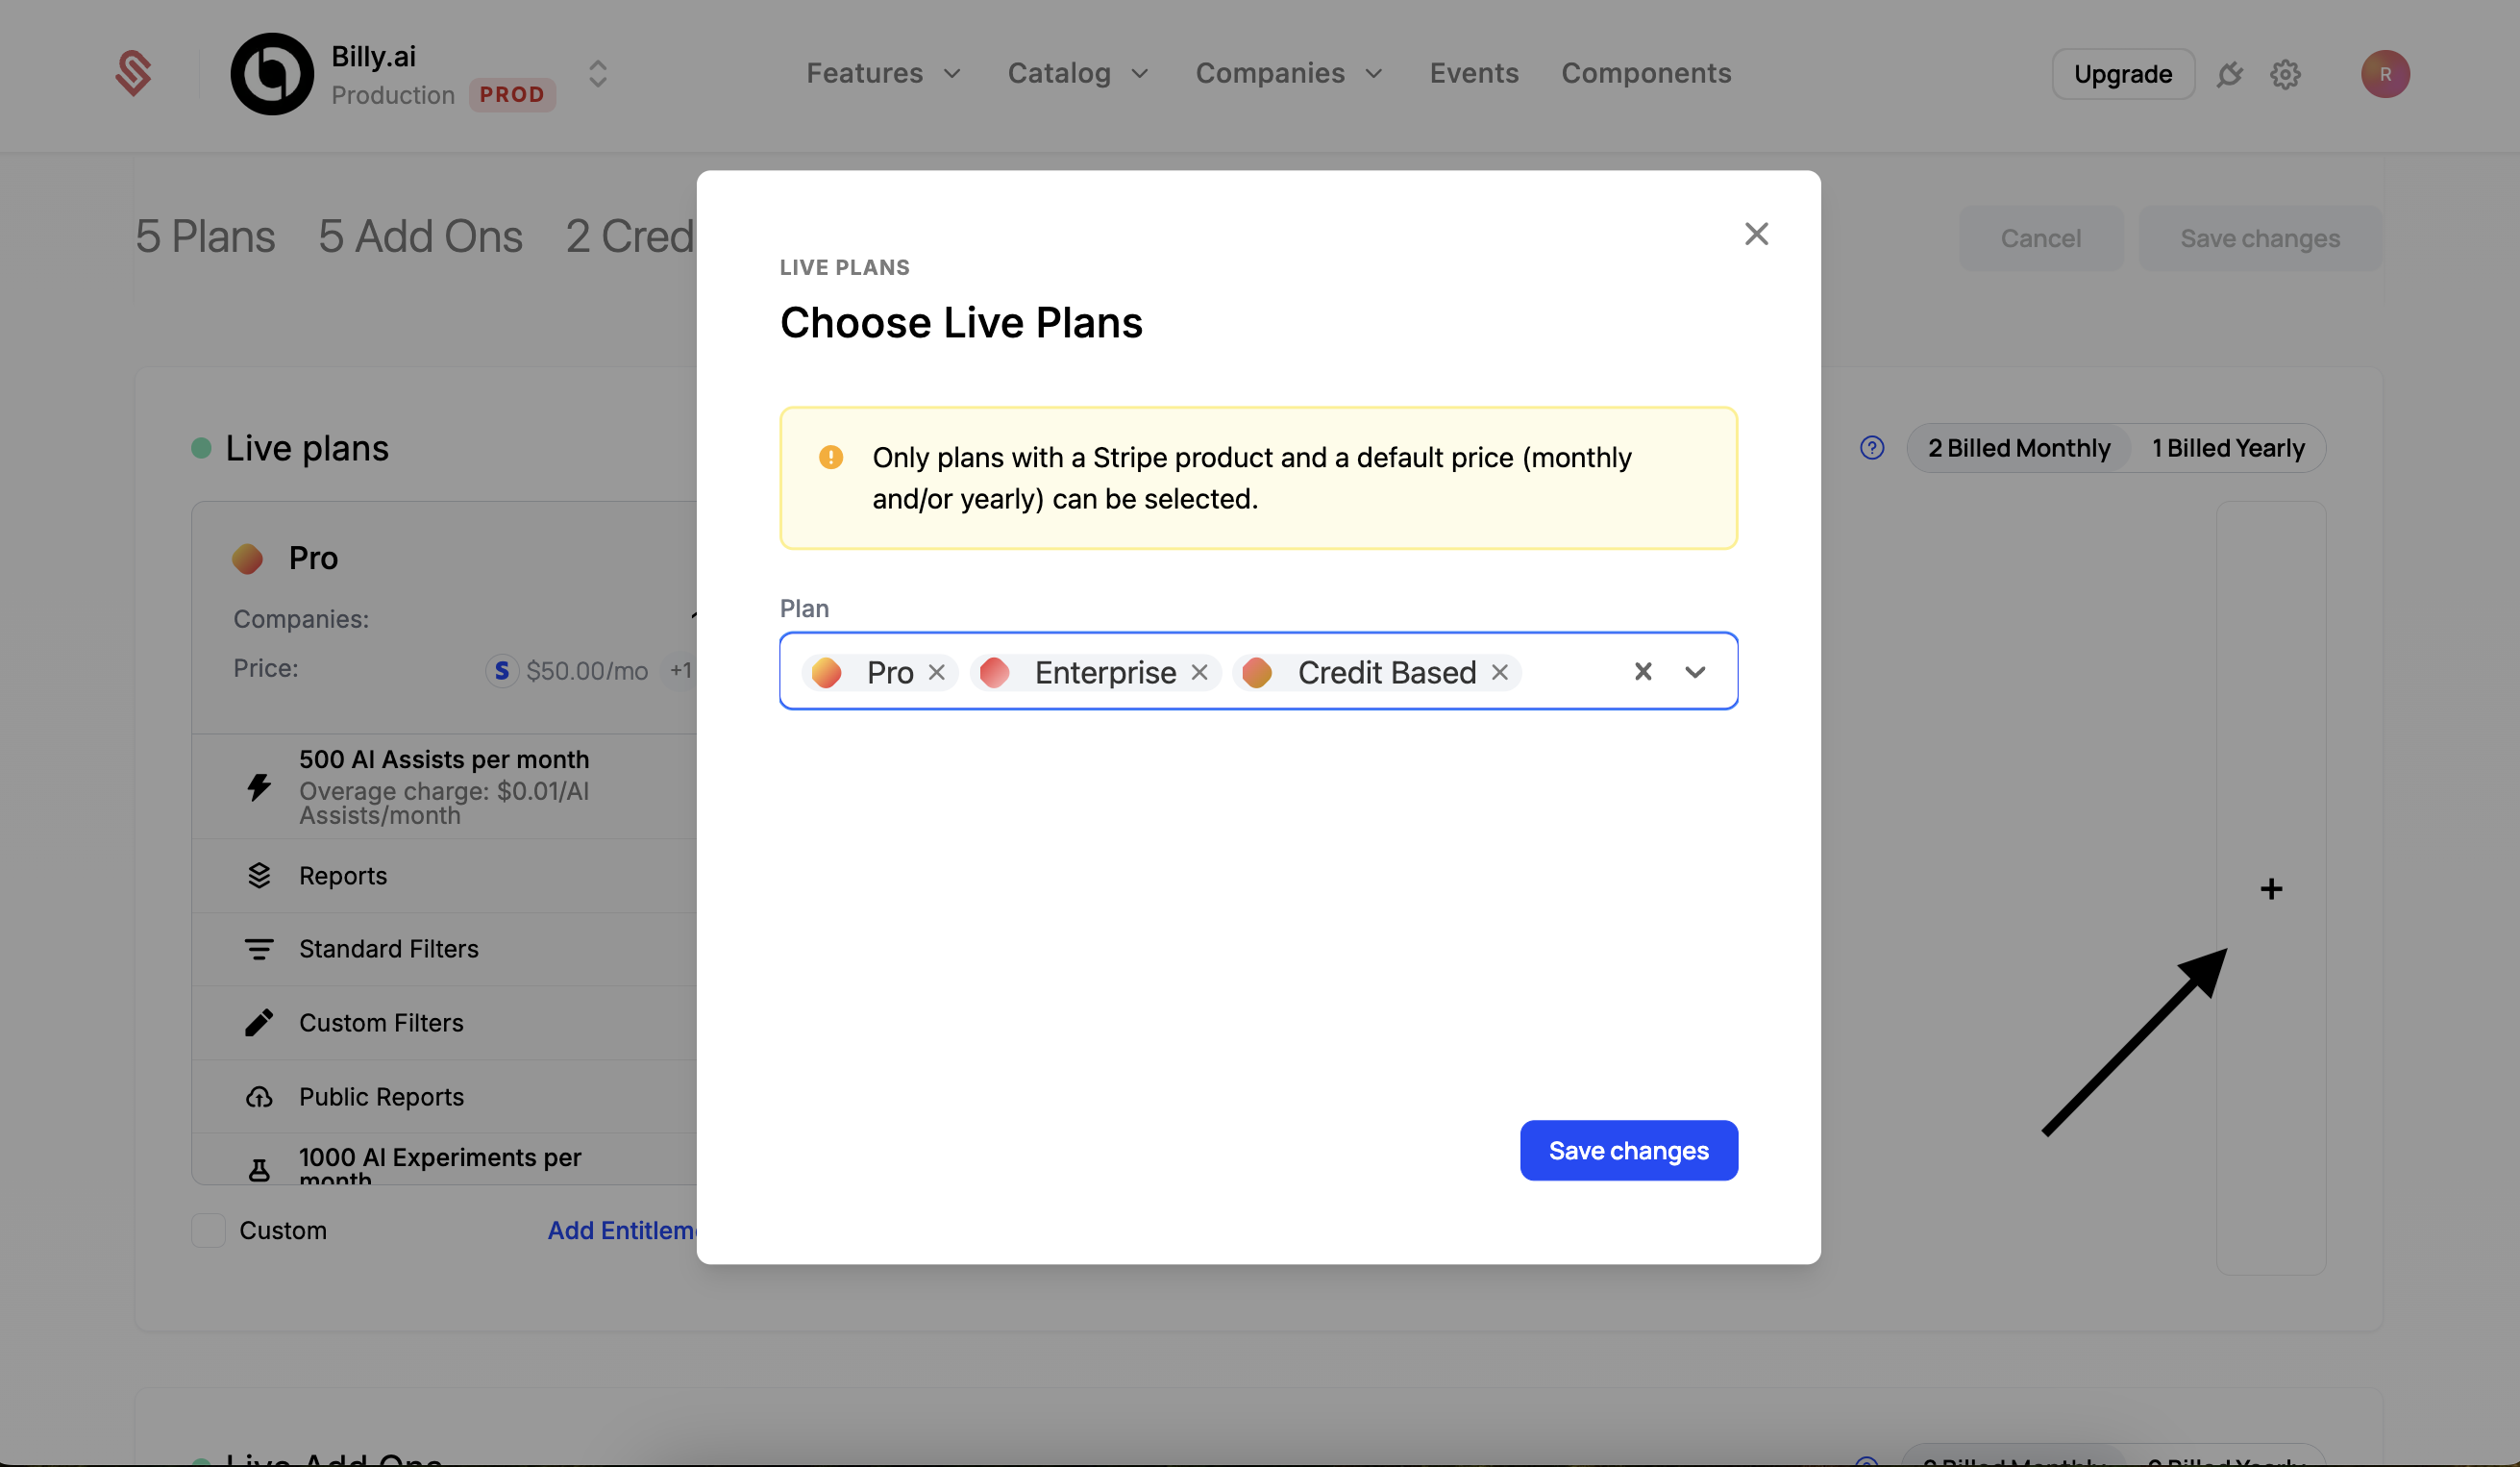
6. Add this plan and credit bundles to the Catalog so Customers can use it.
Now that we’ve finished setting up our plan and credit bundles, we’ll add them to our Catalog so Customers can use them.
- Navigate to the “Catalog” tab, and select “Configuration”.
- Click the ”+” button on the far right side of the “Live Plans” section.
- Add the plan you just created to the list.
- Click “Save” to add the plan to the Catalog.
- Scroll down to the “Credit Bundles” section and click the ”+” button to add the credit bundles you just created.
- IMPORTANT: You’ll need to save your changes by clicking the “Save Changes” button in the top right of the screen.
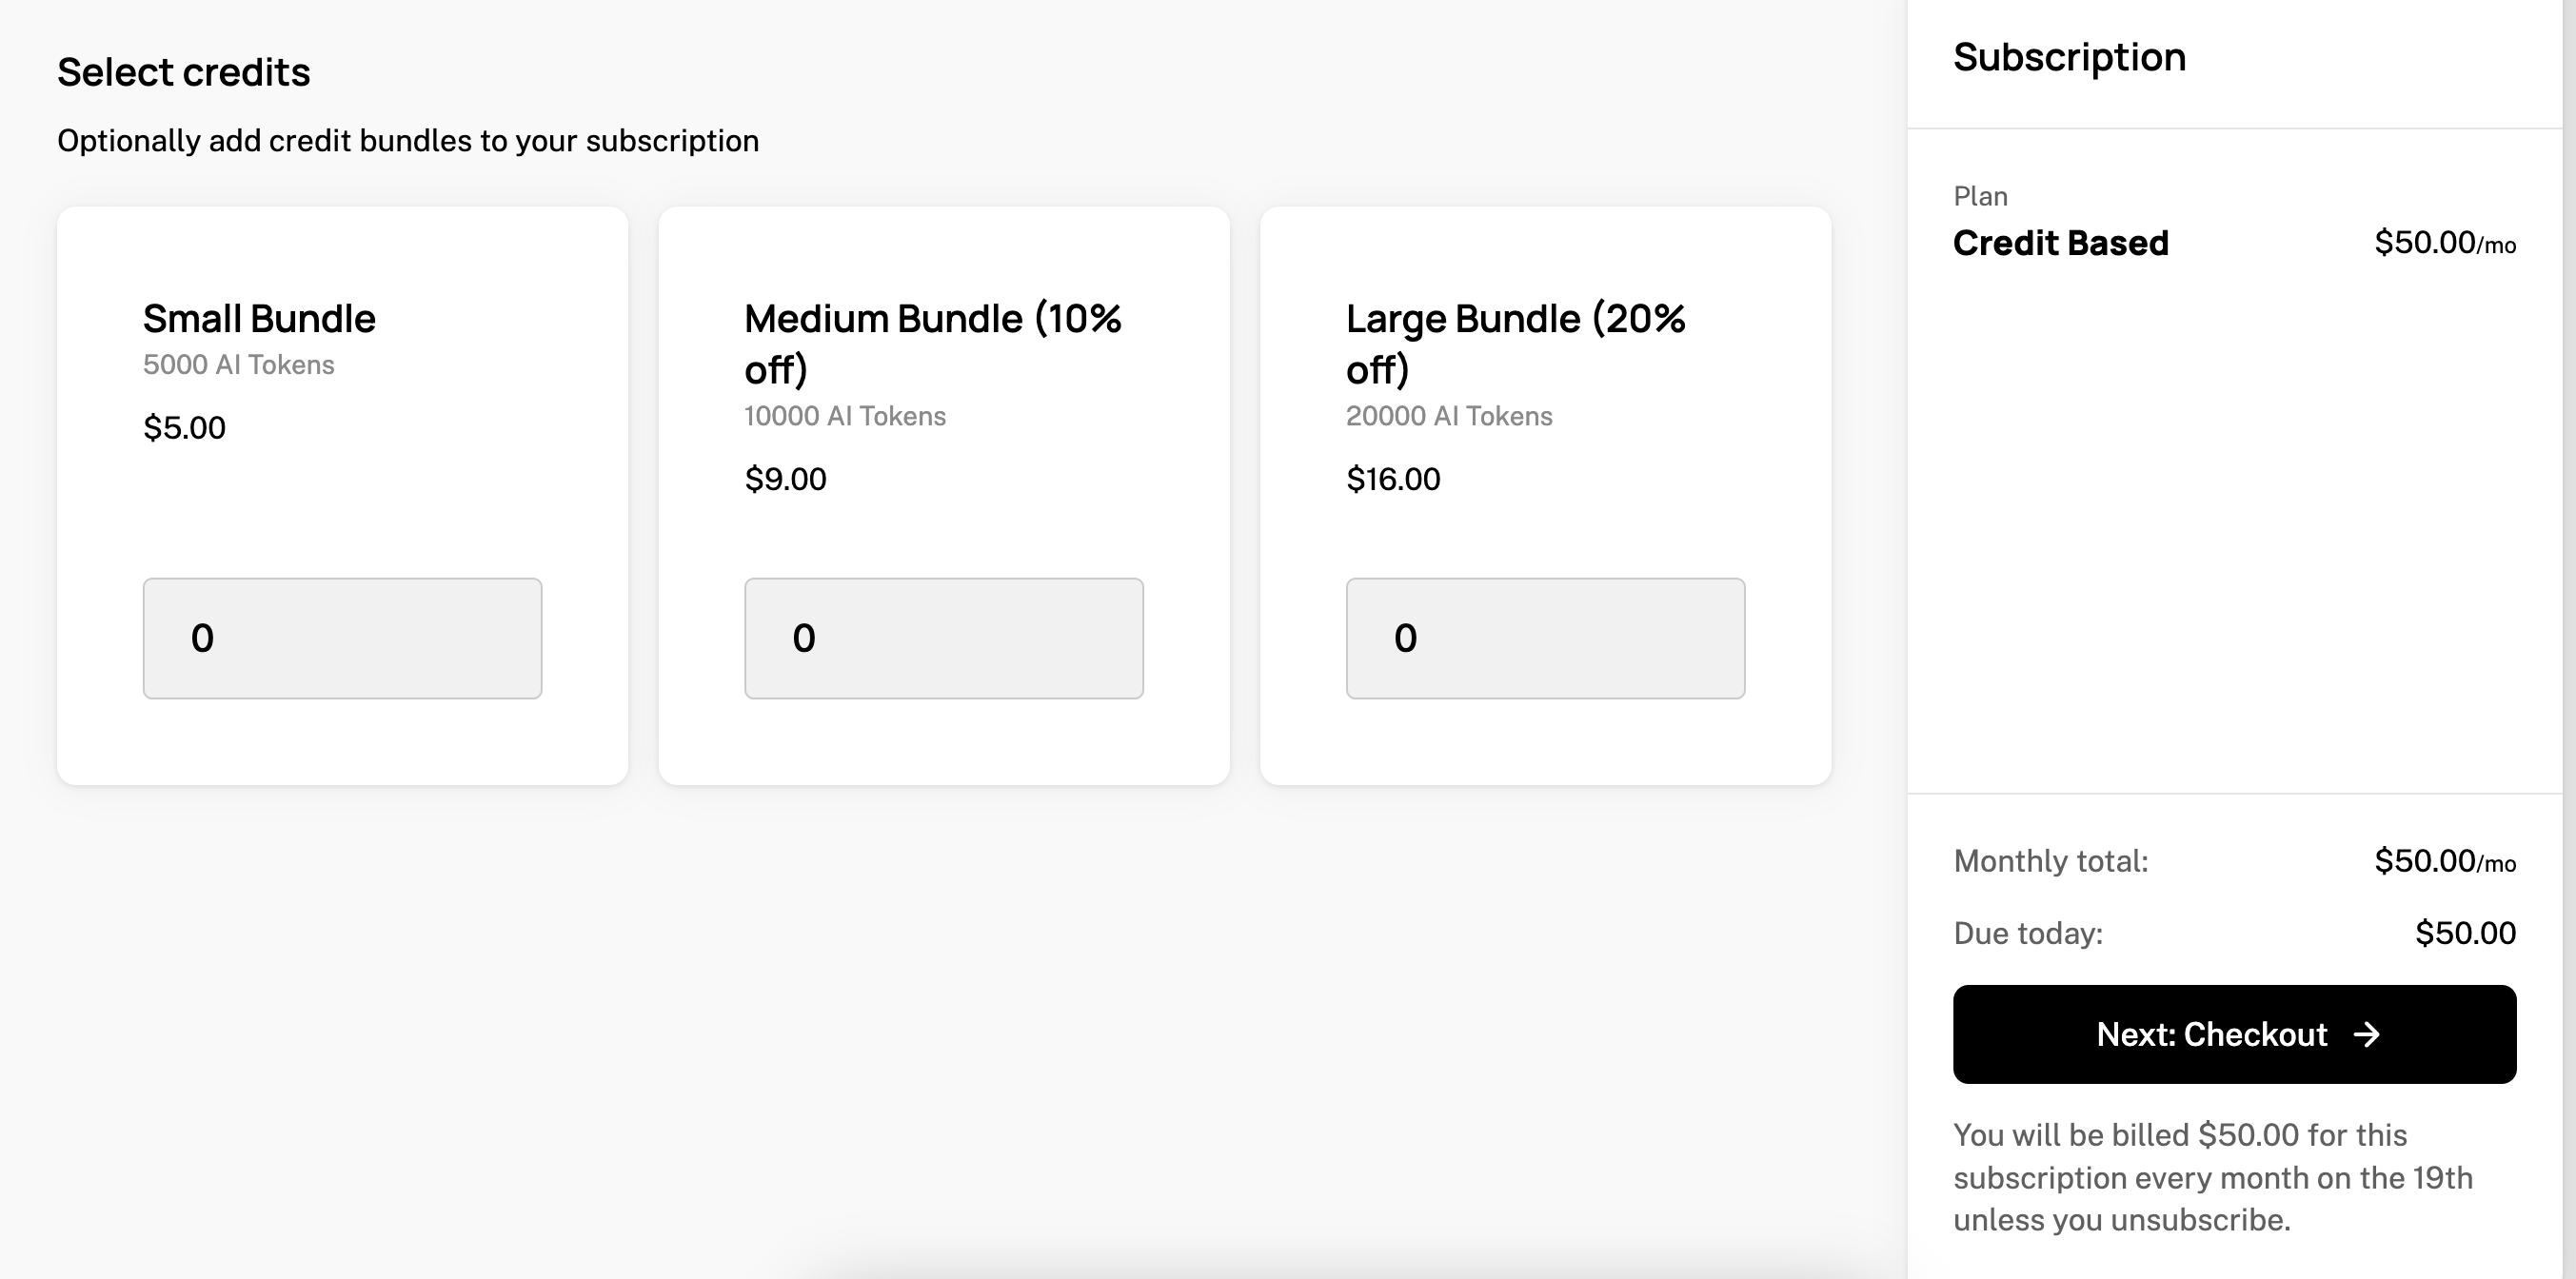
When you’re finished, you can see the credit bundles in your checkout flow:
Credit Refunds via Negative Quantities
When a track event with a negative quantity is submitted for a feature that uses credit burndown billing, Schematic reverses the credit consumption — credits are returned to the company’s balance. This is useful for refunding usage when, for example, a request failed, was retried, or needs to be corrected.
How it works
- A negative quantity event is submitted using a secret API key (publishable keys cannot submit negative quantities).
- Schematic multiplies the negative quantity by the feature’s credit consumption rate to determine the number of credits to refund.
- The refunded credits are added to an adjustment grant — a special credit grant that is automatically created per company per credit type.
- When credits are consumed in the future, adjustment grant credits are always burned first, before plan grants or purchased credits.
Example
Suppose “AI Assists” costs 5 credits per use, and a company has used 10 AI Assists (50 credits consumed). If 2 of those uses need to be reversed:
This returns 10 credits (2 x 5 credits per use) to the company’s balance via an adjustment grant. The next time the company uses any credit-consuming feature, those 10 adjustment credits will be consumed first.
Key details
- Adjustment grants accumulate: Multiple refund events for the same company and credit type add credits to the same adjustment grant, rather than creating new grants each time.
- Adjustment grants are consumed first: Regardless of the configured burn strategy, adjustment grant credits are always consumed before other grant types (plan grants, purchased credits, promotional credits).
- Adjustment grants do not expire quickly: Adjustment grants are given a rolling 1-year expiration that extends with each refund, so they will not expire while actively being used.
- Negative events create negative usage records: For auditing purposes, a negative usage record is created in the credit usage ledger corresponding to each refund.
Auto Top-Up
In addition to manually purchasing credits, Schematic supports auto top-up for credit burndown plans to ensure that customers never run out of credits. Auto top-ups are configured at the plan level, and will automatically purchase the specified number of credits when the customer’s balance is below a pre-set threshold.
- Navigate to the Credit Burndown plan you want to configure auto top-up for.
- Click “Add credit grant” to create a new credit grant.
- Select the Credit Type and Credit Amount you want to use for the auto top-up.
- Enable “Auto Top-Up”.
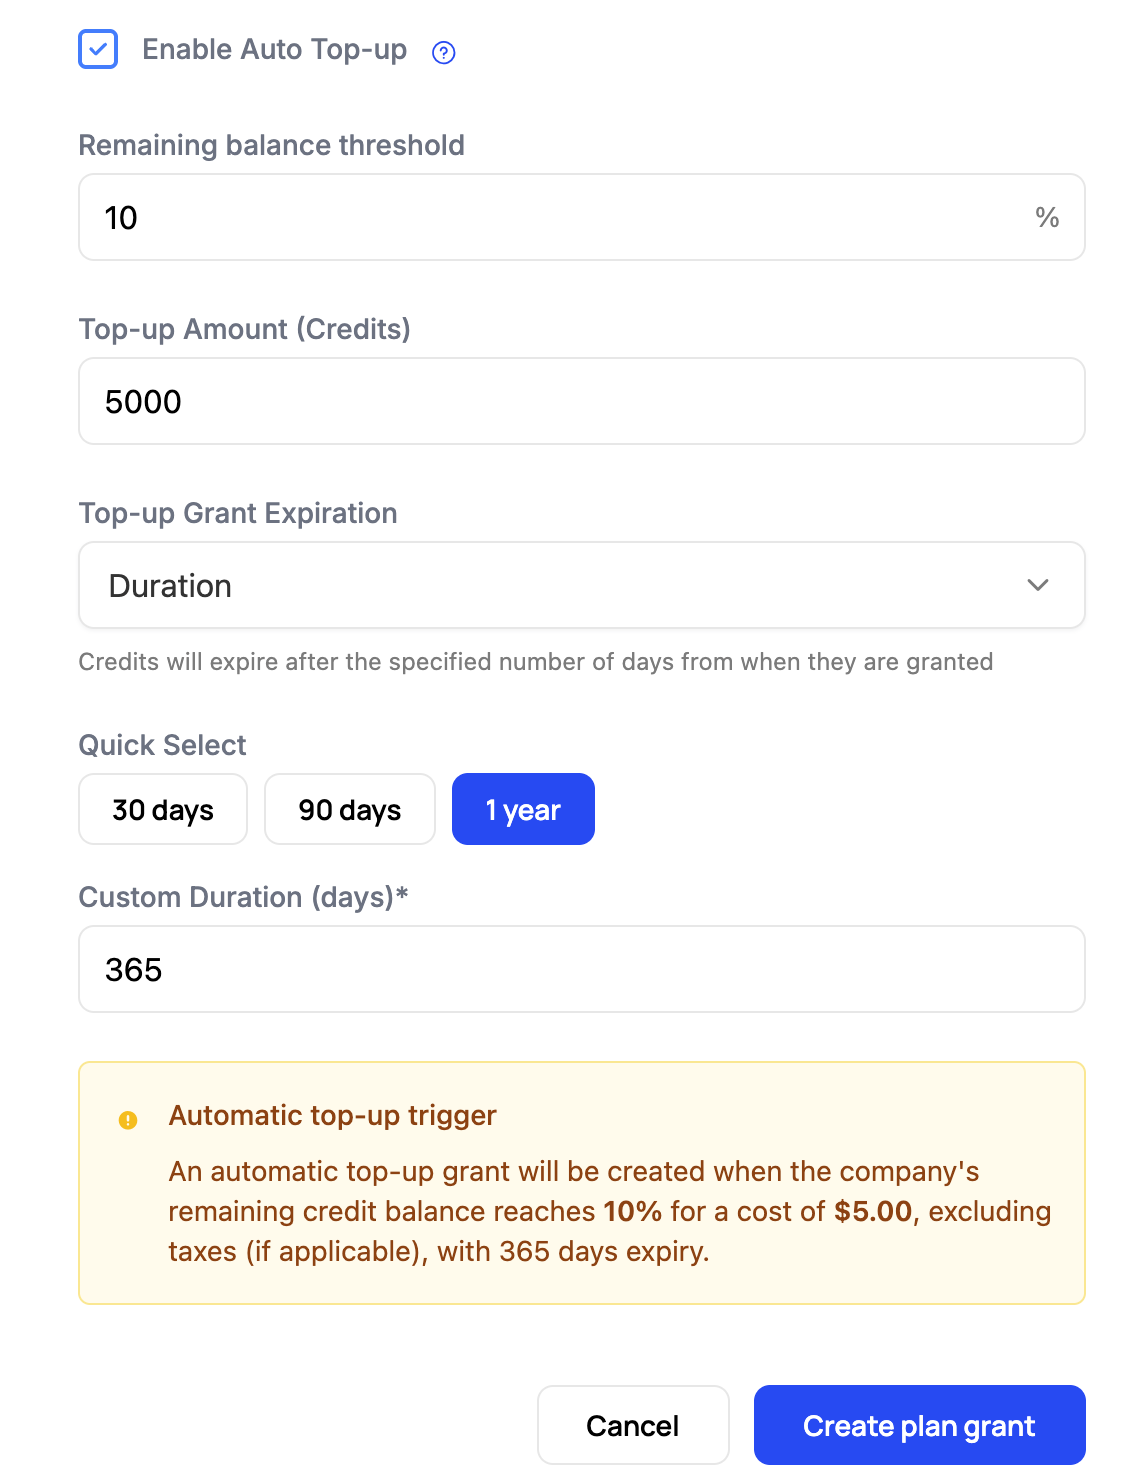
- The “Remaining balance threshold” is the percentage of remaining credits at which a top-up will be purchased. We’ve used 10% for this example. NOTE: The remaining balance includes all plan grants, purchased grants, and promotional grants.
- The Top-up amount is the number of credits that will be purchased. The final cost will be calculated based on the cost basis of the credit type and the number of credits purchased (see Create a Credit Type). The final cost number will be displayed in the confirmation warning below.
- The “Top-up Grant Expiration” represents the expiration policy for the auto top-up grant. We recommend a 1 year duration for the auto top-up grant — this provides customers with adequate time to use the credits, but also simplifies revenue recognition.
- Finally, we provide a confirmation warning with the final cost, threshold, and expiration policy.
- Click “Create plan grant” to save your changes.
Triggering an Auto Top-Up
Auto top-ups are triggered when processing an event that draws from a credit balance and the customer’s balance is at or below the remaining balance threshold. Schematic ensures that if multiple events trigger in a short period of time, only one auto top-up will be purchased.
In the event that an auto top-up purchase fails, Schematic will try to purchase an auto top-up grant the next time the balance is drawn from.
Accessing Credit Information via API
When working with credit burndown models, you can retrieve credit balance and usage information through several API endpoints, the most commonly used ones are listed below.
List Company Credit Grants
To see all credit grants associated with a specific company, use the List Company Credit Grants endpoint. This endpoint returns detailed information about each credit grant, including grant type (plan, purchased, promotional), quantity, remaining balance, and expiration dates, helping you understand the composition of a customer’s credit balance.
Grant Billing Credits to Company
To manually grant credits to a company (for promotional credits, refunds, or other administrative purposes), use the Grant Billing Credits to Company endpoint. This allows you to add credits to a company’s balance outside of the normal plan or purchase flow.
Zero Out Grant
To zero out a specific credit grant (set its remaining balance to zero), use the Zero Out Grant endpoint. This is useful for administrative purposes when you need to cancel a credit grant.
List Feature Usage
Additionally, credit usage information can be found in the List Feature Usage endpoint. This endpoint supports filtering and pagination, and when you include the include_usage_aggregation parameter, it returns a credit_usage_aggregation object with time-bucketed usage data:
usage_this_billing_period: Total credits used in the current billing periodusage_this_calendar_month: Total credits used in the current calendar monthusage_this_week: Total credits used in the current weekusage_today: Total credits used today
This aggregation data allows you to provide customers with detailed insights into their credit consumption patterns and help them understand their usage trends over time.
Conclusion
Congratulations! You’ve now implemented a credit burndown model in Schematic. Credit burndown enables you to:
- Offer flexible usage-based billing with prepaid credits
- Let customers purchase additional credit bundles as needed
- Provide volume discounts through credit bundle pricing
- Track and manage credit usage across your product features
You can use this model with both new and existing plans to give your customers more control over their usage while maintaining predictable revenue for your business.