Plans
A plan in Schematic represents the base billing and entitlement configuration for a given company. For example, if you offer Basic, Standard, and Pro packaging, these would represent mutually exclusive Plans in Schematic.
Schematic limits companies to only 1 plan at a time. For a step-by-step guide about creating a plan in Schematic, click here. To learn how to assign companies to plans, click here
There are two options that can be defined with each plan - billing and the trial period:
Billing
Defining billing in Schematic functionally maps Stripe products to Schematic plans.
If you do define billing, those that have a Stripe subscription with the mapped product will be assigned the corresponding plan in Schematic. Moreover, if a company changes plans via Schematic (either via Schematic admin options or via in-app components), the Stripe subscription will be updated accordingly.
Defining billing is optional. You can define a plan in Schematic that is not linked to Stripe billing at all. In that case, you can indepedently manage plan membership and how companies are charged.
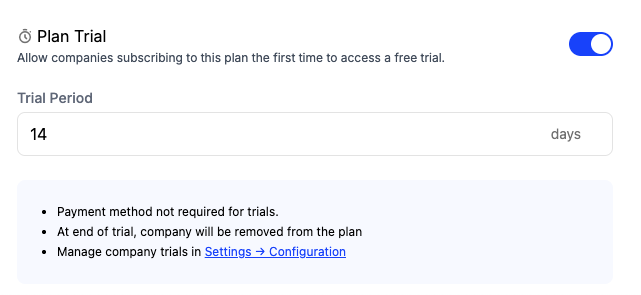
Trial
When a trial period is defined for a plan, Schematic will ensure that the company receives the corresponding entitlements for that period the first time they are assigned that plan. You can configure whether payment is required up front or not — if it is required, the company will convert into the corresponding paid plan automatically; if not, they will downgrade to your default plan.
If you want to surface plan and trial information in your app (e.g. a plan name badge, trial countdown, or post-trial conversion flow), the React and Vue SDKs provide direct access to this data. See the React SDK docs or Vue SDK docs for details.
Plan Versions
Plans in Schematic are versioned to support a range of common monetization scenarios. Plan versions make it easy to handle both larger plan iterations (e.g. annual pricing changes) and short term pricing experiments, while controlling exactly when changes take effect and how existing companies are handled.
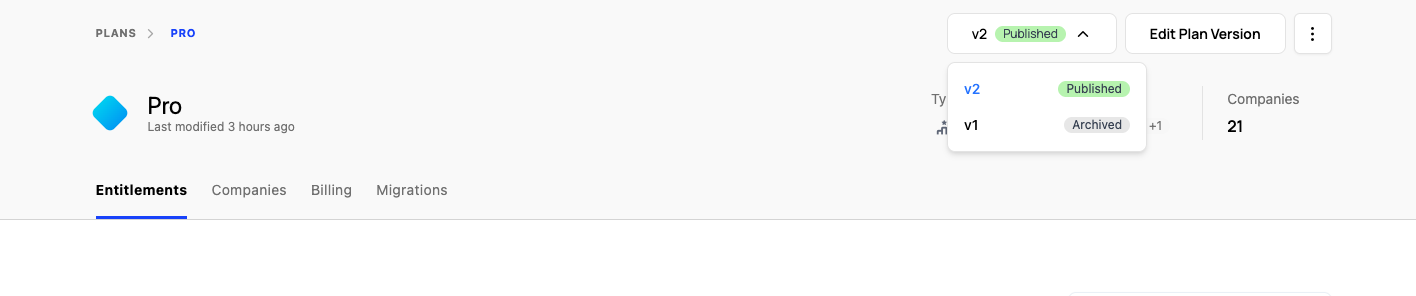
Each plan has a version selector in the top right of the plan page, and every version carries a status:
- Draft: a work-in-progress version that is not yet live. Editing a published plan creates a draft. Drafts cannot be checked out and have no companies until they are published.
- Published: the live version. New checkouts and new plan assignments use the published version.
- Archived: a previous version that is no longer the live version.
For a full walkthrough of editing a plan and rolling out a new version, see Rolling Out New Plan Versions.
Plan Version Migrations
When you publish a new version, you decide what happens to the companies on the current version. You can:
- Migrate all companies to the new version
- Choose which companies migrate, leaving the rest on their current version
- Keep all companies on their current version (grandfathering), while new checkouts use the new version
You can also migrate companies between versions at any time from the Migrations tab on the plan page, independent of publishing.
Custom Plans
For one-off, negotiated deals (often sales-led and invoiced), you can create a custom plan scoped to a single company instead of changing the plan everyone else sees. A custom plan has its own entitlements, pricing, and versions, but is only ever assigned to one company and never appears in your checkout flow.
See Custom Plans for details.
Create a plan
- Navigate to the Plans page and click “Create Plan” in the upper right corner
- Add name and a description
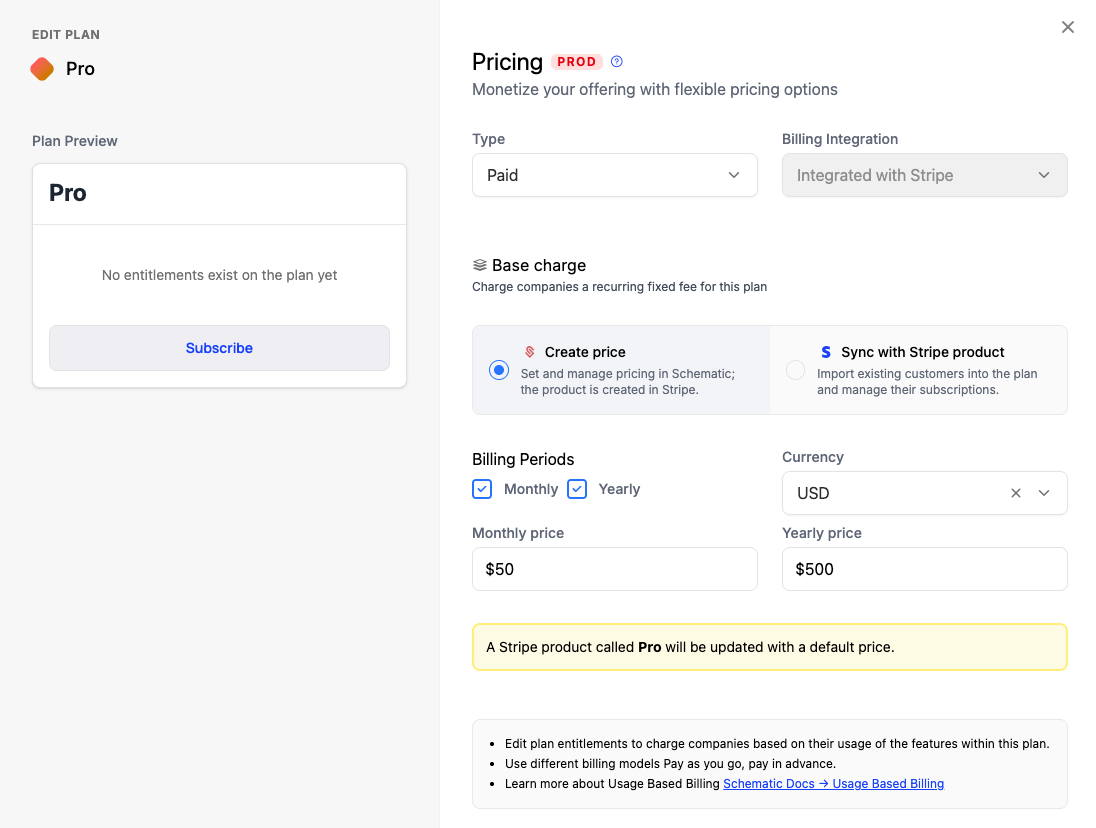
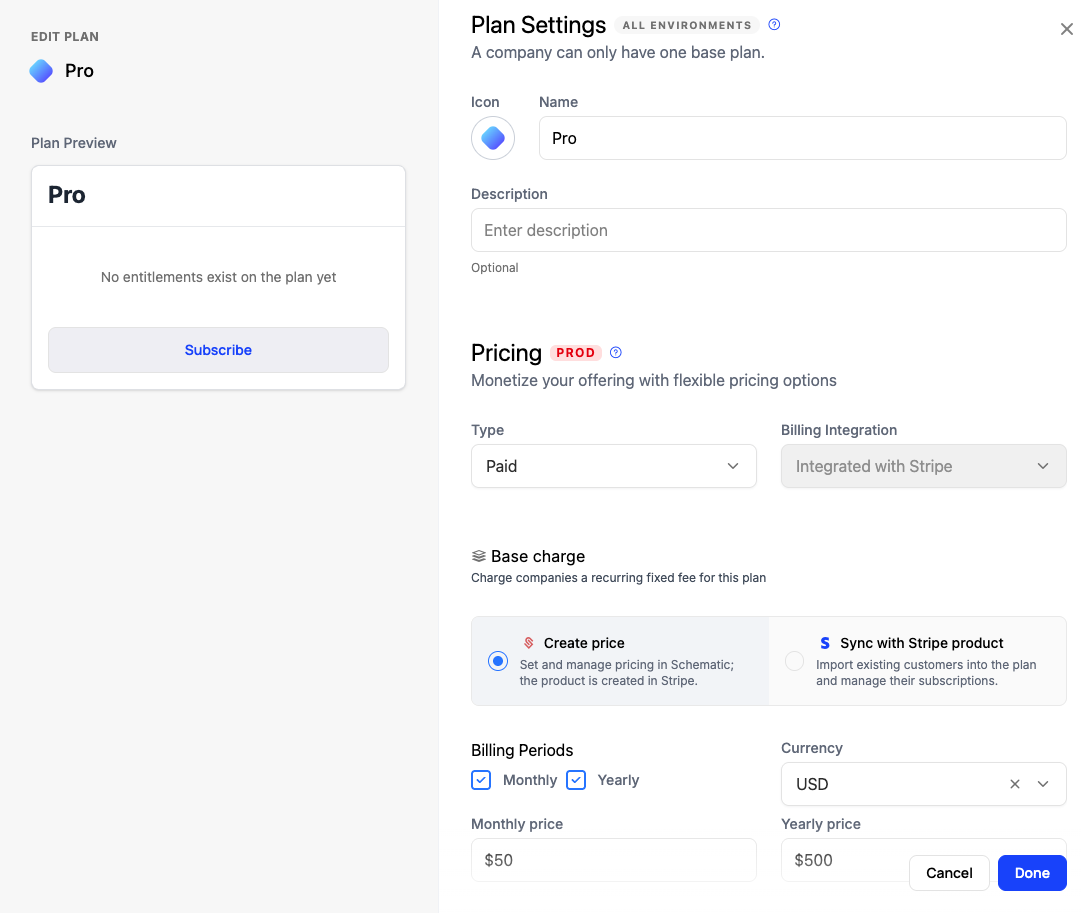
- In the Billing step, choose whether the plan is Free or Paid
- Set the billing integration to be “Integrated with Stripe”
- If integrated with Stripe, you can choose to Sync with an existing Stripe product.
- Optionally, configure trial information if you choose.
- Click “Done” in the lower righthand corner
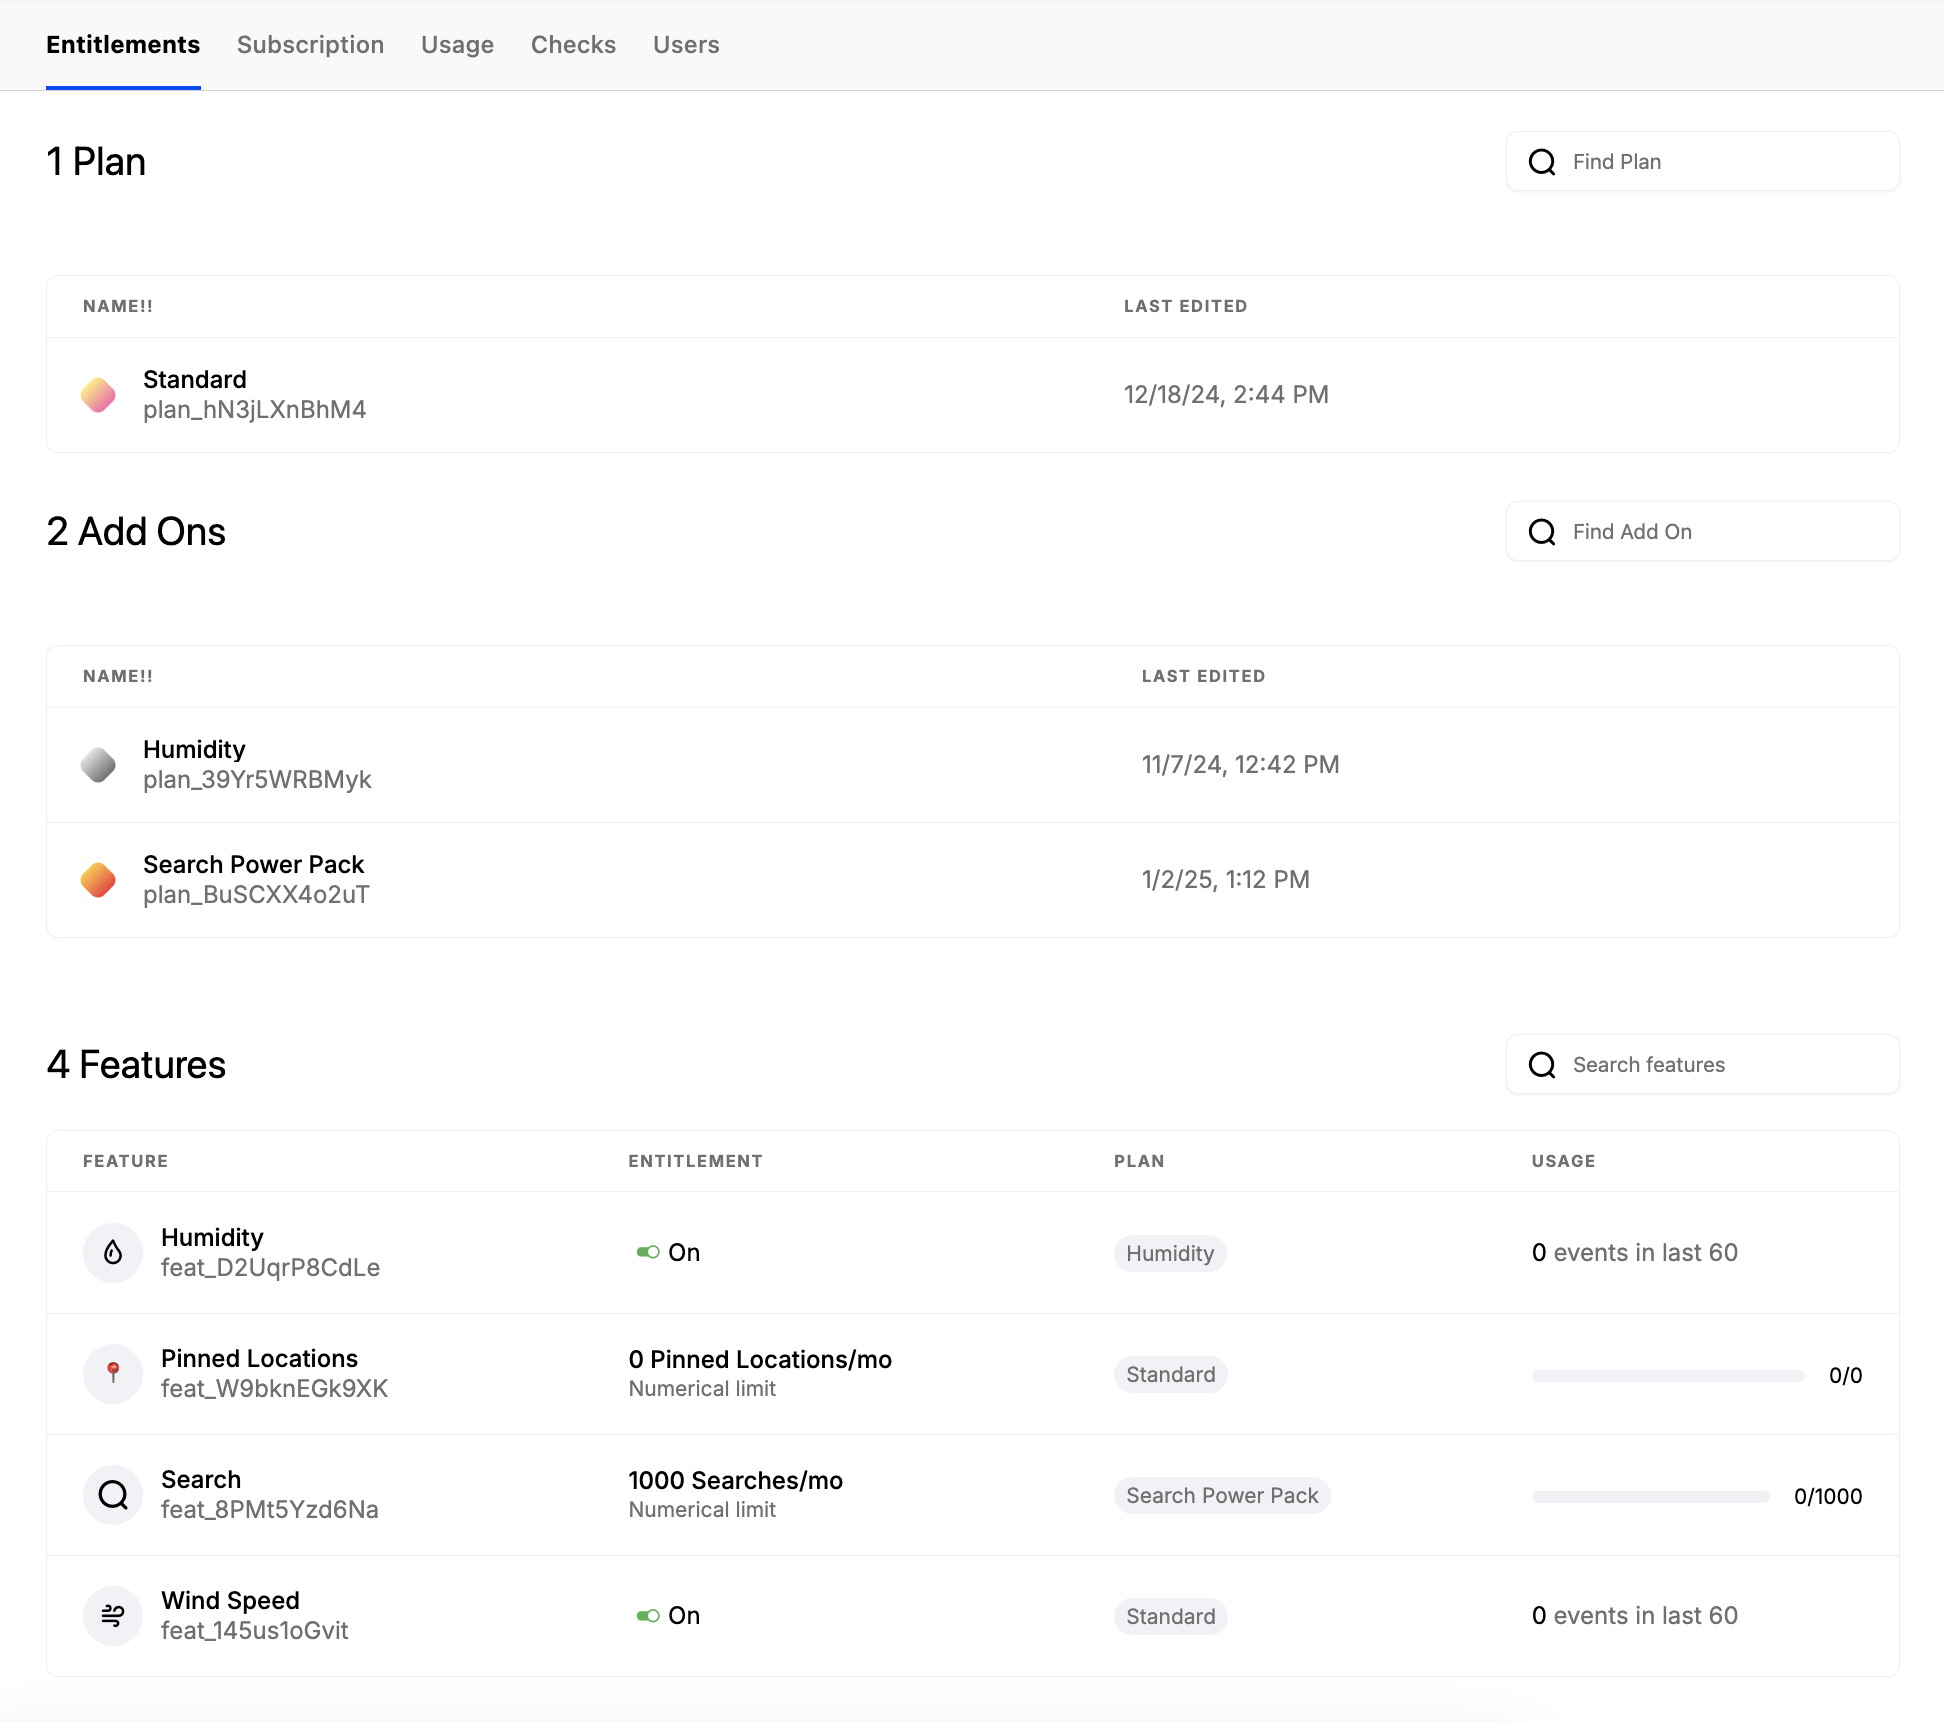
Adding Entitlements
Before we save our plan, let’s add an entitlement.
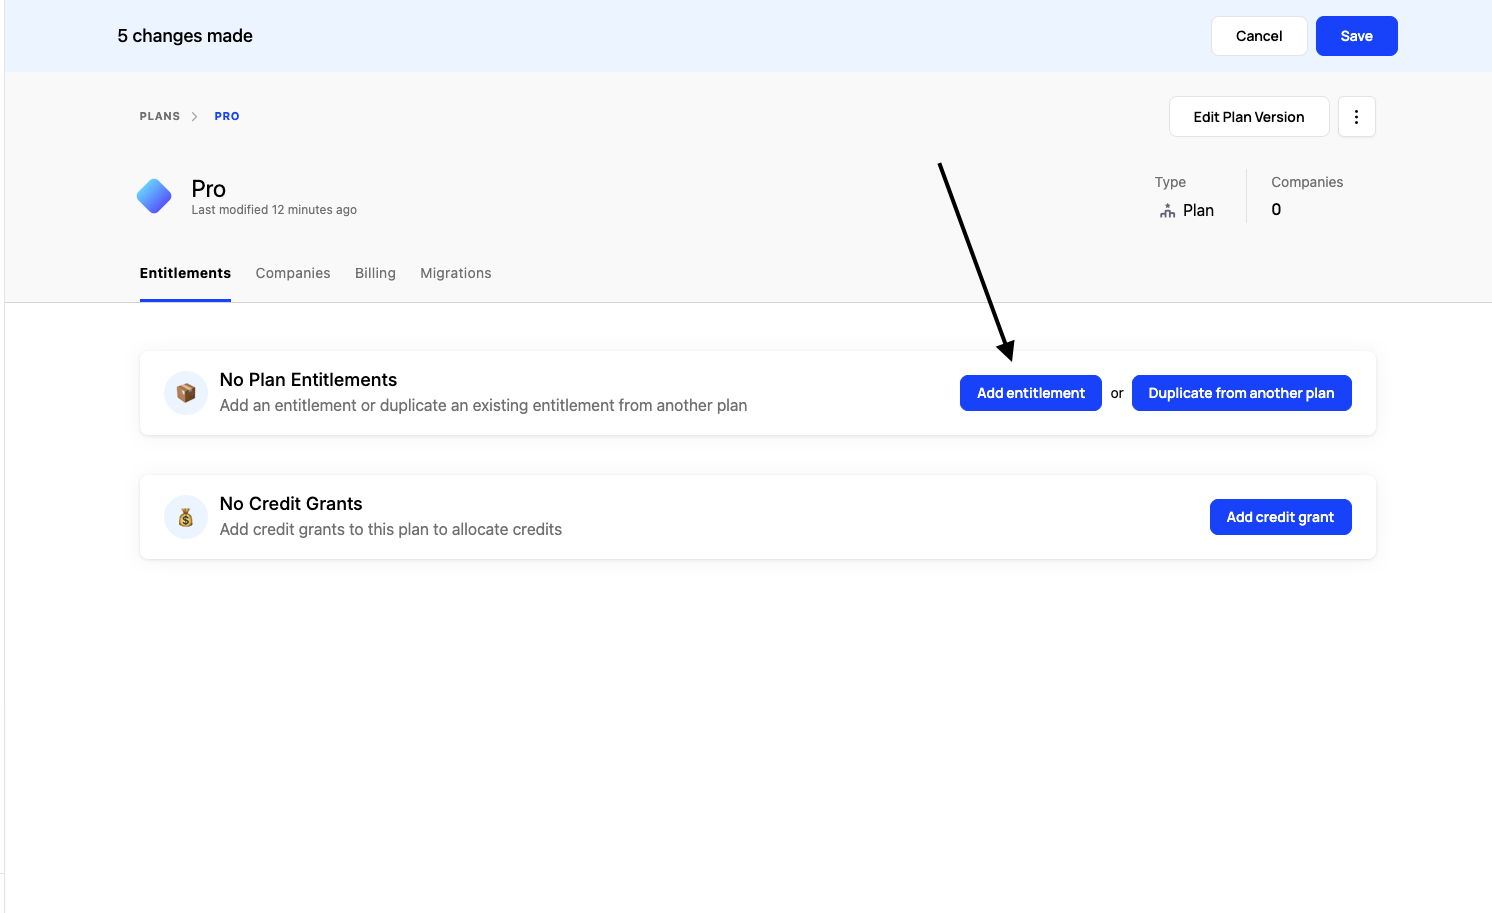
To setup, an entitlement, you’ll need to
- Select which feature you want to use
- Determine how you’ll monetize the feature.
- Configure the monetization details
- Save the Entitlement.
When you’re done adding entitlements, click “Save” in the top right to finalize the plan.
Creating a new plan version
Any edit to a published plan, whether an entitlement change or a change to the plan itself (e.g. name or price), creates a new draft version. You can keep editing the draft (via Edit Plan Version) until you are ready to publish. Nothing changes for existing companies while a version is in draft.
When the draft is ready, a banner appears at the top of the plan page (e.g. “Pro v27 is ready to publish”). Click Publish version to enter the publishing flow.
Review changes
The first step shows a side-by-side comparison of the current published version and your draft, followed by a summary of exactly which entitlements were added, removed, or changed.
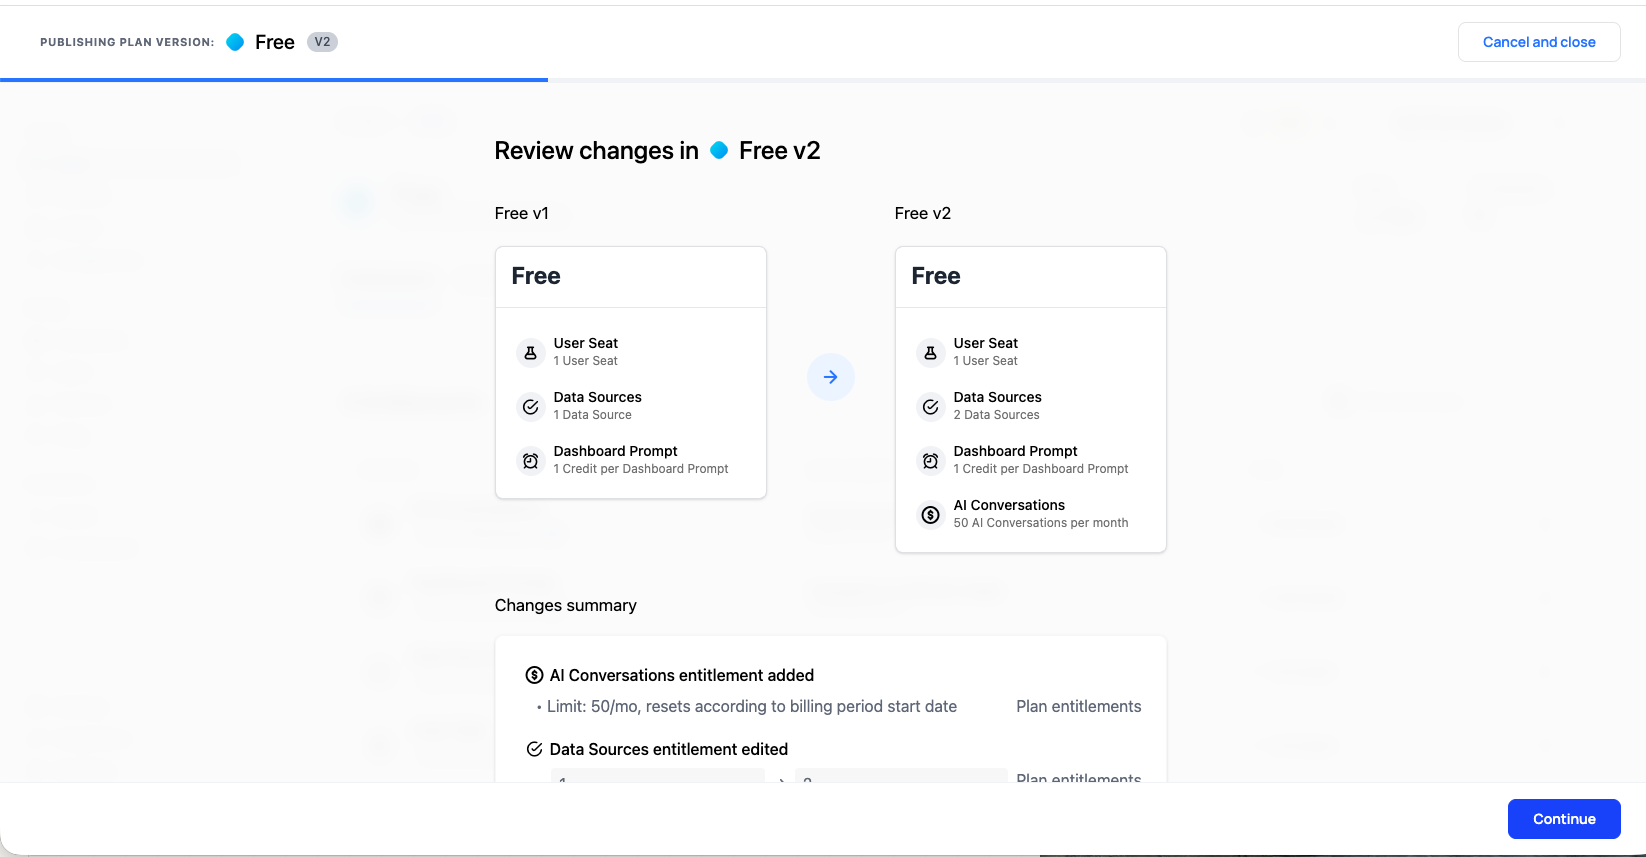
Once published, the new version becomes the Published version shown in Schematic Components for new checkouts. Customers cannot check out onto an older version, though existing companies can remain on the version they are on.
Subscriber migration
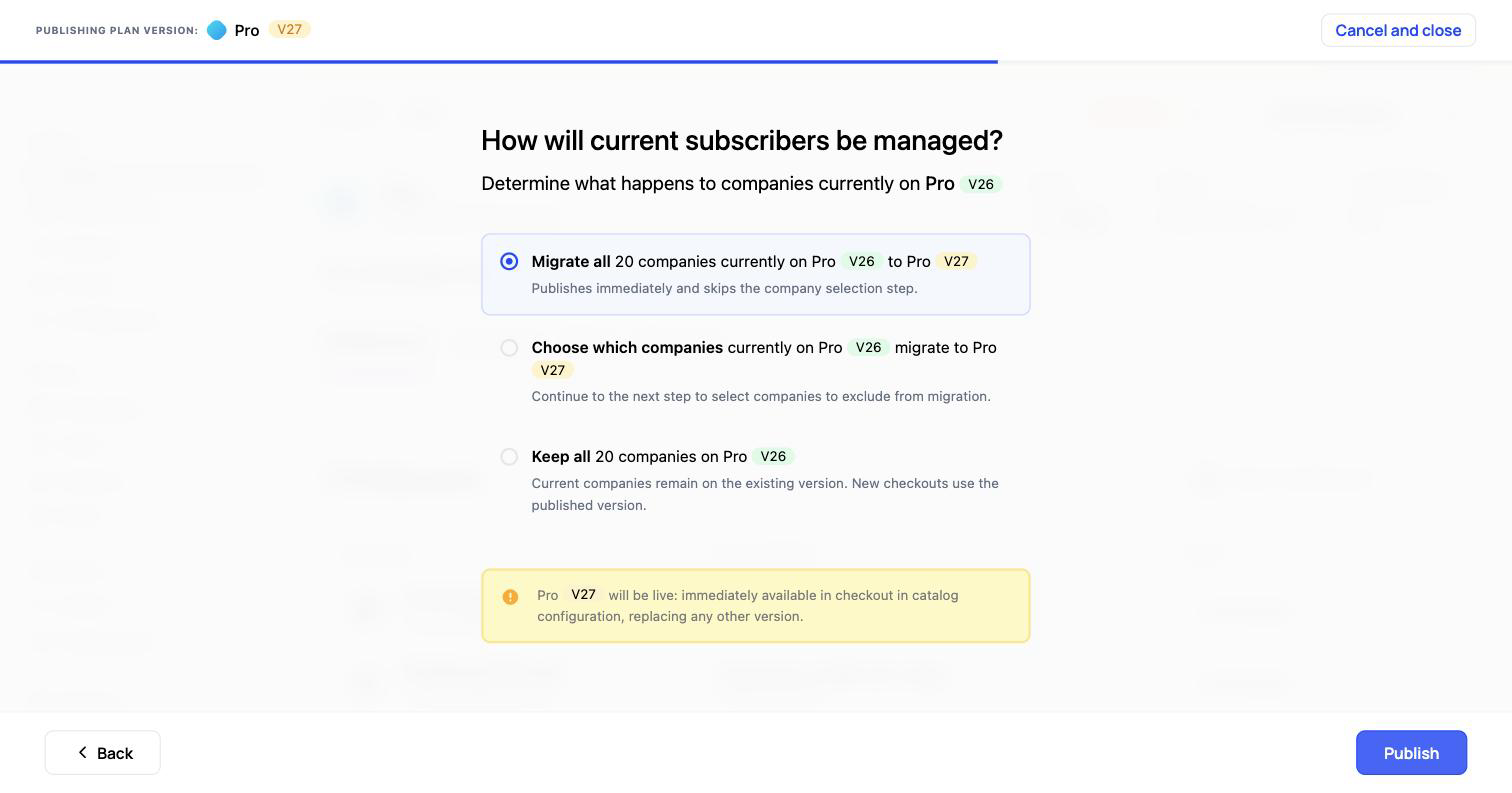
The next step, “How will current subscribers be managed?”, determines what happens to companies on the current version. You have three options:
- Migrate all companies to the new version. This publishes immediately and skips the company-selection step. Migrated companies have their entitlement limits and price updated to the new version (prorations apply for price changes).
- Choose which companies migrate. You continue to a screen where you select which companies to move; any company you leave unselected stays on its current version.
- Keep all companies on the current version. Existing companies are grandfathered onto their current version, and only new checkouts use the newly published version.
If you choose which companies to migrate, you’ll see the full list with each company’s current and new subscription. Unselected companies remain on their current version.
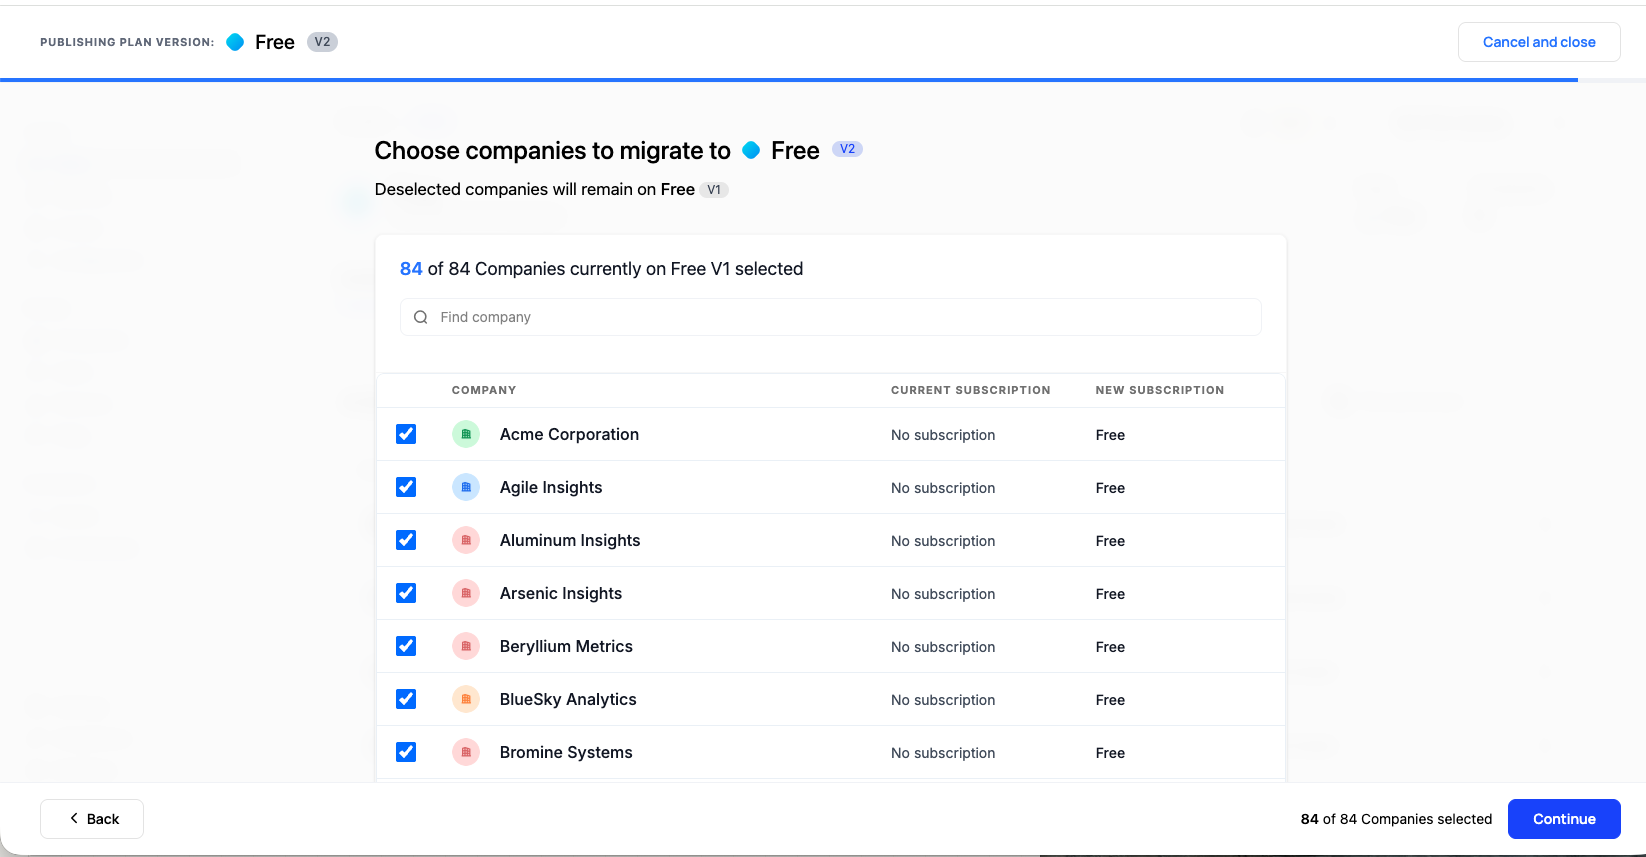
Companies that aren’t migrated keep their current entitlements and price, and can be migrated later — or not at all.
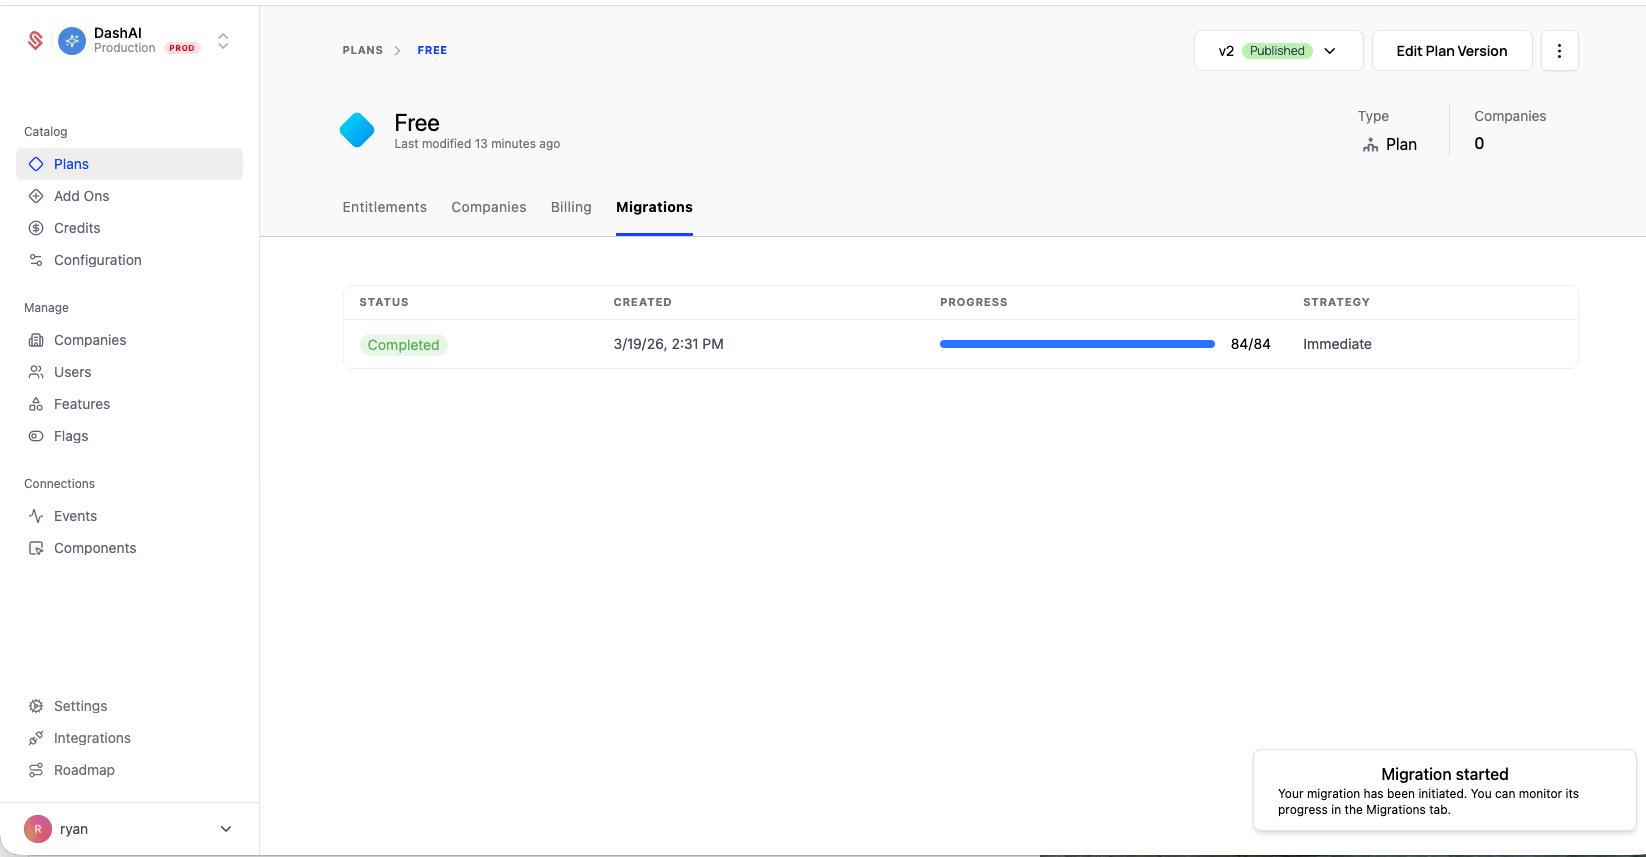
Monitoring migrations
You can track migration progress on the Migrations tab of the plan page, including the status and strategy of each run. You can also start a migration here at any time, independent of publishing, to move companies from another version onto this one.