Stripe Integration
The Schematic Stripe integration is the most common way to implement Schematic into your application. It extends Stripe’s billing platform into your application to seamlessly implement and enforce your pricing and packaging within your application. This includes:
- Enforcing entitlements and usage-based limits
- Seemless upgrades, downgrades, cancellations, and trials
- An out of the box checkout component
The integration is powered by a bi-direcitonal sync with Stripe. Through the integration, you can:
- Import and synchronize customers and subscriptions
- Map Stripe Products to Schematic Plans to automatically provision entitlements in your application
- Map Usage-based Features to Stripe Metered Products
- Use Schematic Components to power checkout, subscription management (e.g. invoices, payment method), and upgrade/downgrade/cancellation that will sync directly to Stripe to update subscriptions
When are Stripe customers created?
Schematic creates a Stripe customer record for a company only when that company is subscribed to a Stripe-enabled plan (a plan with a price configured, even $0). Companies on free plans that have no Stripe price will exist in Schematic but will not have a corresponding record in Stripe.
This means companies do not need to exist in Stripe in order to check out — they just need to have a company record in Schematic. When they complete checkout for the first time, Schematic automatically provisions a Stripe customer and subscription for them.
If you want all companies to be synced to Stripe from the moment they are created, you can configure the Initial Plan to use a plan with a $0 price.
Setting up Product Catalog and features
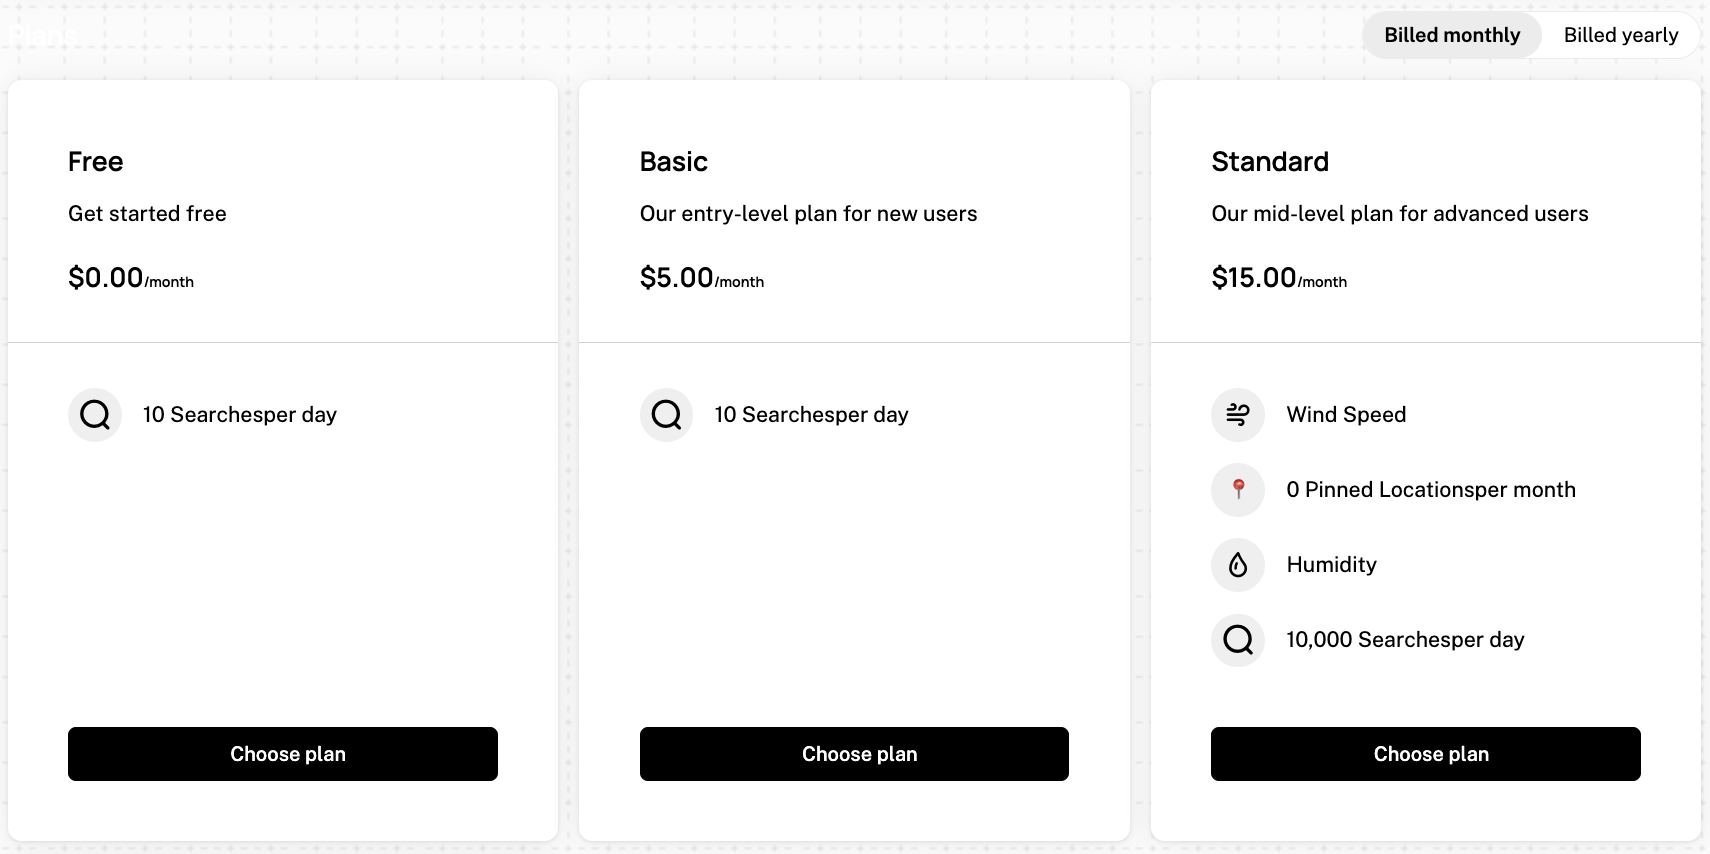
Plans
Plans are the core element of a product catalog. Schematic plans can be mapped to Stripe products and prices. When configuring a plan, you can choose to map to an existing Stripe product and price or create a new one. Schematic supports configuring both monthly and yearly prices for plans.
Because plans are versioned, the underlying Stripe product is shared across a plan’s versions, while each plan version has its own Stripe prices. Publishing a new version with a pricing change creates new Stripe prices for that version; companies on prior versions keep their existing prices until they are migrated. When a version is archived, its prices are deactivated in Stripe.
Mapping a plan to Stripe enables Schematic components (e.g. checkout flow) to support the plan for users. See here for more details
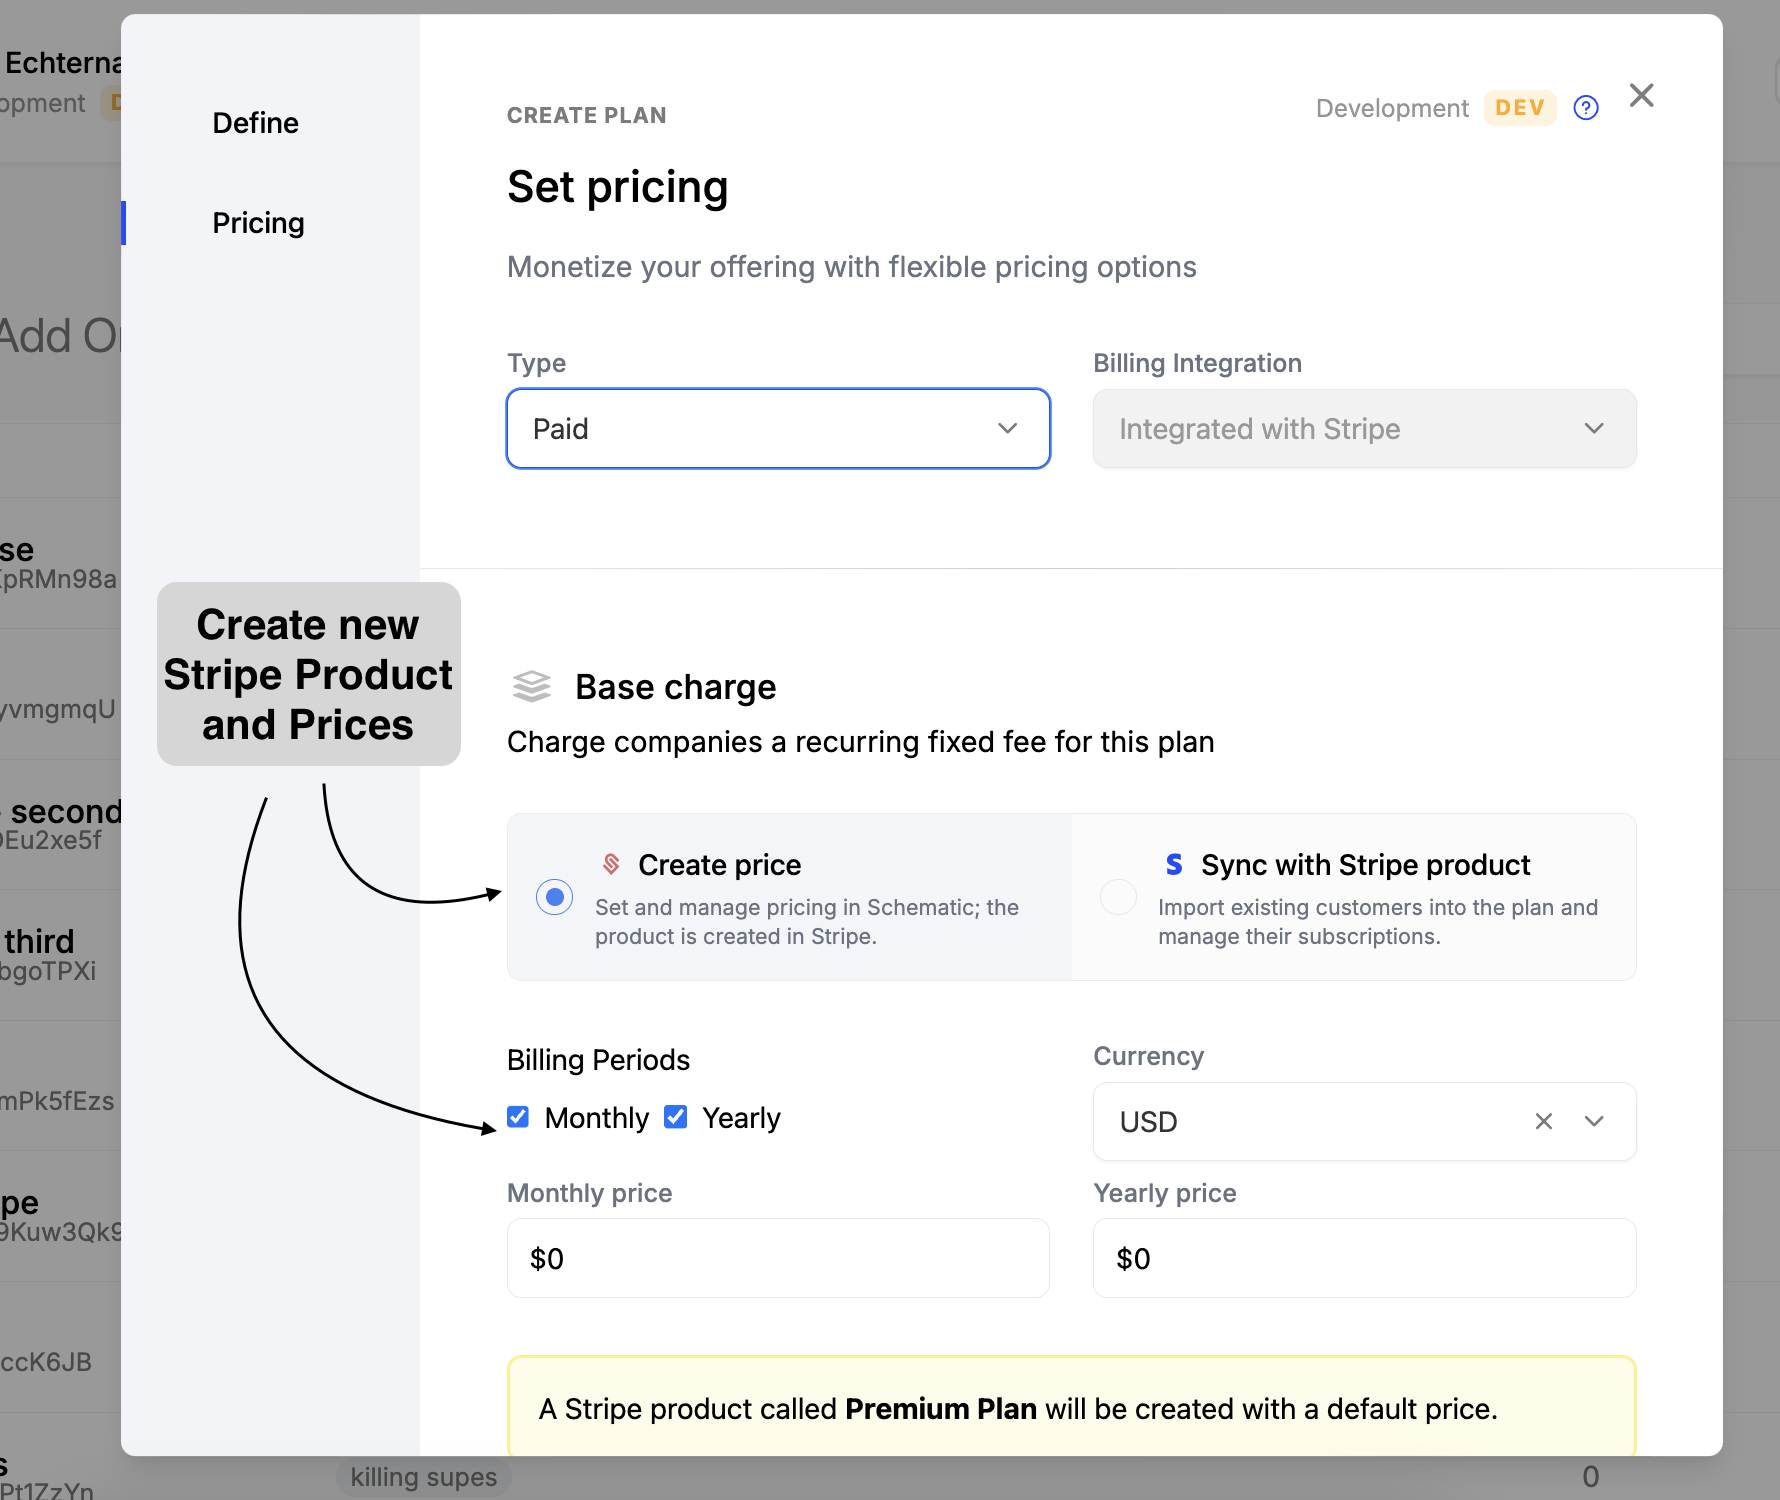
To create a new plan and a corresponding Stripe product, follow the steps below:
- Navigate to the Plans page in Schematic (Catalog > Plans)
- Click the “Create Plan” button
- Name your plan and click “Continue” to setup pricing details.
- Select “Paid” for “Type”, then supply a monthly and/or yearly price. (Screenshot below)
- Finally, click “Save”
Plan Add Ons
In addition to plans, Schematic add ons can similarly be mapped to Stripe products and prices. This is useful for offering additional features or services to your customers. Schematic supports configuring both monthly and yearly prices for add ons.
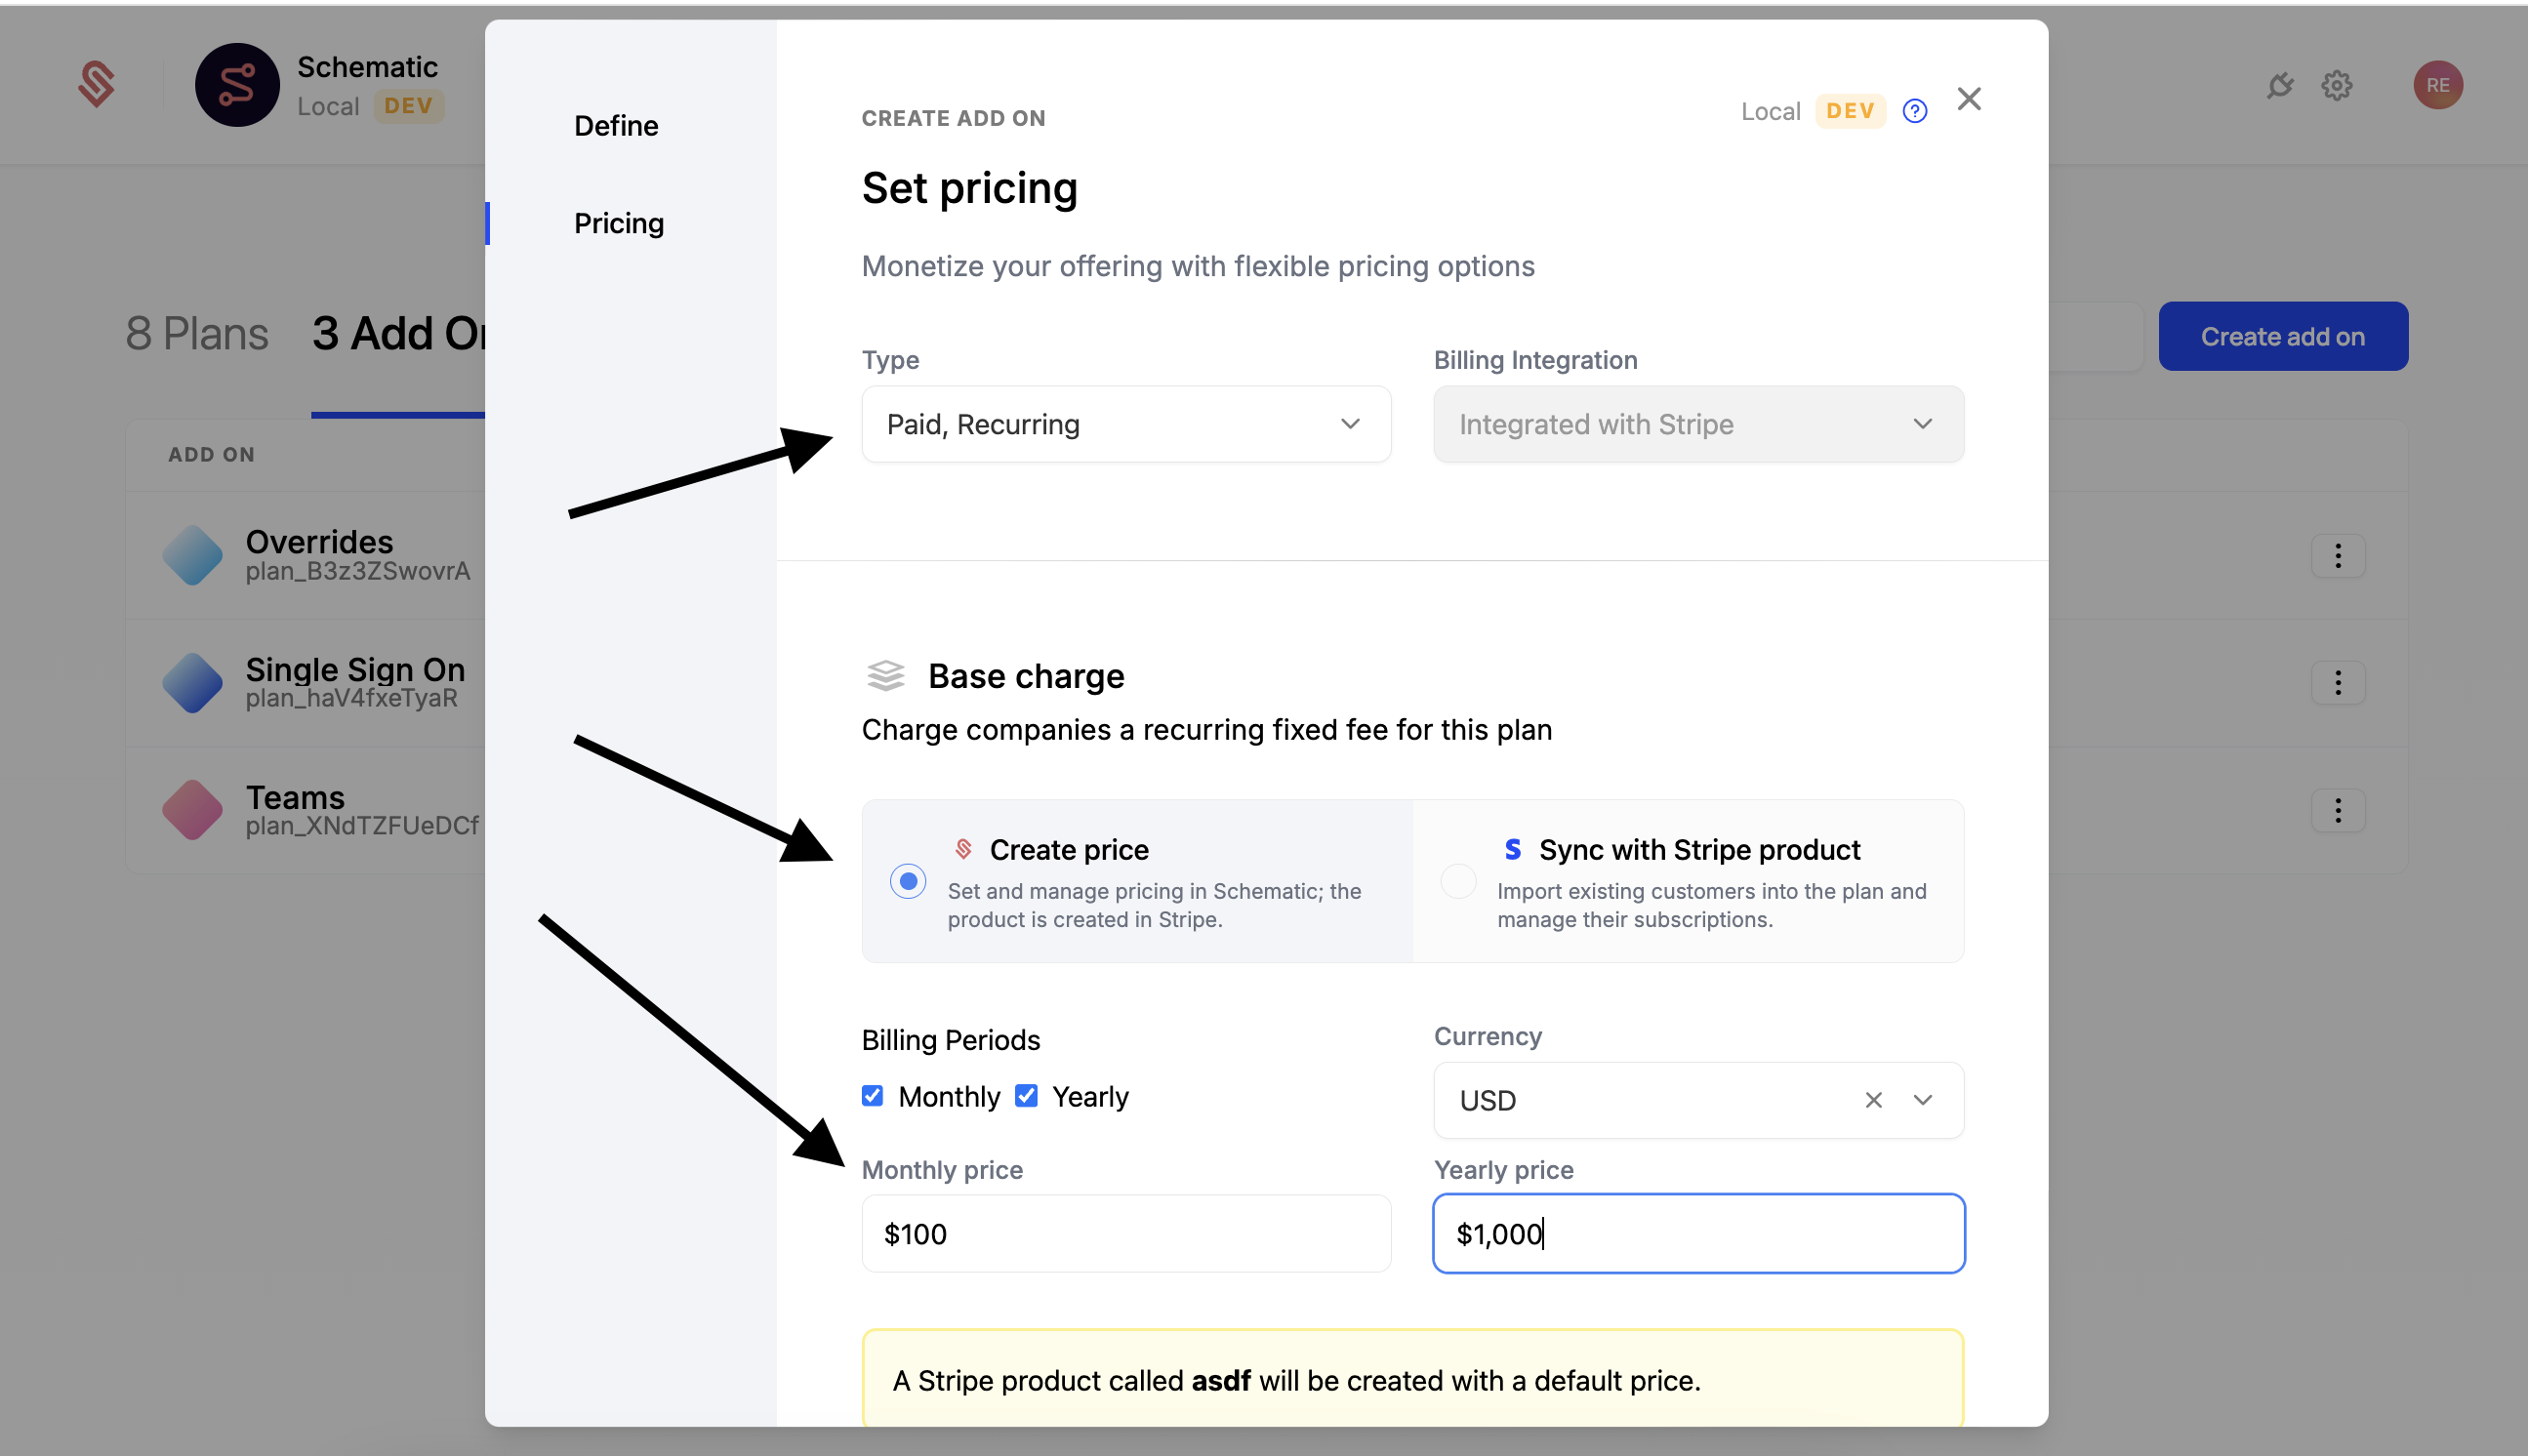
To create a new add on and a corresponding Stripe product, follow the steps below:
- Navigate to the Add Ons page in Schematic (Catalog > Add Ons)
- Click the “Create Add On” button
- Name your add on and click “Continue” to setup pricing details.
- Select “Paid, Recurring” for “Type”, then supply a monthly and/or yearly price. (Screenshot below)
- Finally, click “Save”
Usage Based Features
Usage based features are core feature in most modern SaaS applications. Schematic usage based features are mapped to Stripe metered products, either existing or new. Usage is tracked in real time, and will be reflected within Schematic web app, Stripe, and any Schematic components (e.g. customer portal).
Schematic supports negative quantity events for usage adjustments and refunds. When negative events are submitted, the reduced usage is reported to Stripe. Note that Stripe enforces that total usage for a billing period cannot go below zero. Negative quantity events require a secret API key. See Negative Quantities for more details.
To add a usage-based feature to a plan and create a new price for it, follow the steps below:
- Open the feature in Schematic (Features > Features)
- Click “Add Plan Entitlement” to begin
- Select the plan you want to add the feature to
- Set a value for the feature’s limit (25 in the example below)
- For Period, select “Monthly” and have the usage reset “According to Billing Period” (this is the most common setting). This means that the user will get 25 usages per month, and that the “month” will be measured based on the day they signed up (i.e. if they signup on March 15th, then the “month” will be March 15th to April 14th).
![]()
See the Usage Based Features page for more details on how to set up usage-based features.
Schematic Components
Schematic components are the easiest way to power your checkout flow and customer portal. These components allow your customers to easily:
- Purchase a plan or add on
- Manage their subscription
- View their invoices
- Upgrade, downgrade, or cancel their subscription
Schematic components will sync any changes to the subscription to Stripe.
See the Schematic Components page for more details on how to setup and use Schematic components.
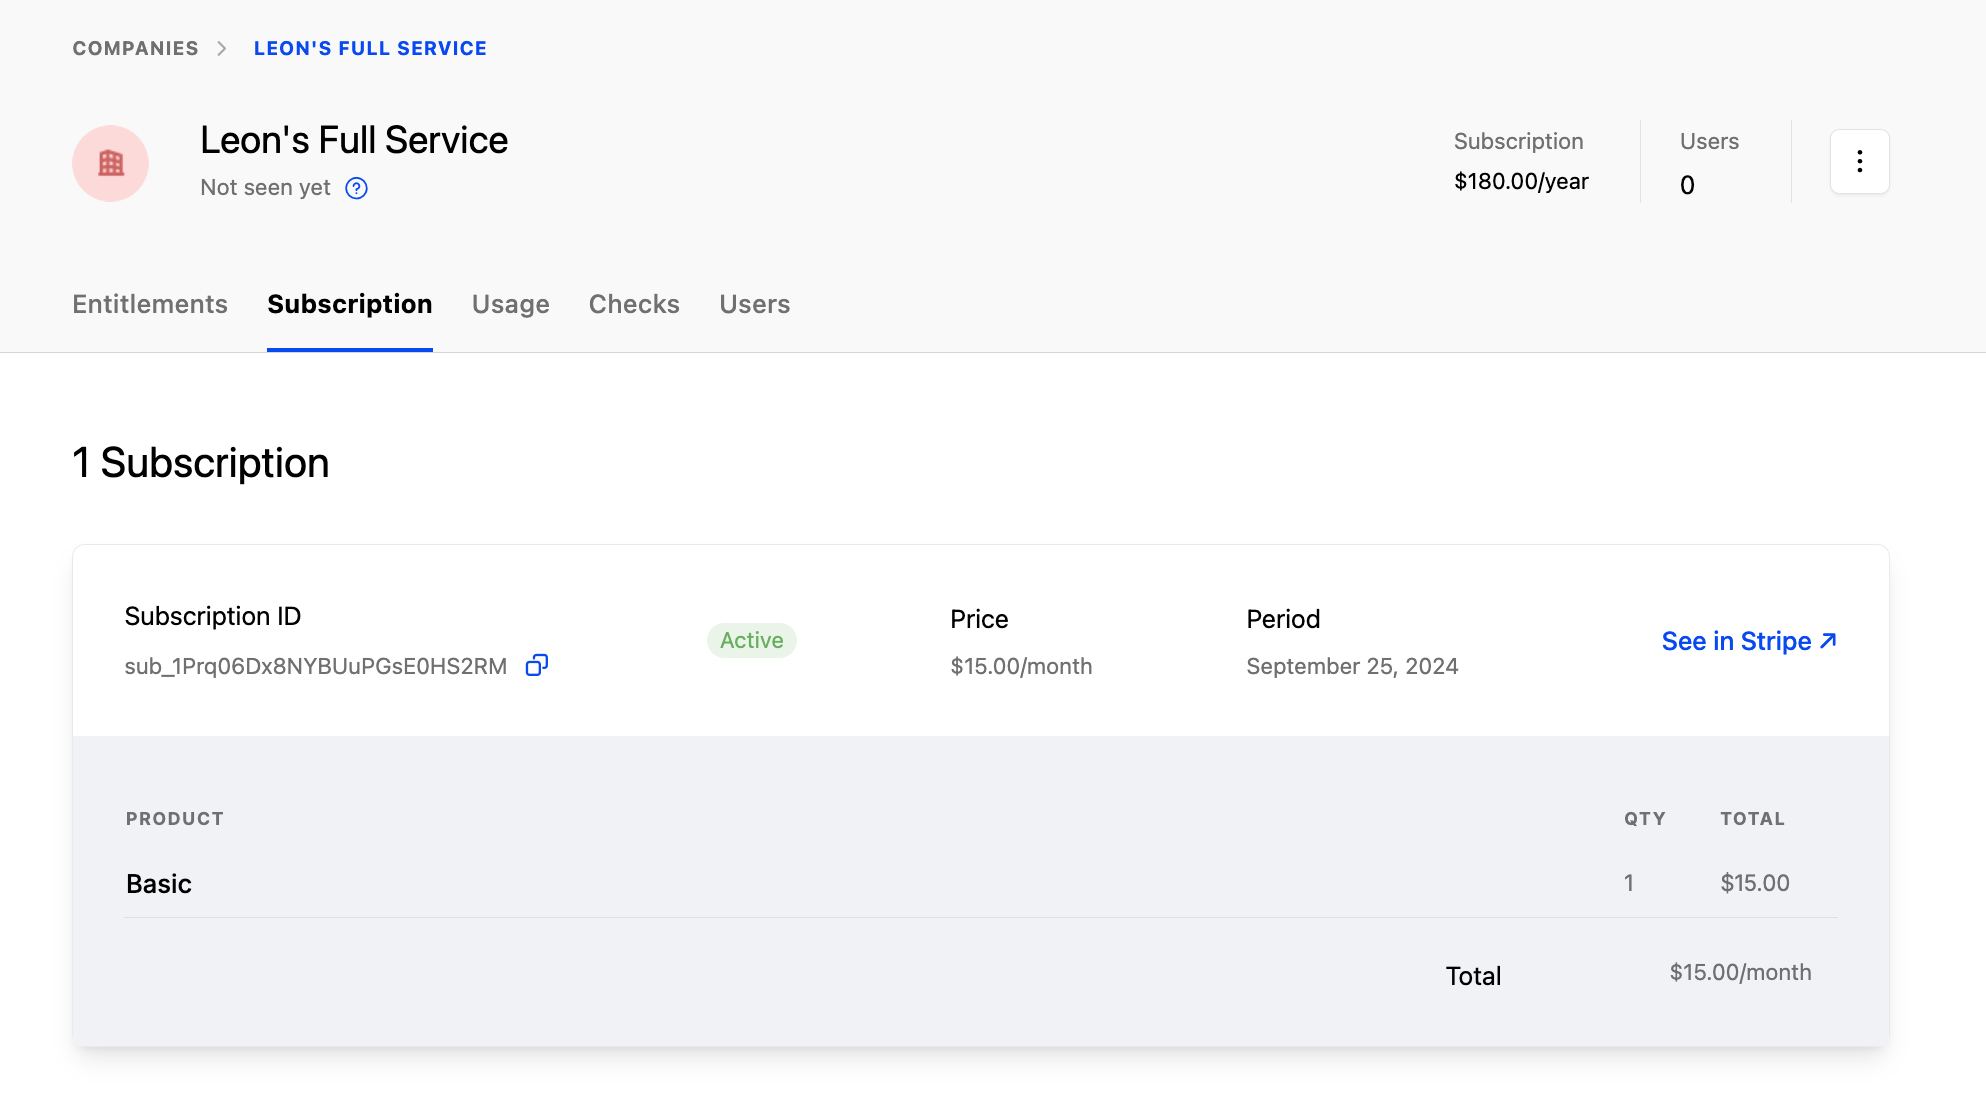
Viewing Company Data in Schematic
For companies in Schematic that have an associated Stripe subscription, you can view that data in the Subscription tab within a company profile. Data will include:
- Products & quantities
- Quantities and rates
- Discounts/coupons that are applied to the subscription
- Term
- Subscription status
- A link to the company in Stripe, if you need additional information.
Subscription Statuses
Stripe supports a number of statuses that correspond to the subscription lifecycle. Schematic treats subscriptions differently based on that status. The table below summarizes how Schematic handles a Stripe subscription based on each status.
When a company’s subscription is active in Schematic, they are granted entitlements that correspond to the products in that subscription. When a company’s subscription is inactive, entitlements are revoked.
More on Stripe subscription statuses here.
Handling Missed Stripe Payments
When a customer misses a payment, they will be marked past_due in Stripe, but Schematic will continue to treat the subscription as active (see table above). Stripe will attempt multiple retries to collect payment, and after these have failed, will mark the subscription as cancelled, at which point Schematic will cancel the subscription, revoke the entitlements, and move the company to the fallback plan (if one is configured).
This payment retry logic is configurable in Stripe and defaults to 3 retries over 3 weeks (see below).
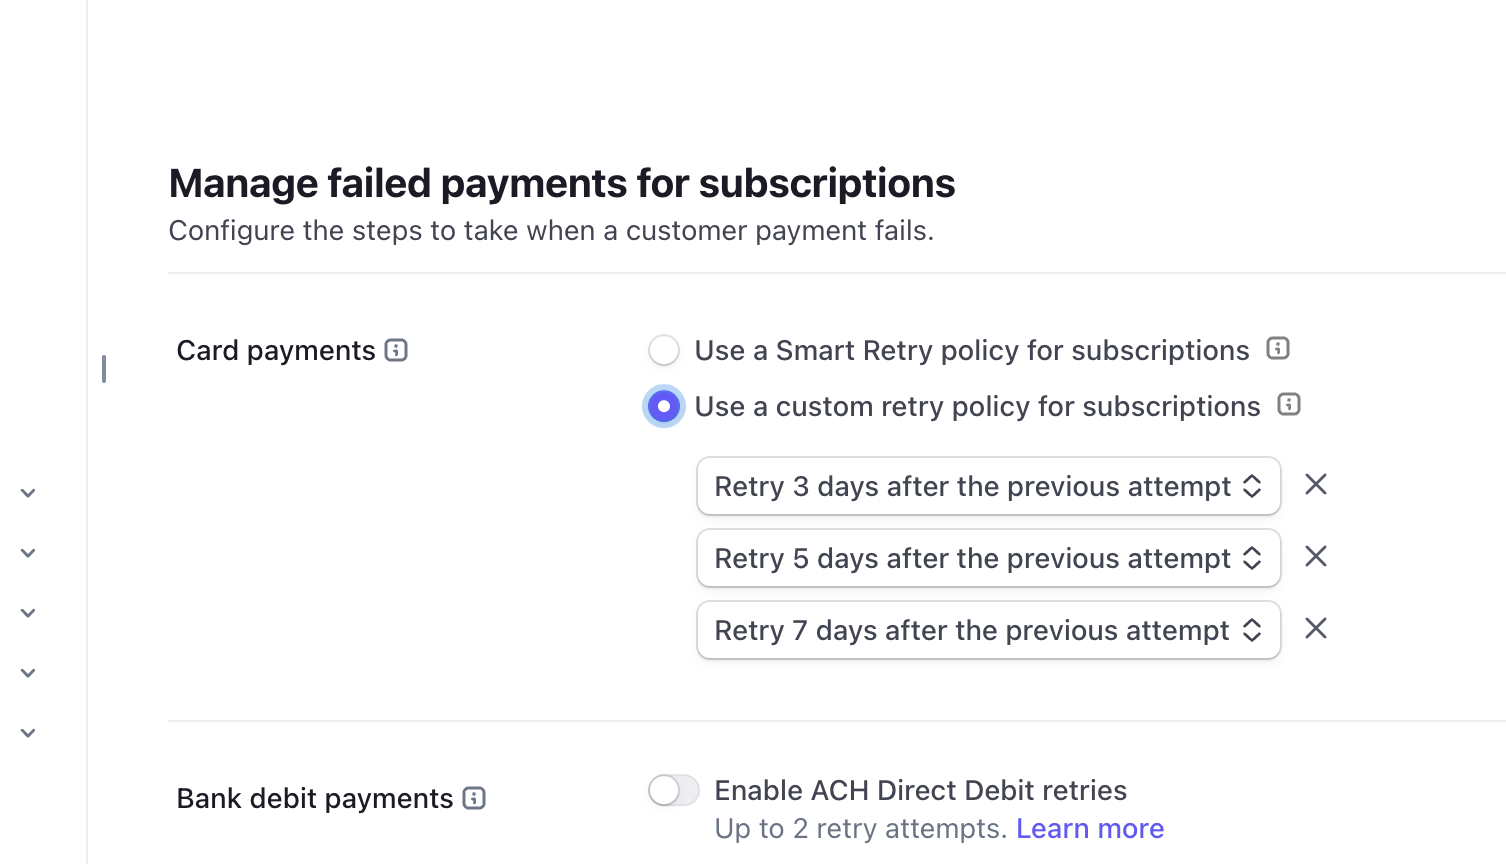
If you wish to change this behavior, you can configure it in Stripe by navigating to Settings > Billing > Subscriptions & Email.
Deleting Companies within Schematic
By default, when a company is deleted within Schematic, the associated subscription in Stripe is not deleted. This is to preserve other data and workflows that may be configured within Stripe. If you would like to delete the subscription as well, you can do so by toggling “Cancel Stripe subscription upon deletion” when deleting the company.

Alternatively, if you are deleting the company from the Schematic Api, you can pass cancel_subscription: true in the body of your request. See the Delete Company API docs for more details.